Electra
Add a charge to your night time outlook with this easy to craft Electra star !
Project Info
Paper required: one sheet 8 ½ x 11 inch (or A4)
Finished Project size: 5 inches (12 cm)
Difficulty Level: beginner
Click button below to get your free printable pattern !
Click button below to get your free printable pattern !
INSTRUCTIONS
STEP 1
Print the Electra pattern onto the two matching paper sheets of your choice.
Read the pattern key included in the General Instructions.
Step 2
Cut out the twelve parts by cutting on all black lines.
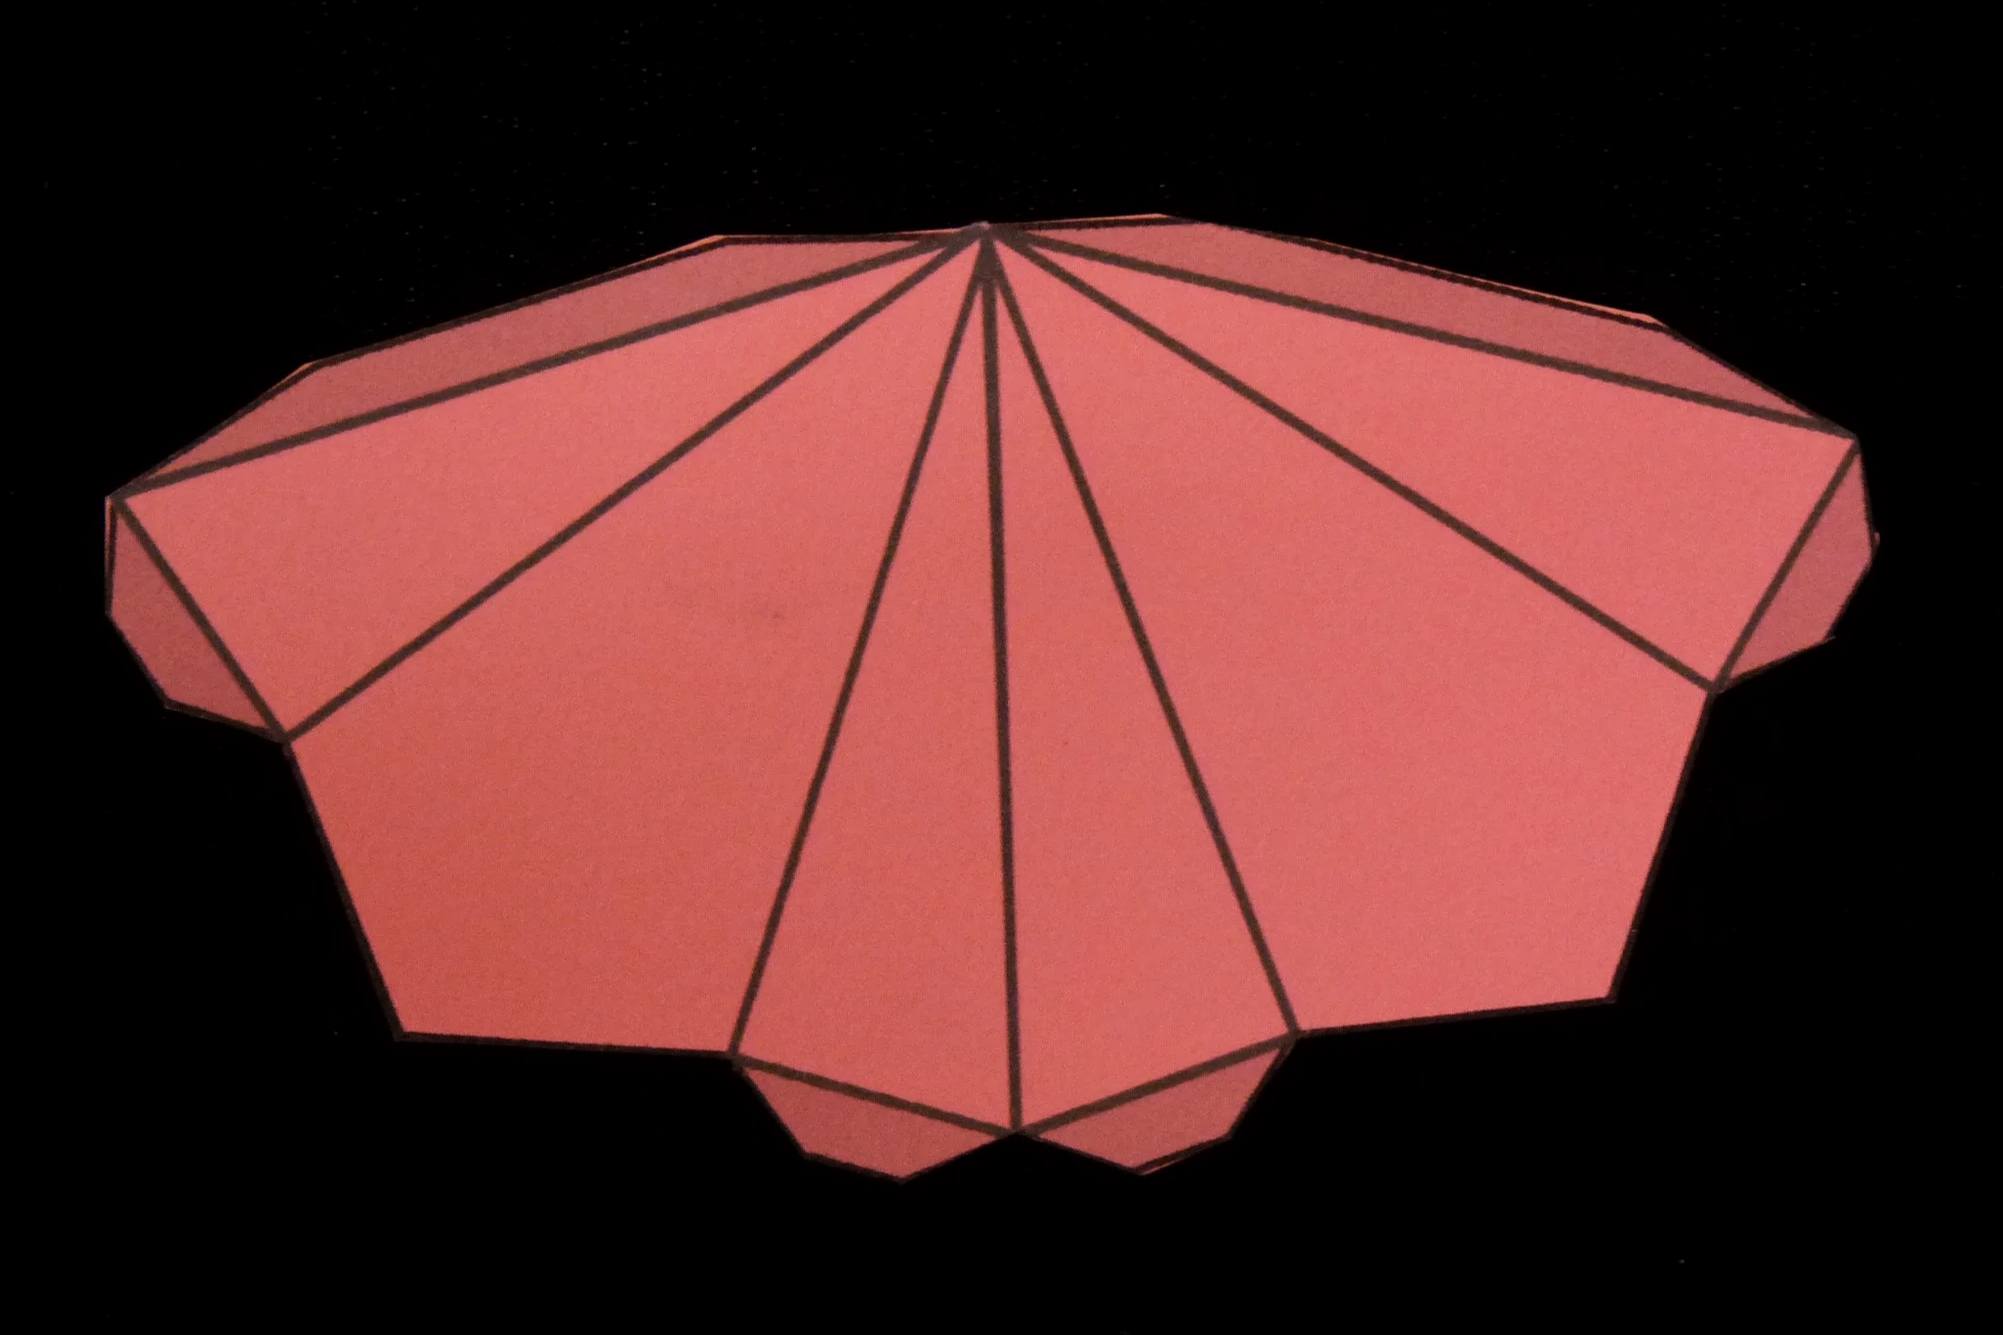
Photo 1. Inside of a Part after Step 2
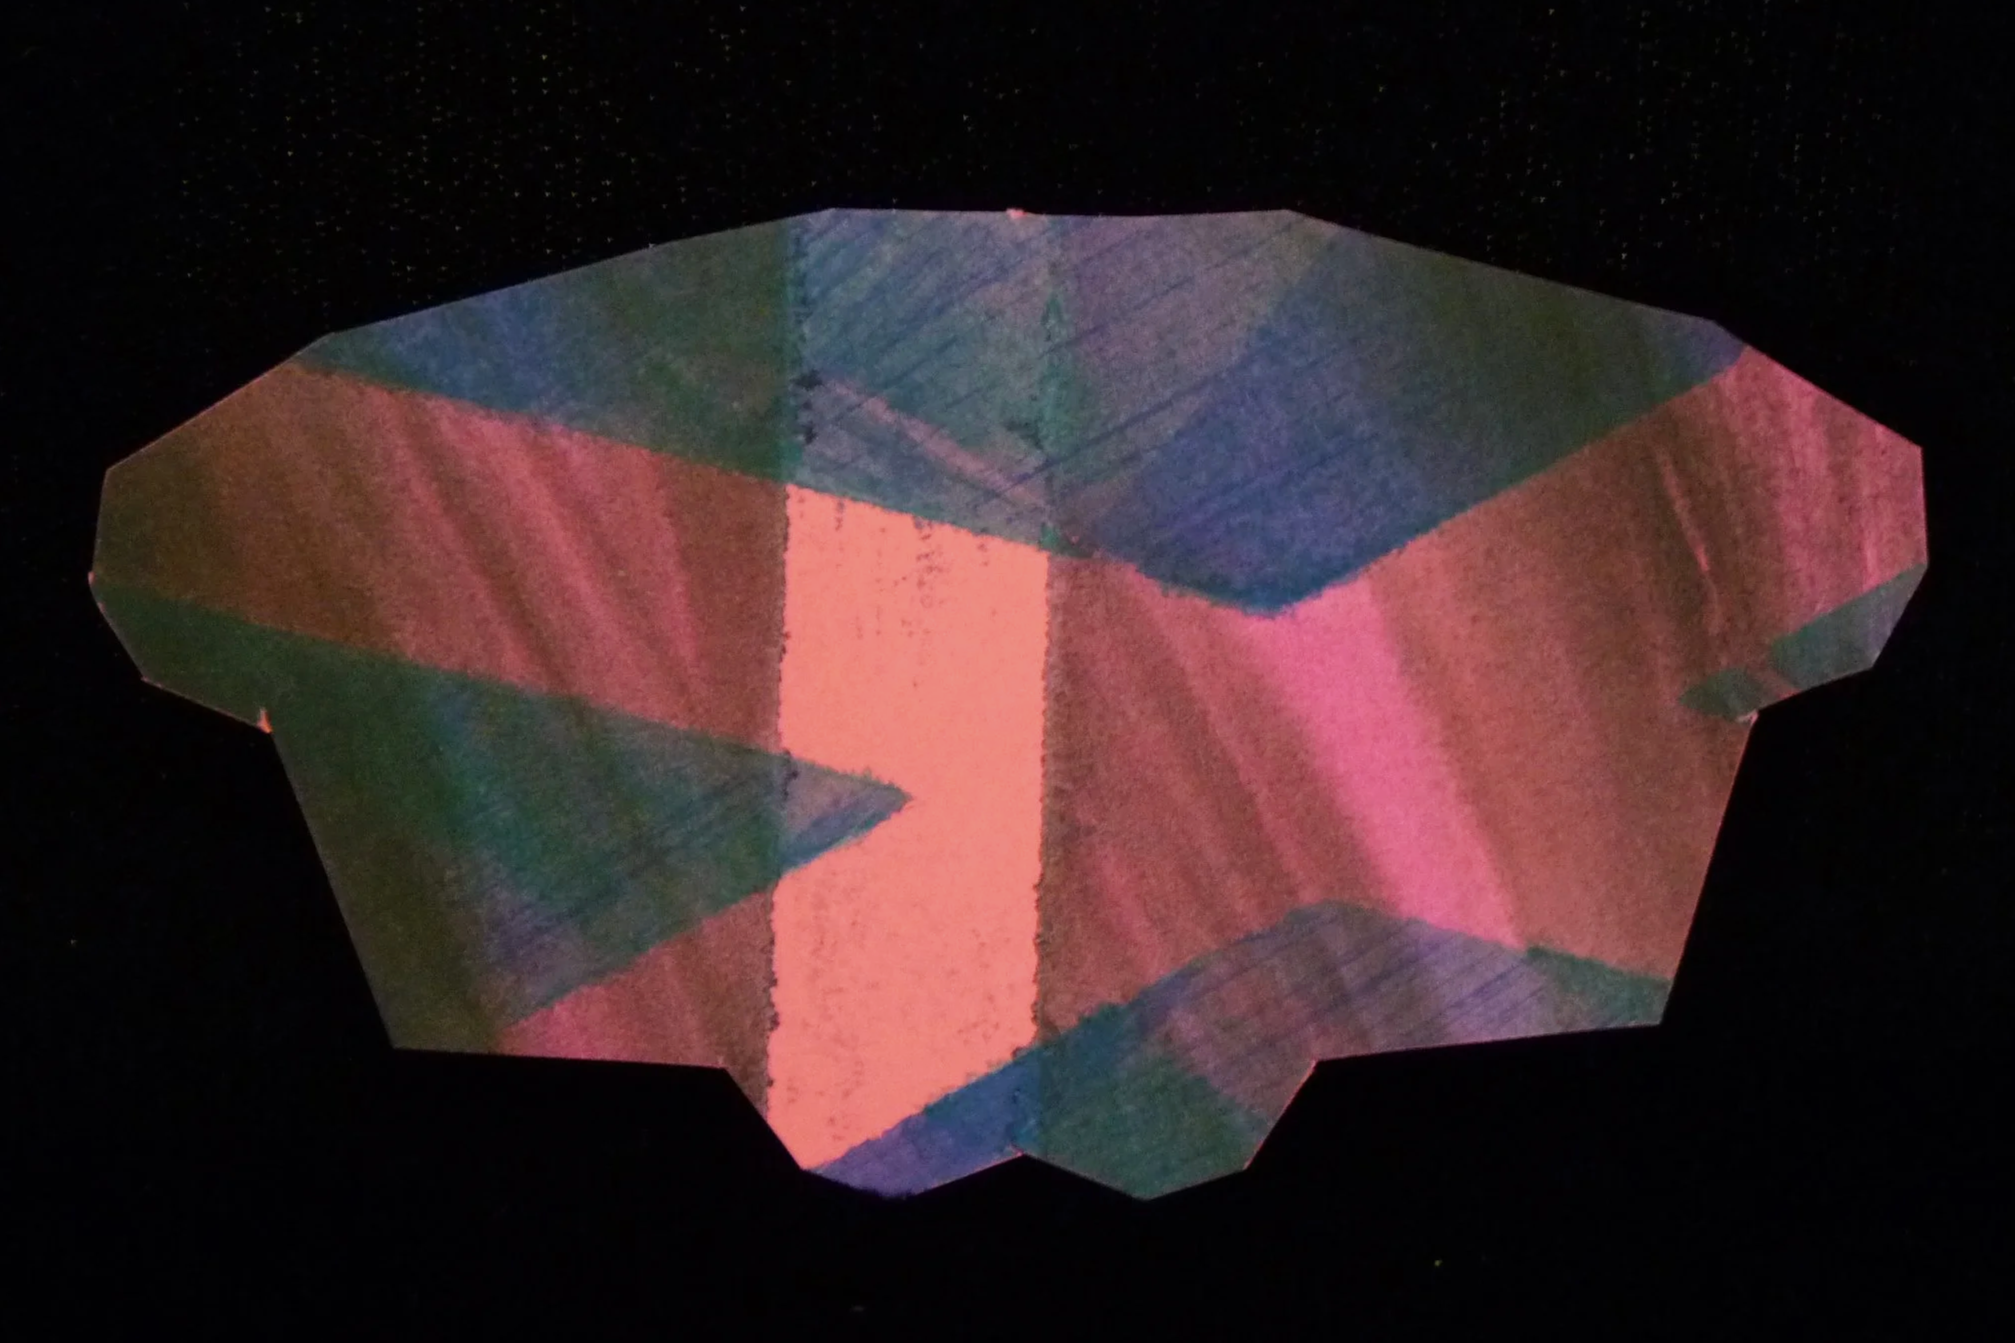
Photo 2. Outside of a Part after Step 2
STEP 3
On all twelve parts, fold green lines as valley folds. On each part, glue one long flap to the other long flap to make a point.
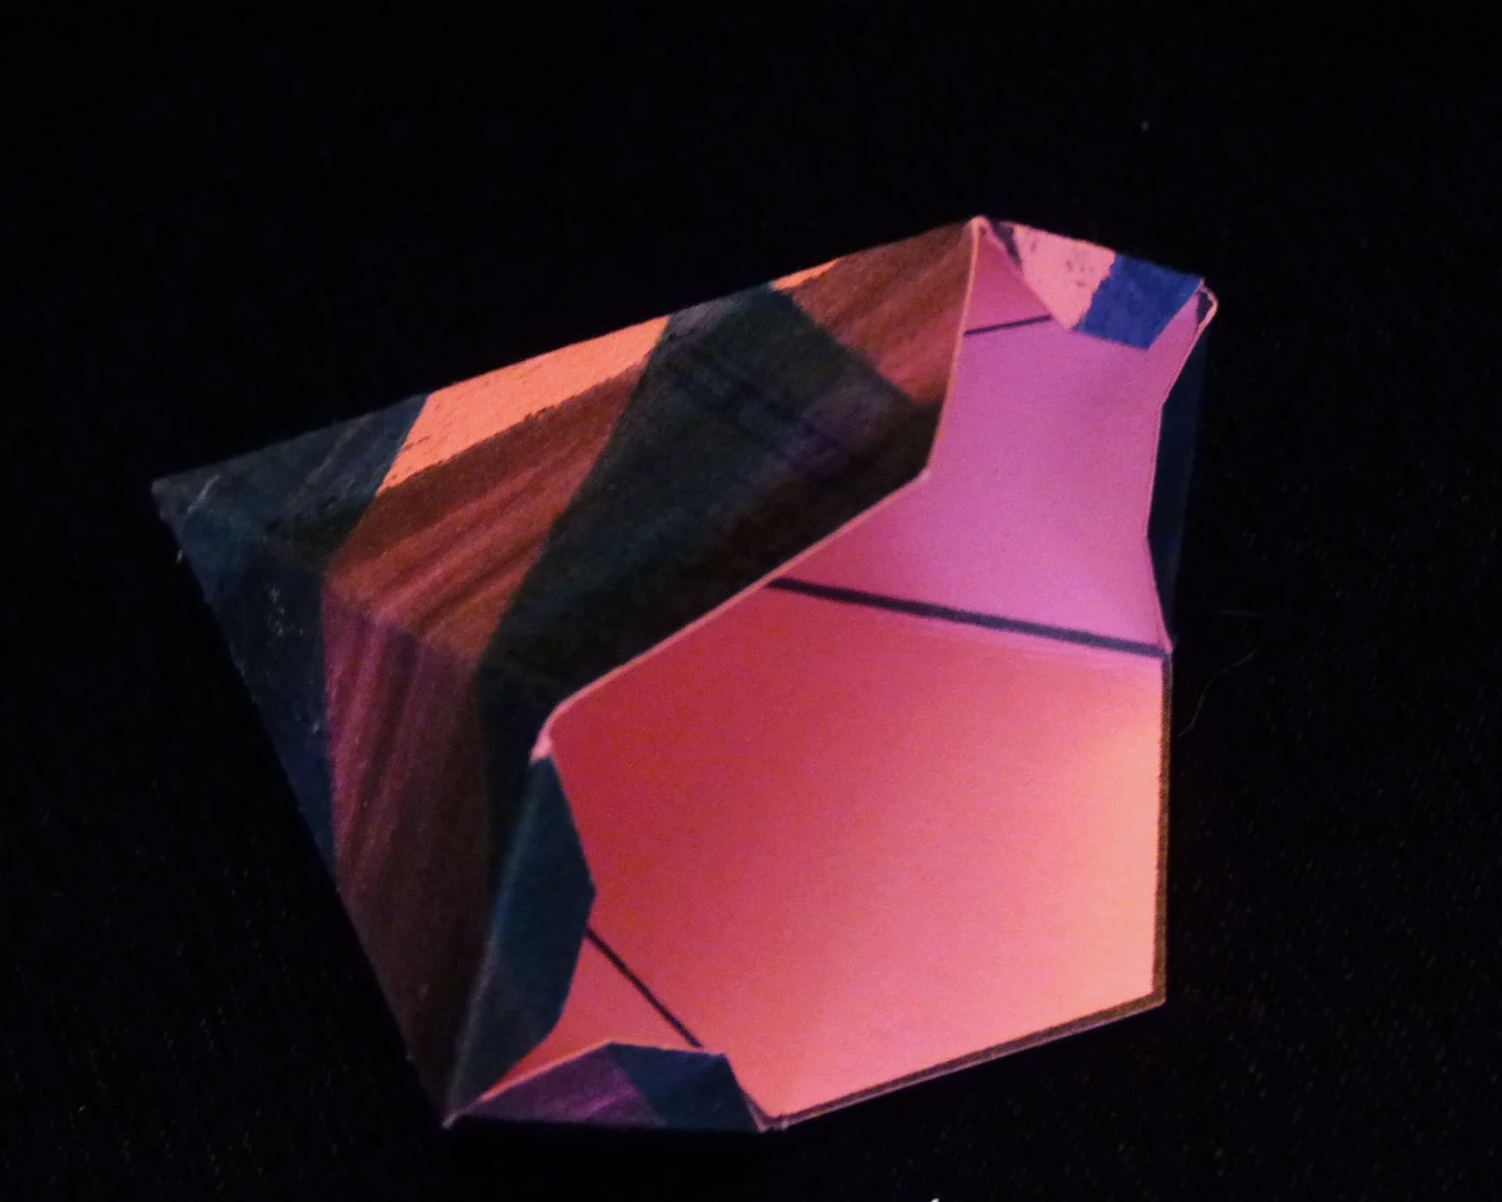
Photo 3. Inside of a Part after Step 3
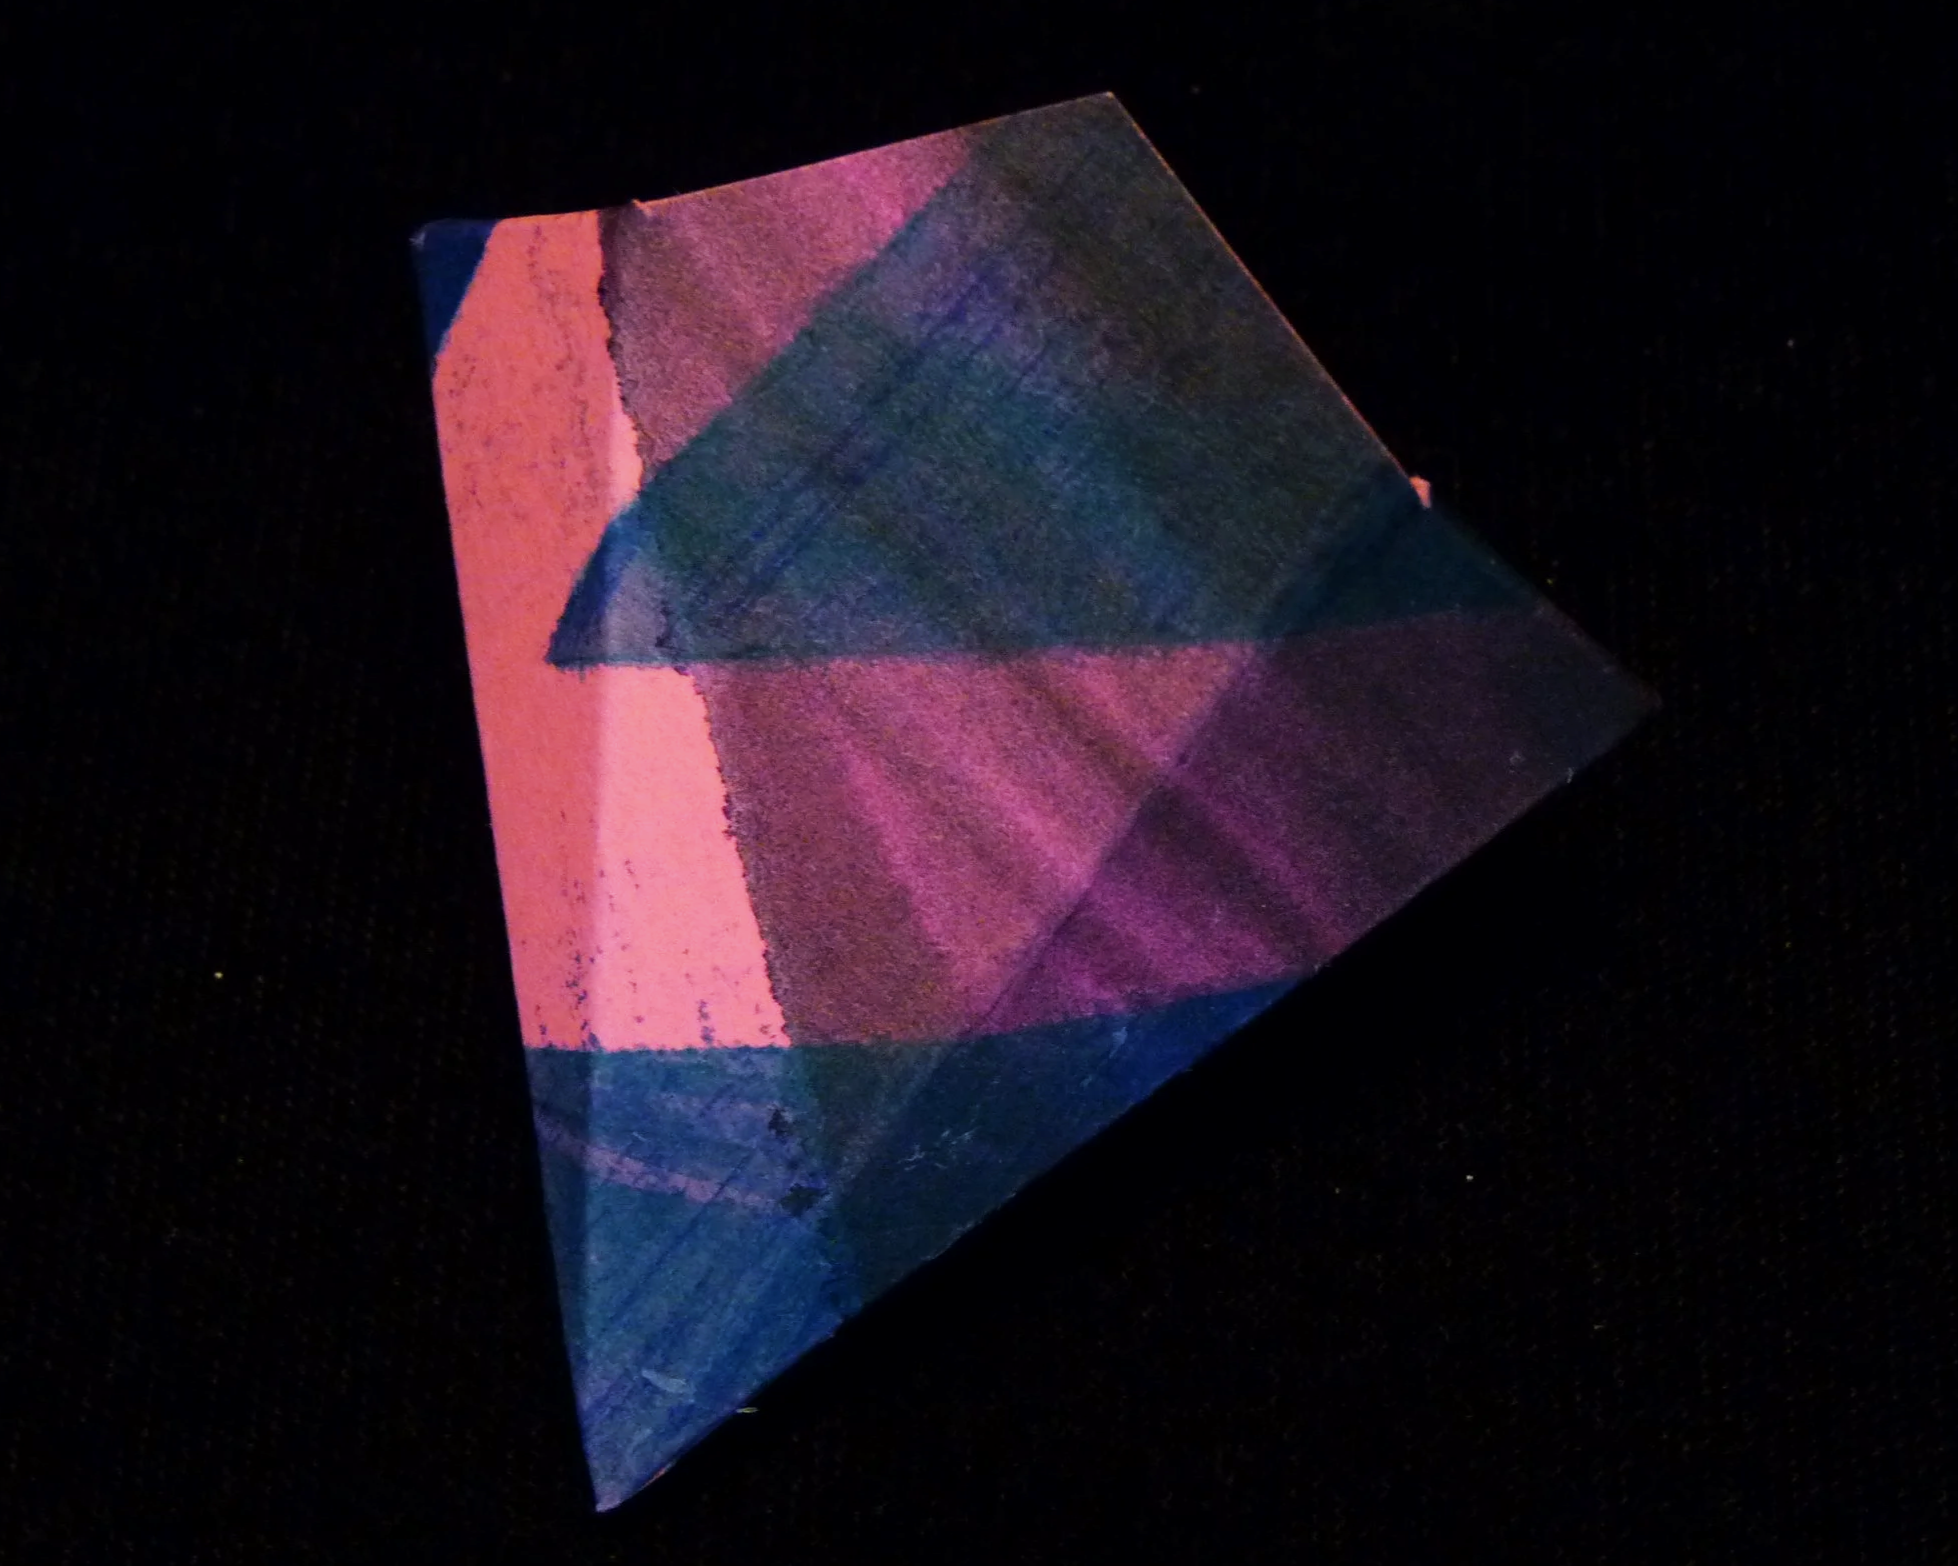
Photo 4. Outside of a Part after Step 3
Step 4
Connect three parts together at a common point. Each part is attached to its two neighbors with a glue flap.
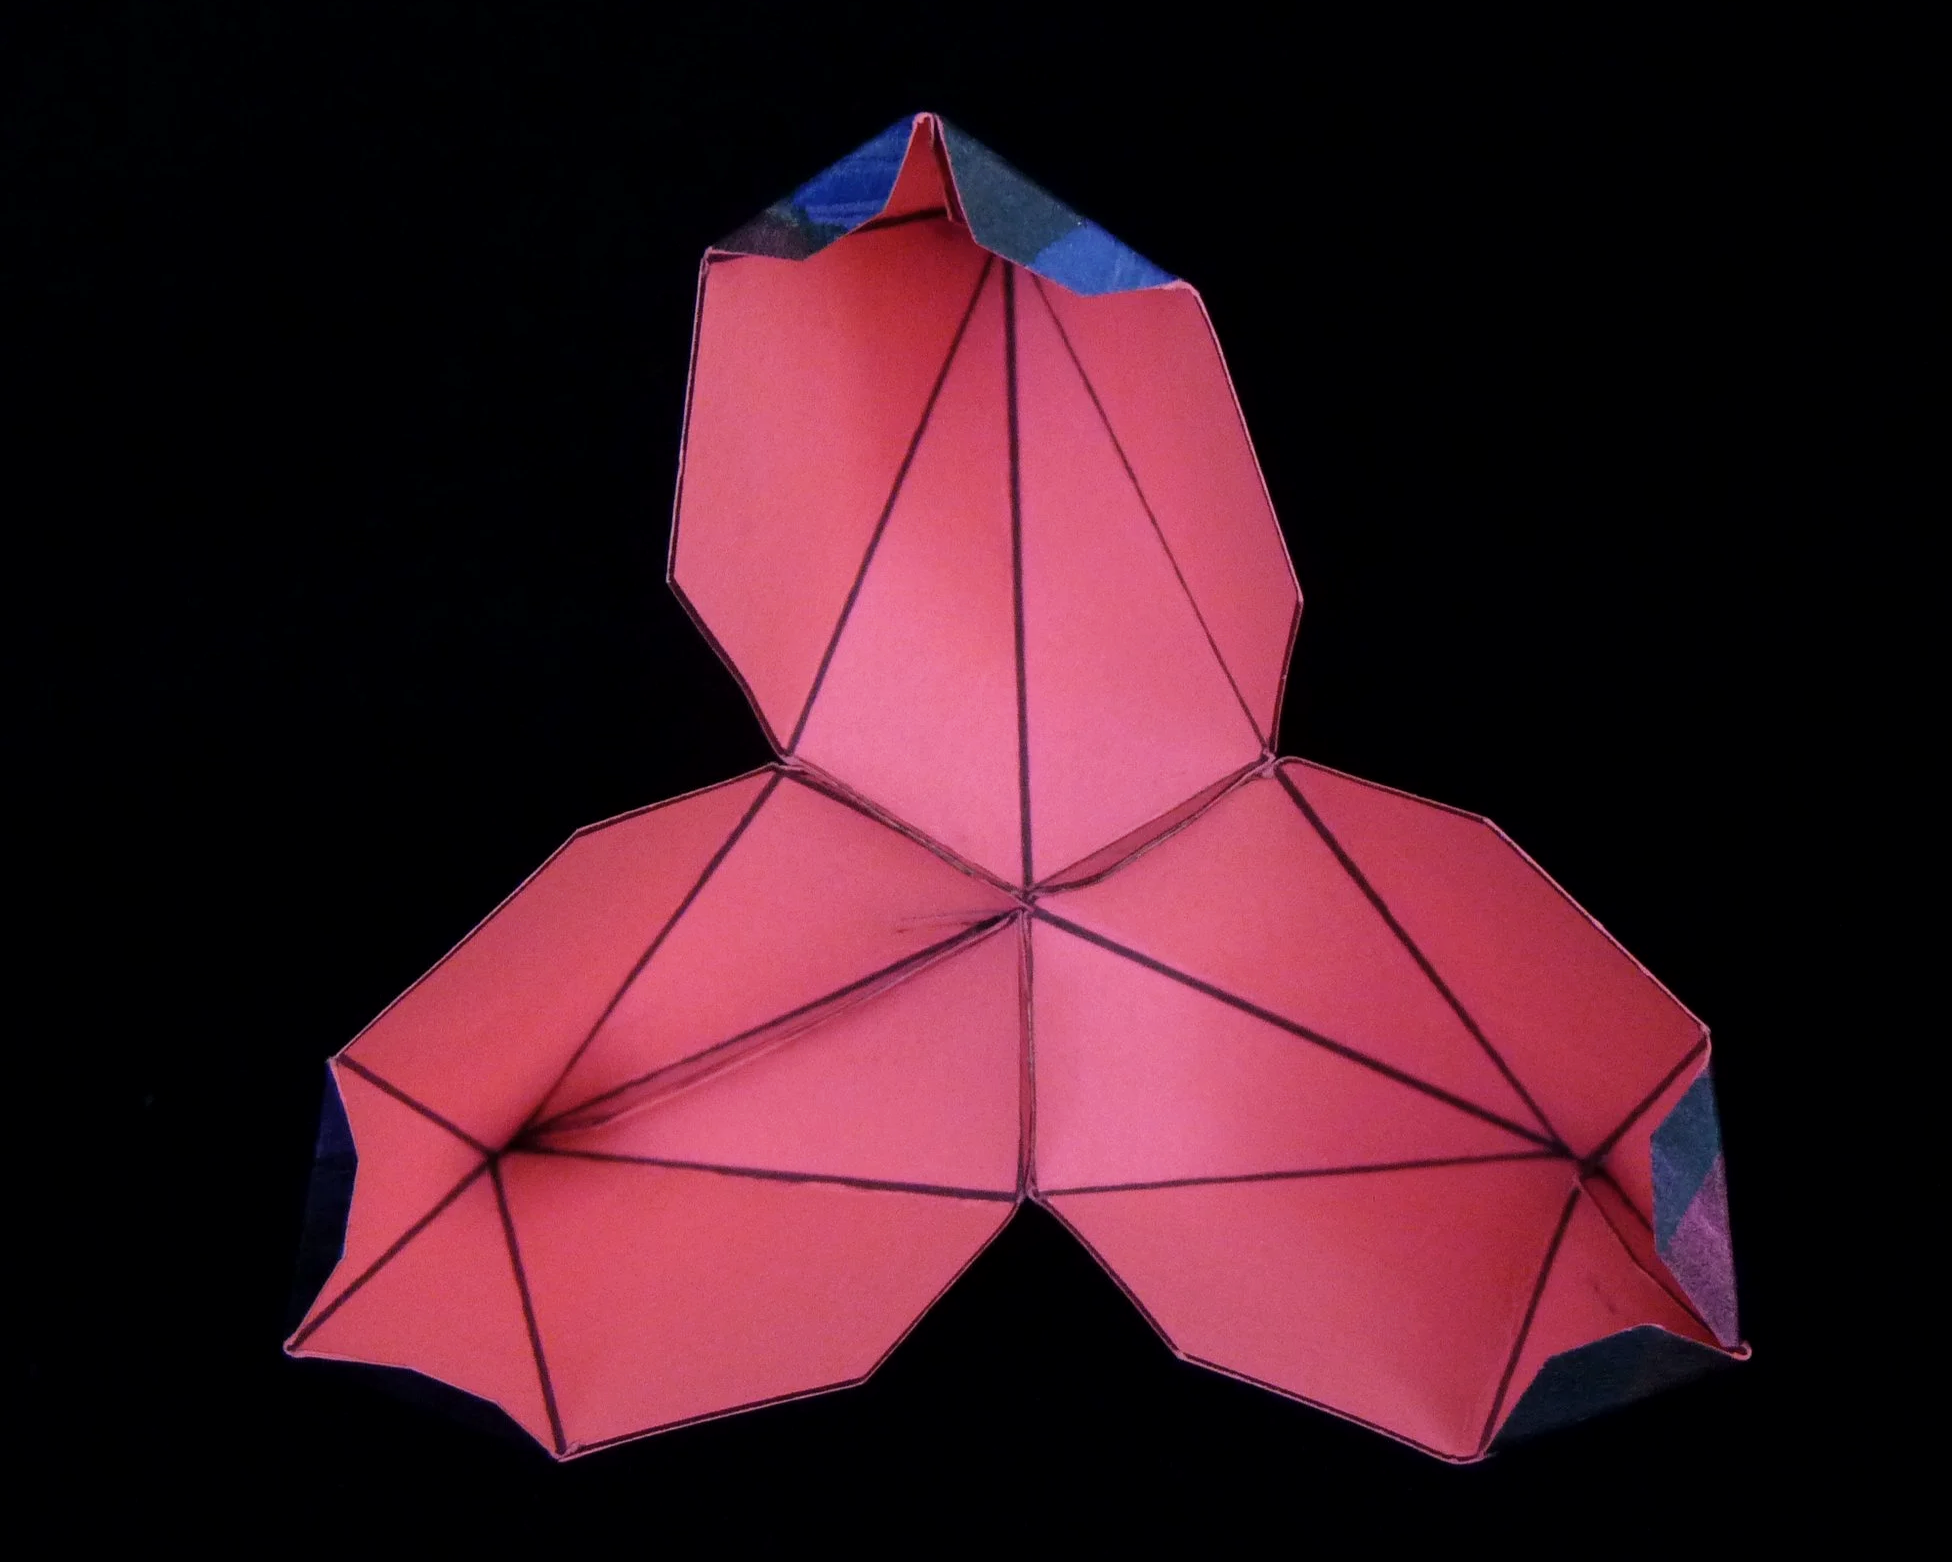
Photo 5. Inside of Project after Step 4
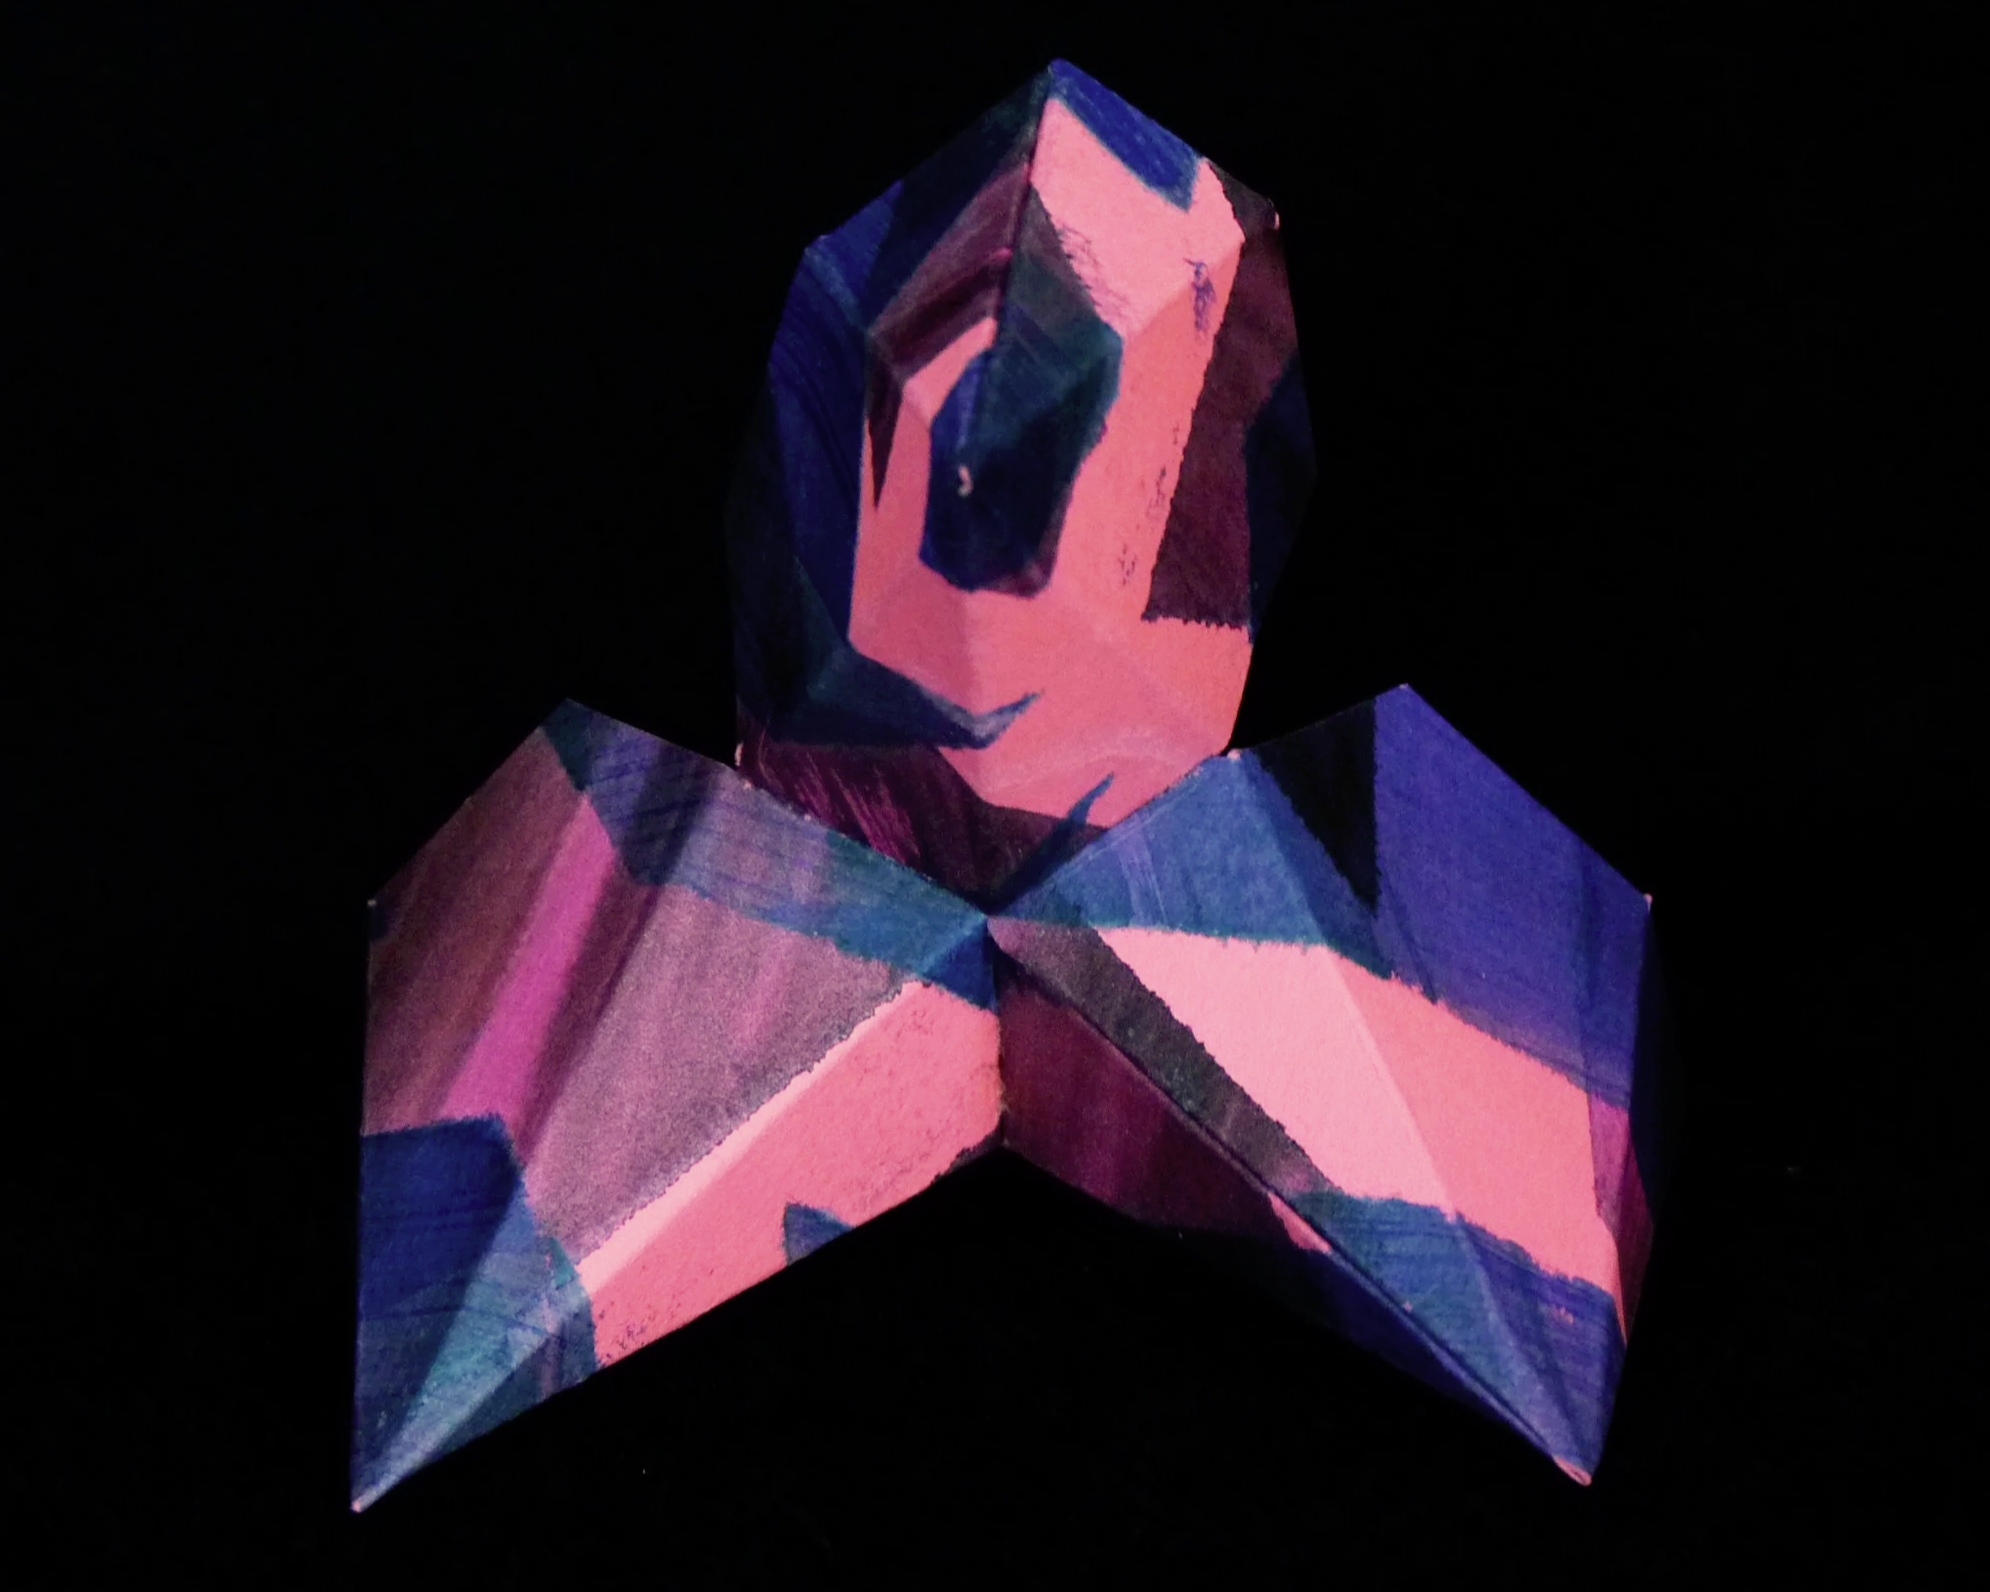
Photo 6. Outside of Project after Step 4
Step 5
Attach a new part to each of the six available glue flaps on the project.
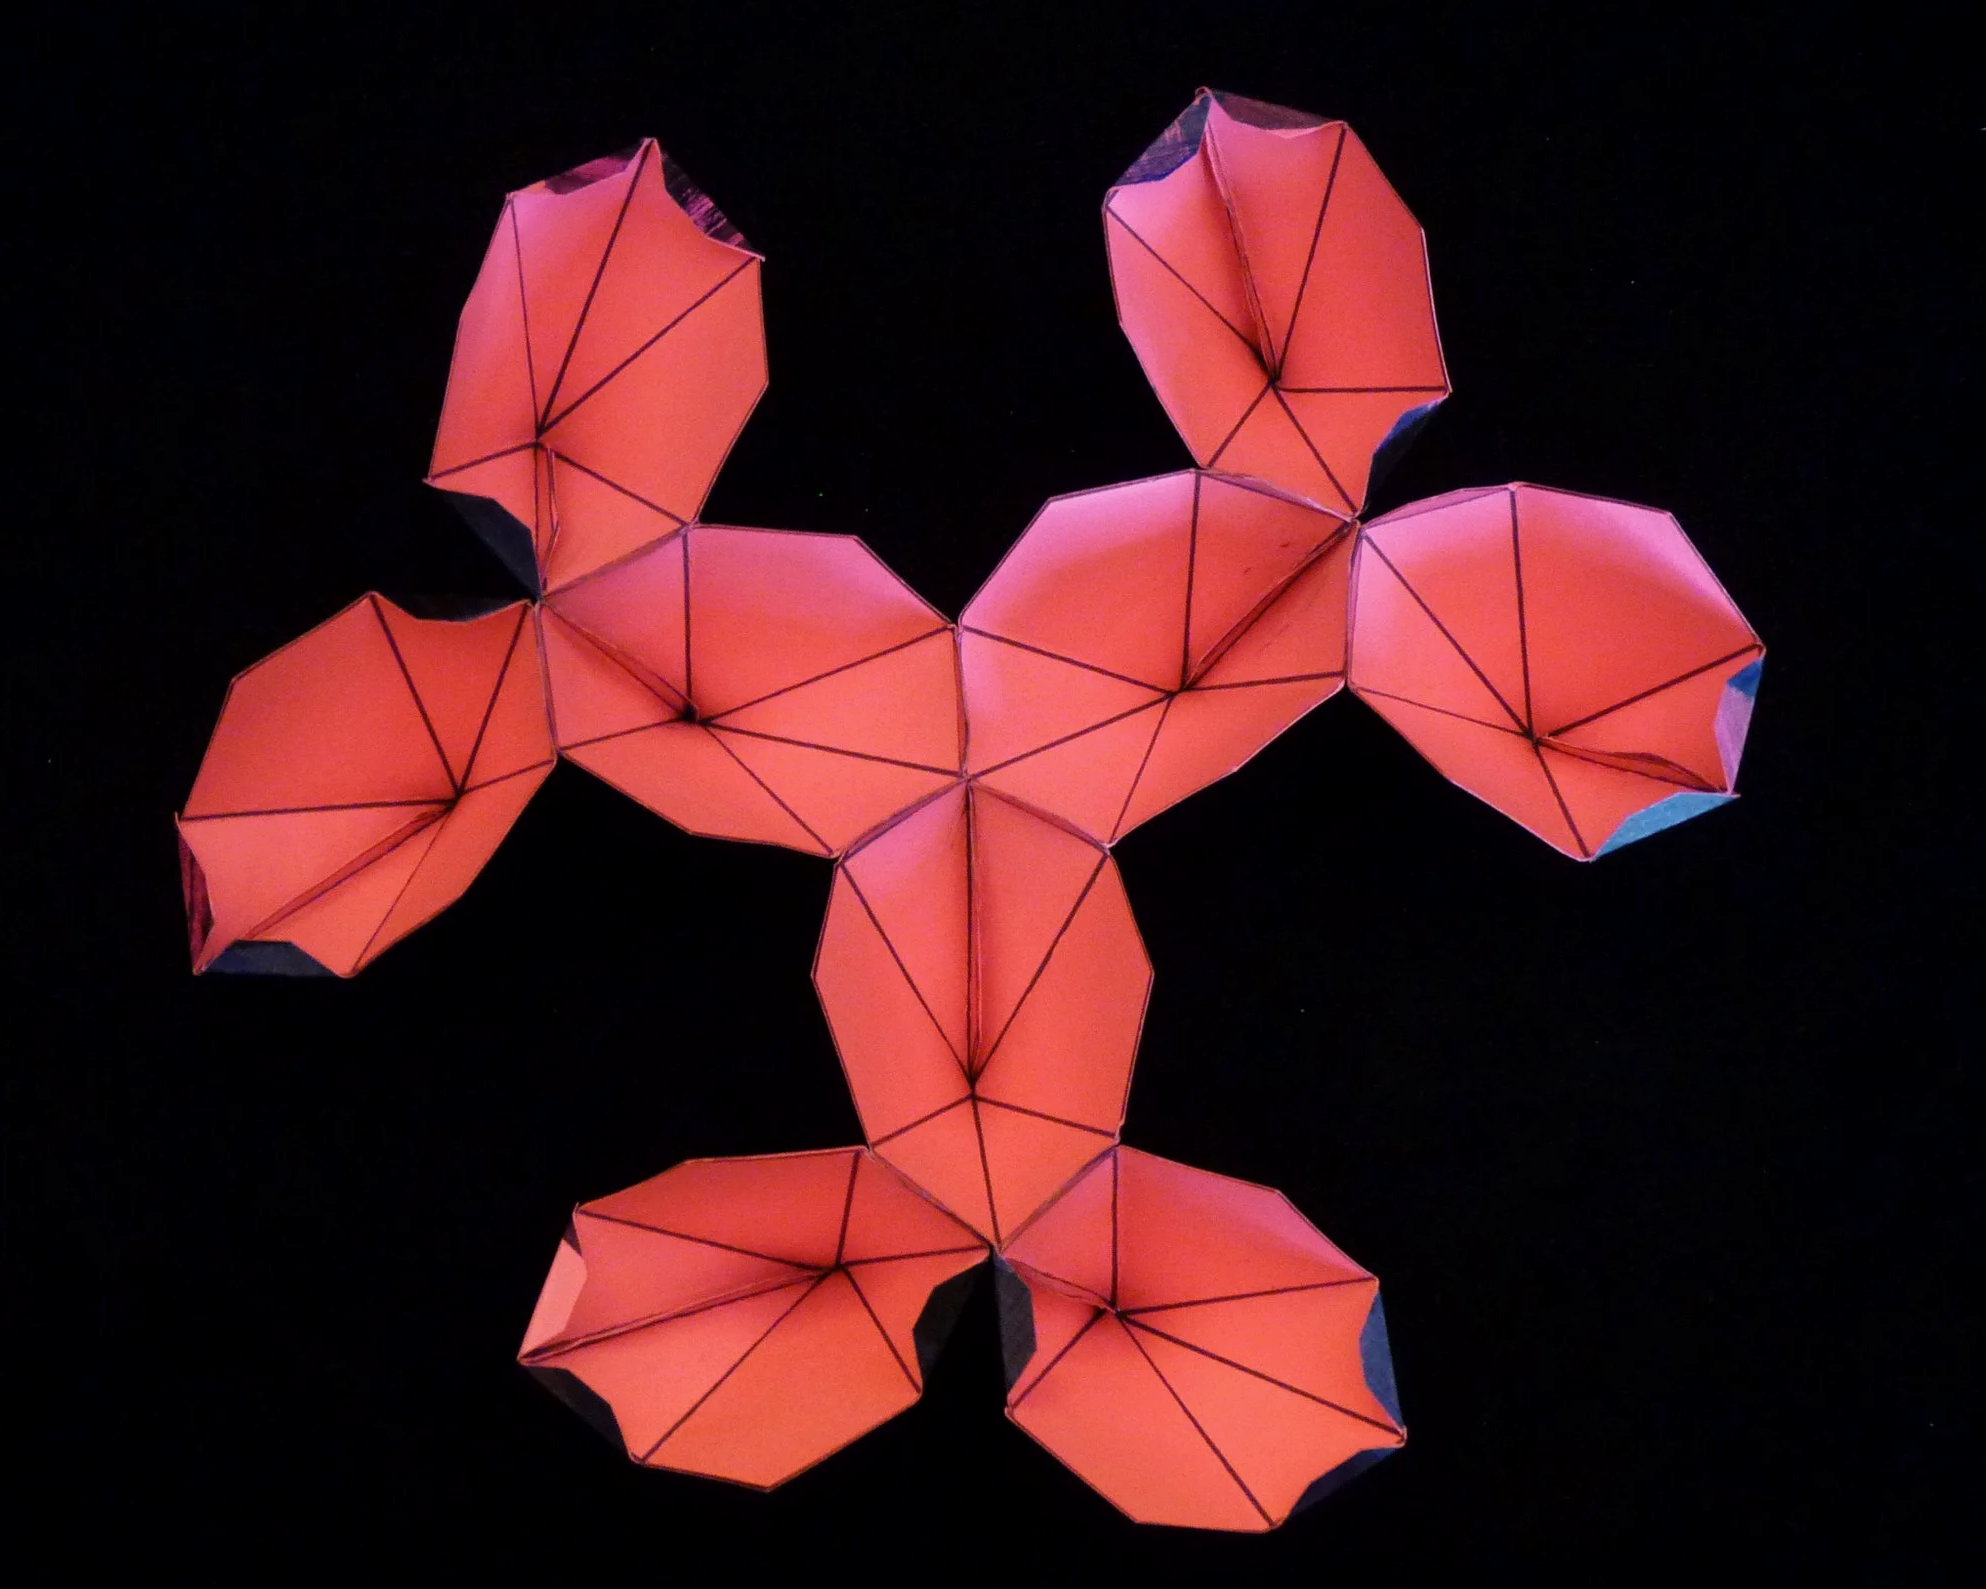
Photo 7. Inside of Project after Step 5
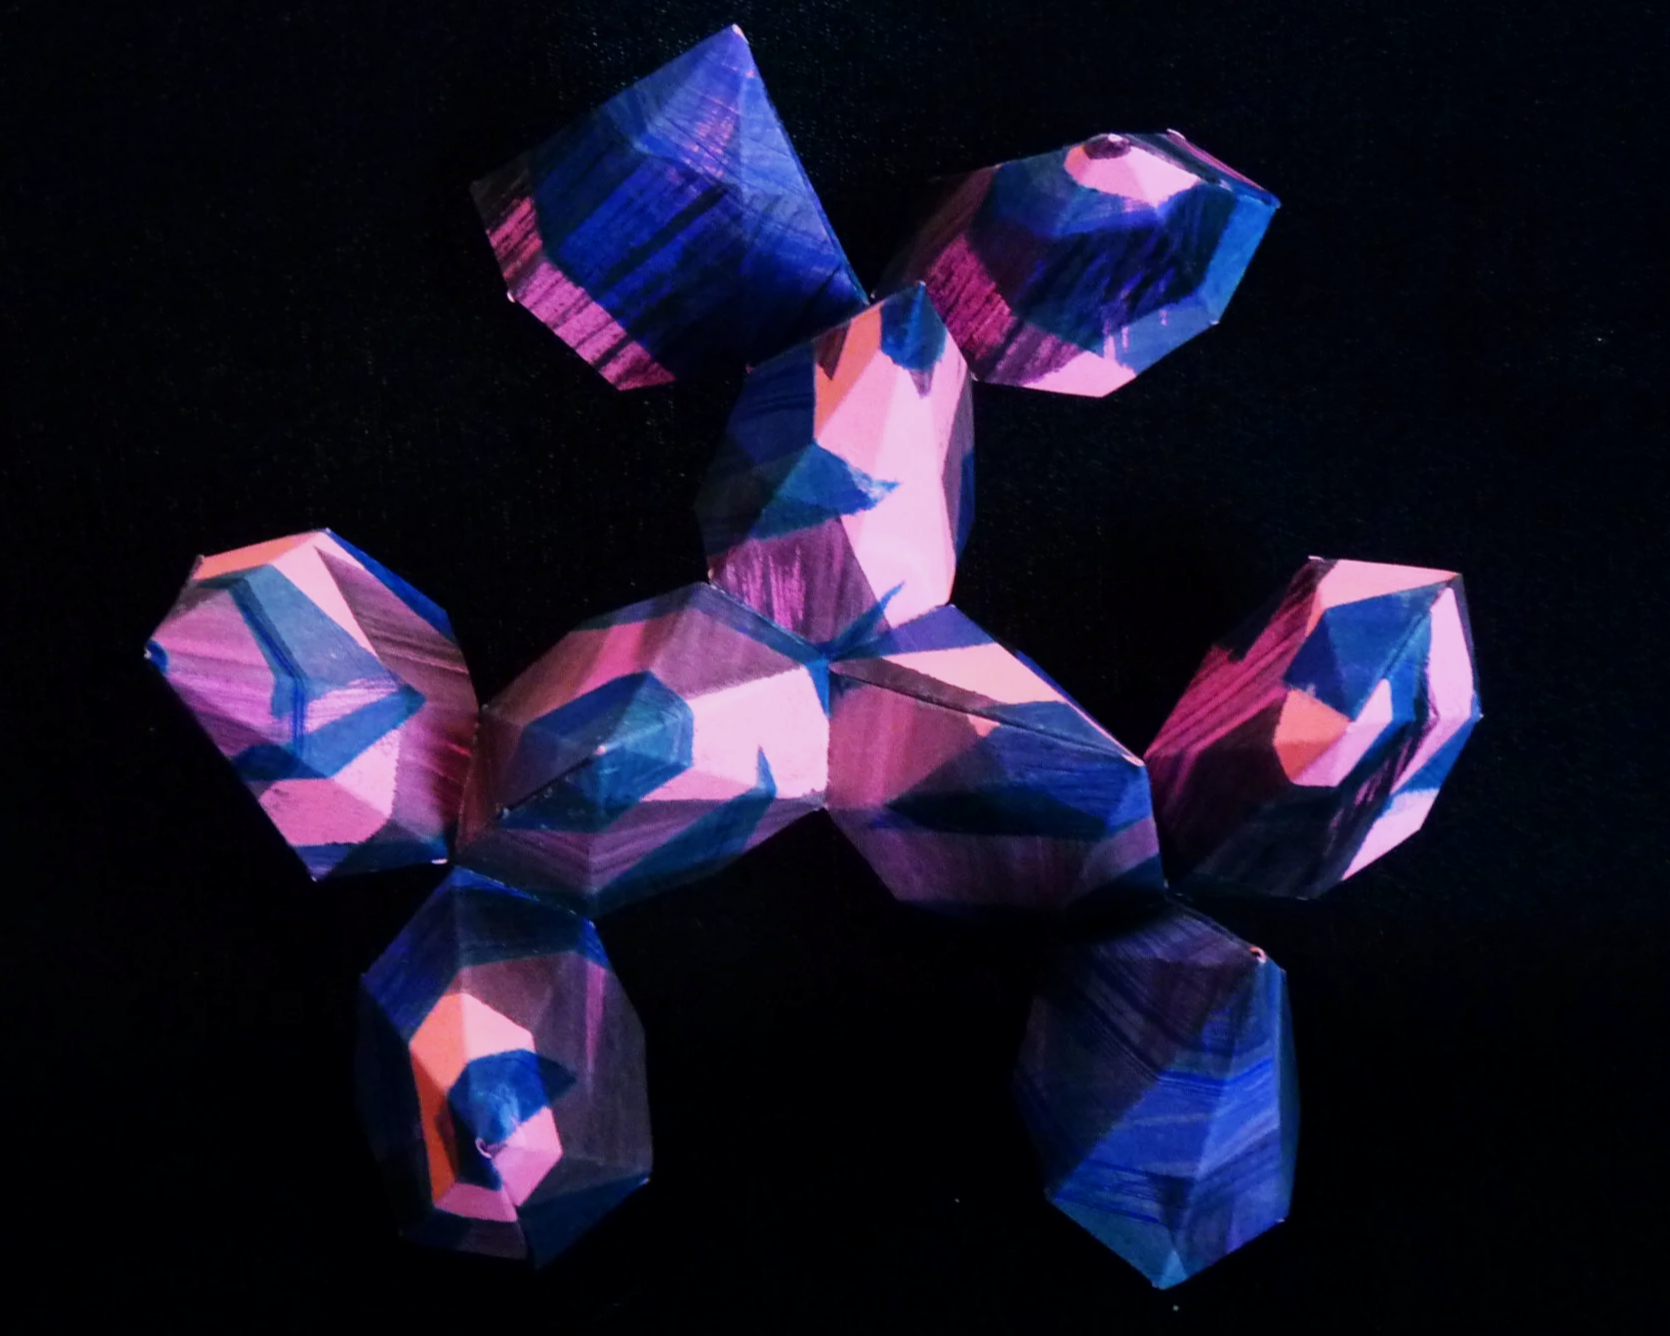
Photo 8. Outside of Project after Step 5
Step 6
Connect each of the parts added in Step 5 to each of its two neighbors (also added in Step 5), using one glue flap for each connection. Three open 4-point stars will be formed between the parts as shown in Photos 9 and 10.
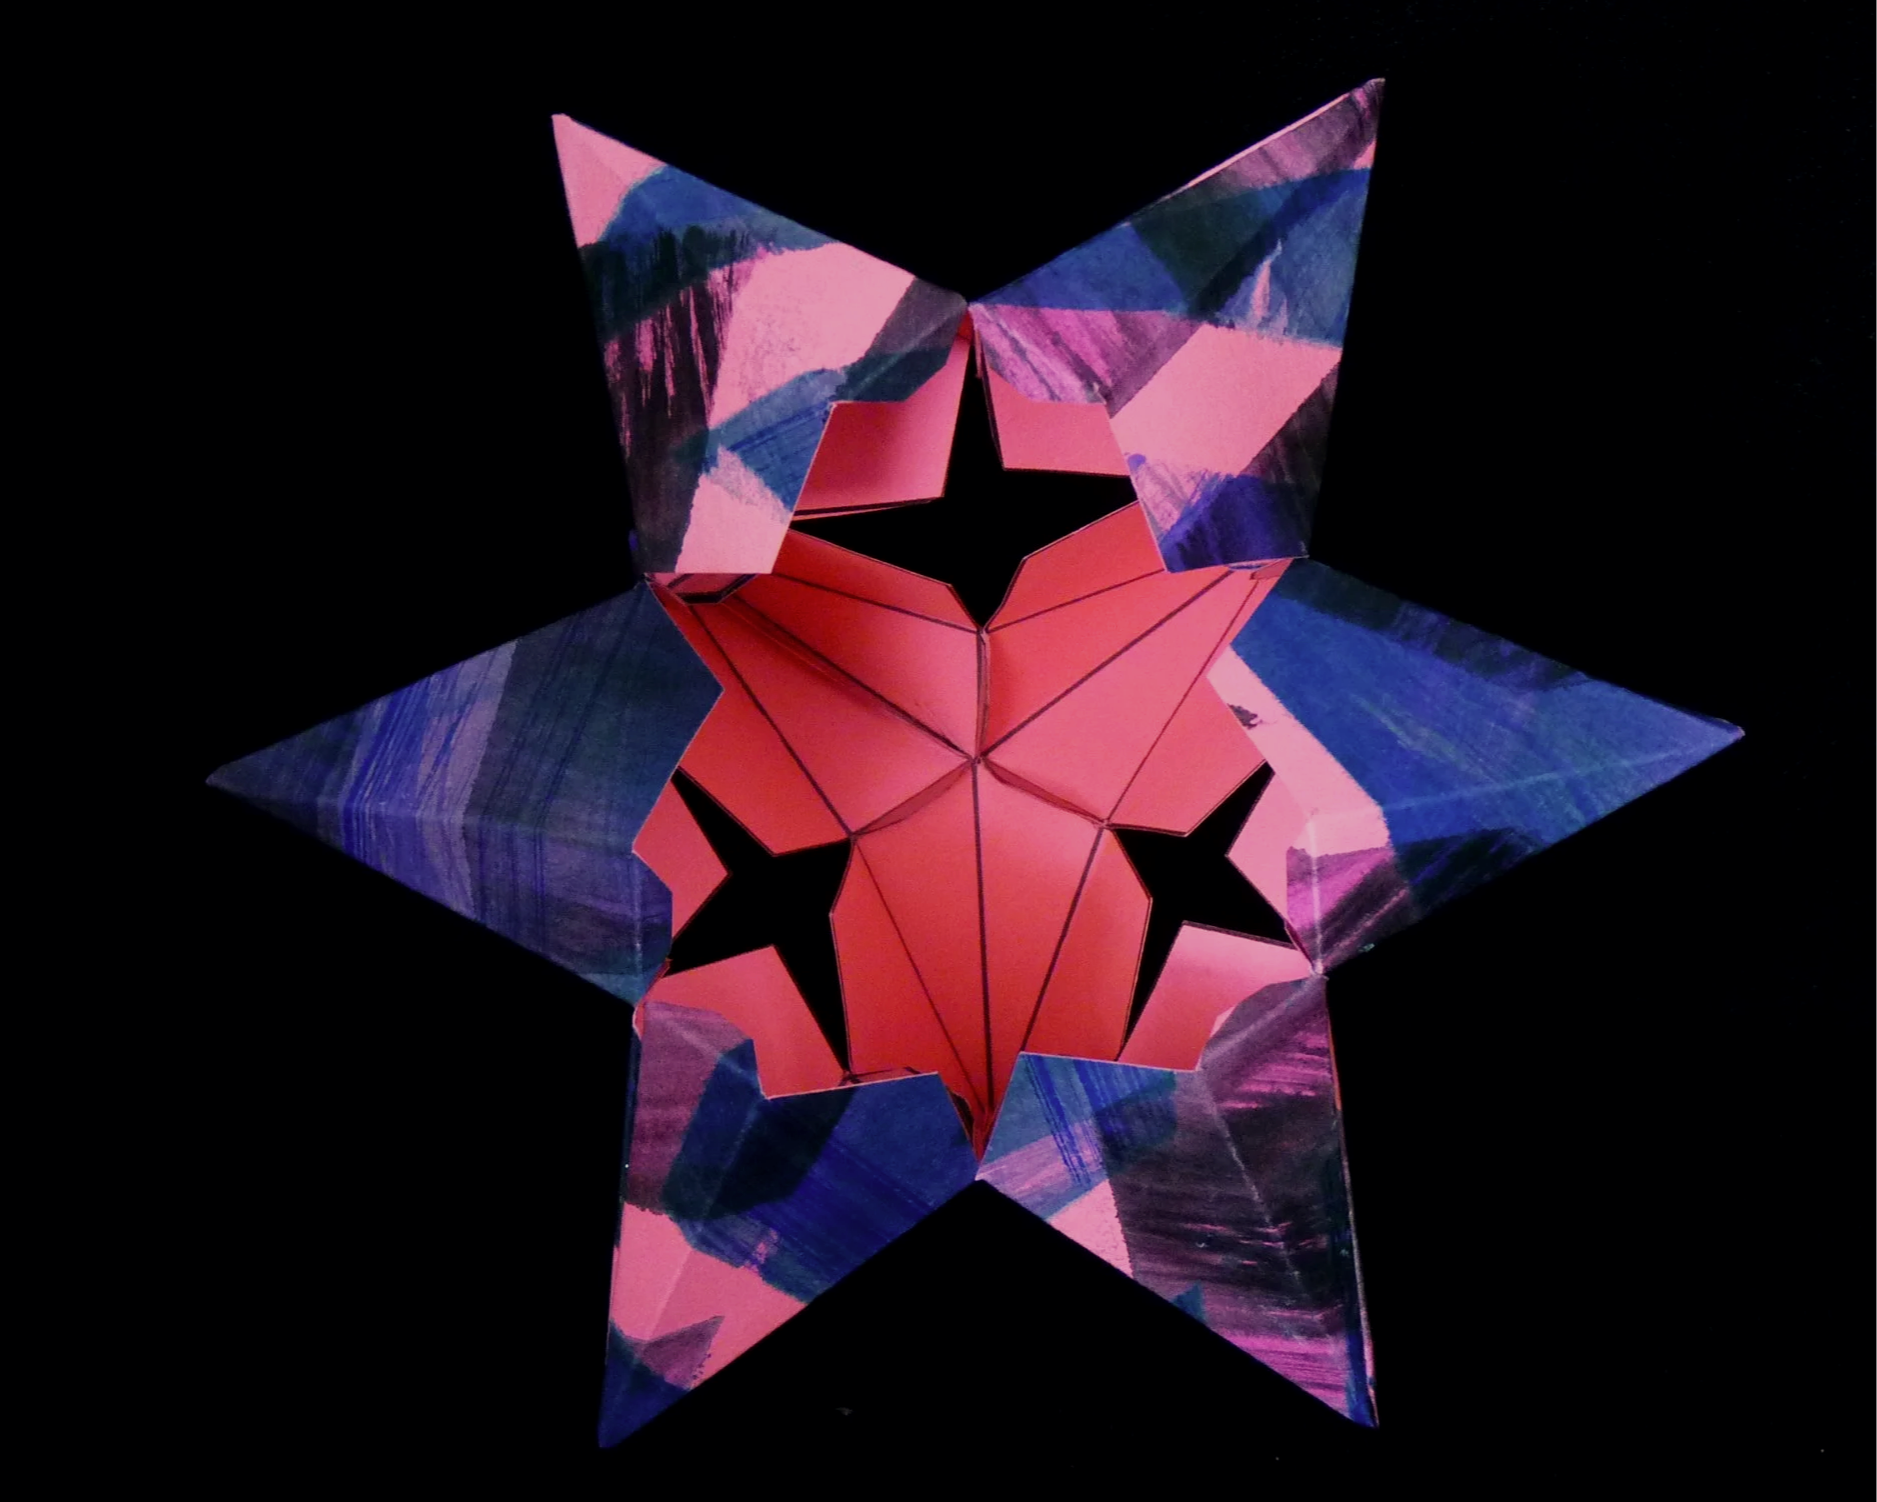
Photo 9. Inside of Project after Step 6
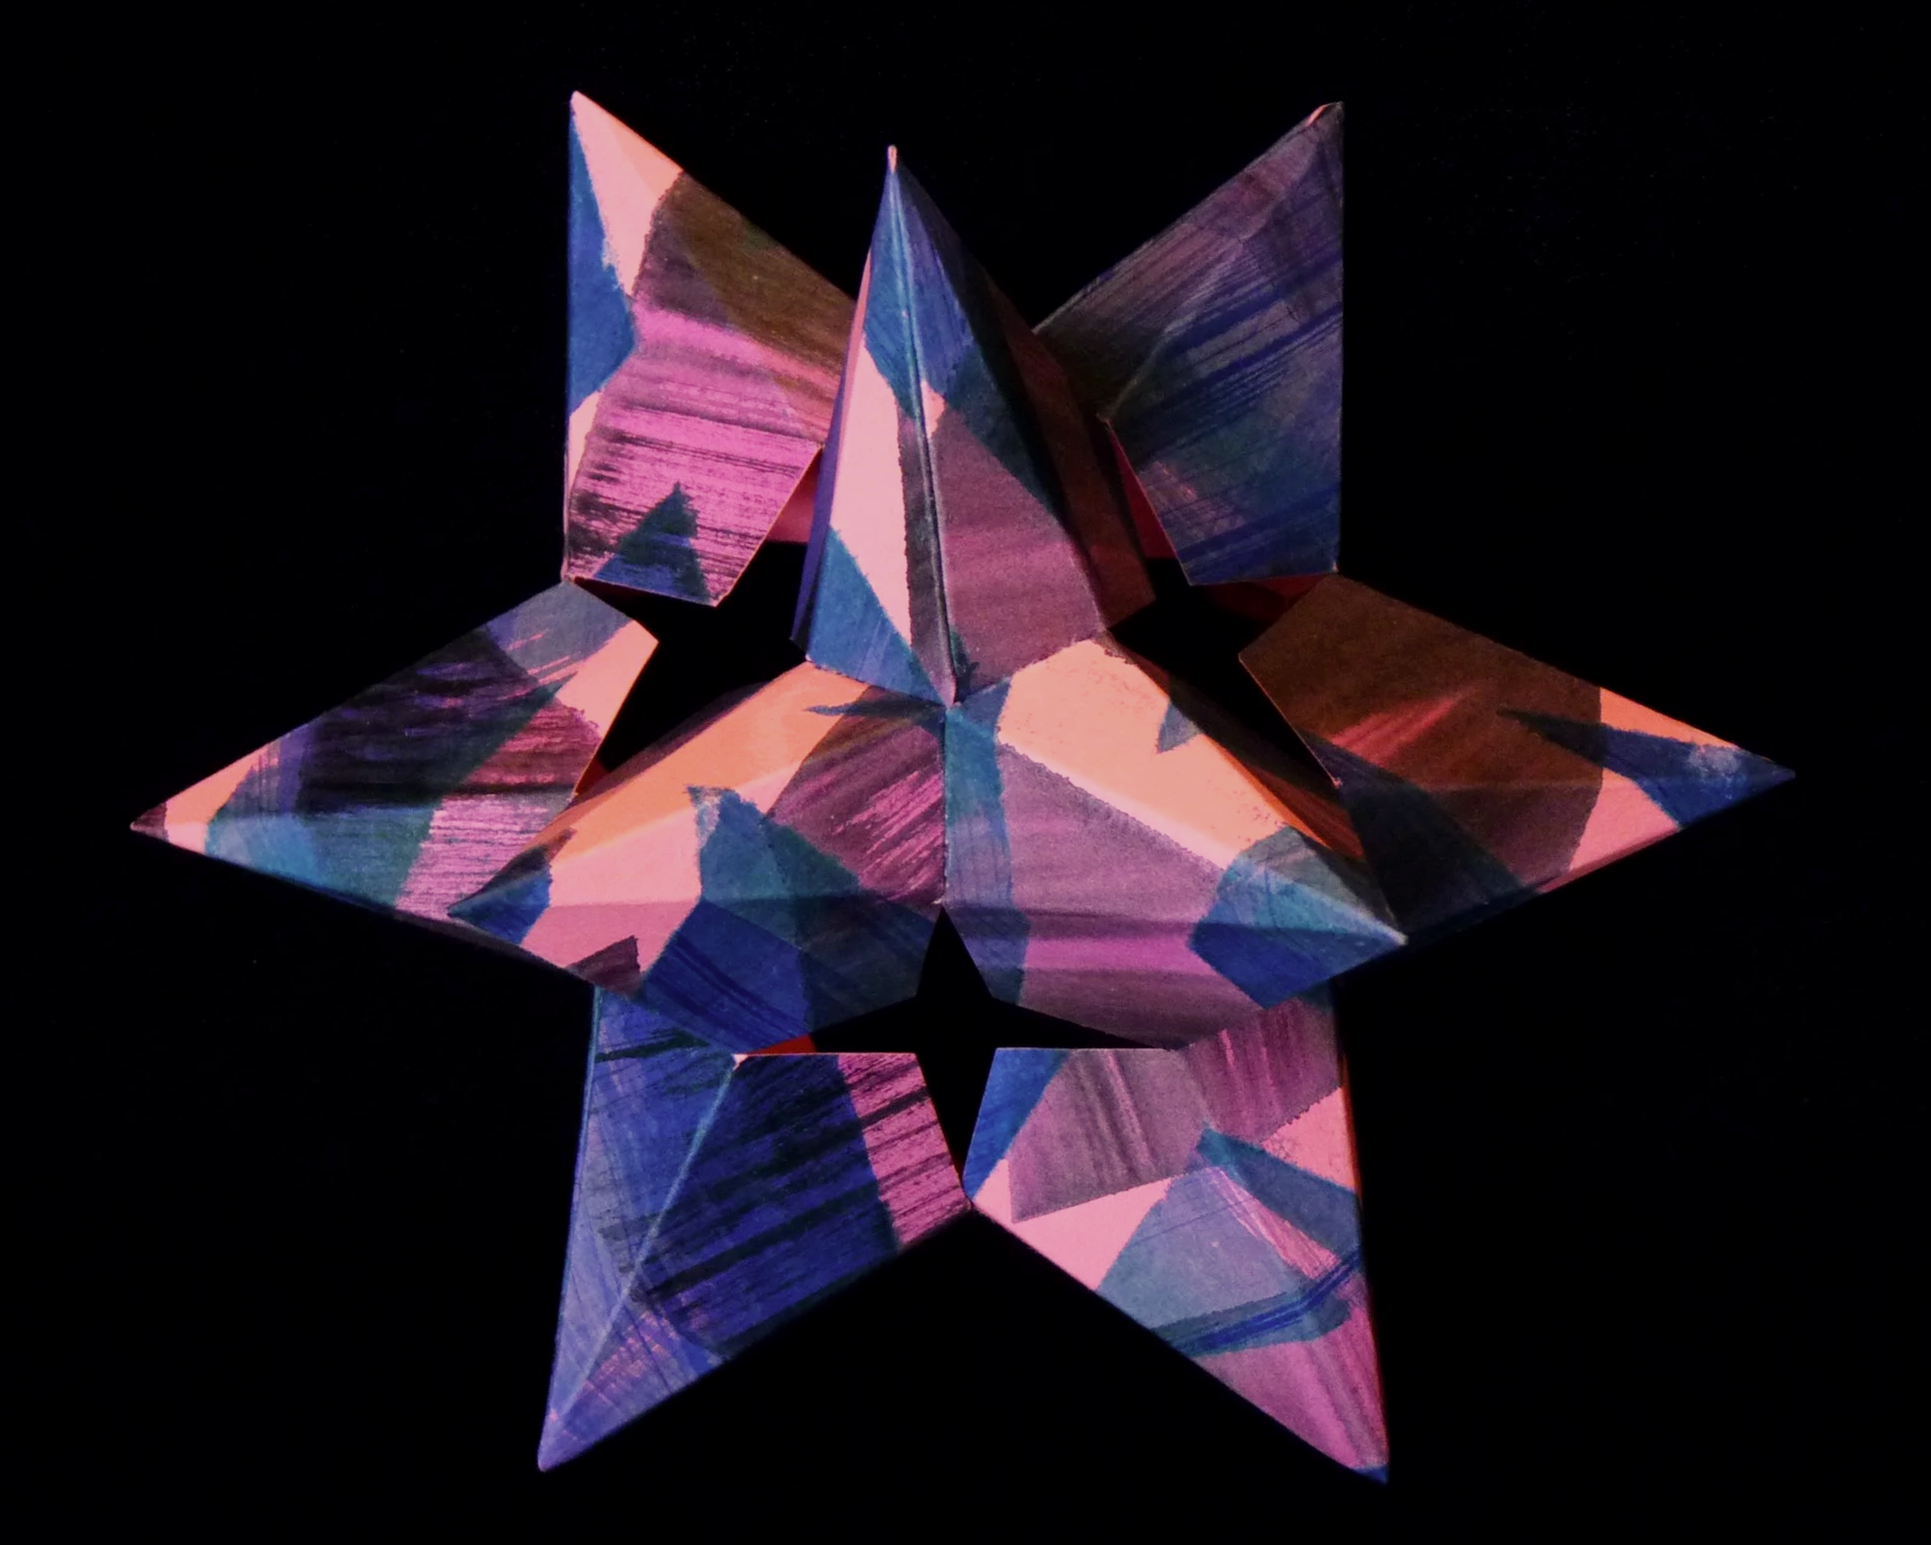
Photo 10. Outside of Project after Step 6
Step 7
Make a new set of three parts, the same as constructed in Step 4. Use the six glue flaps on the new module to connect it to the six available glue flaps on the project. Finished !
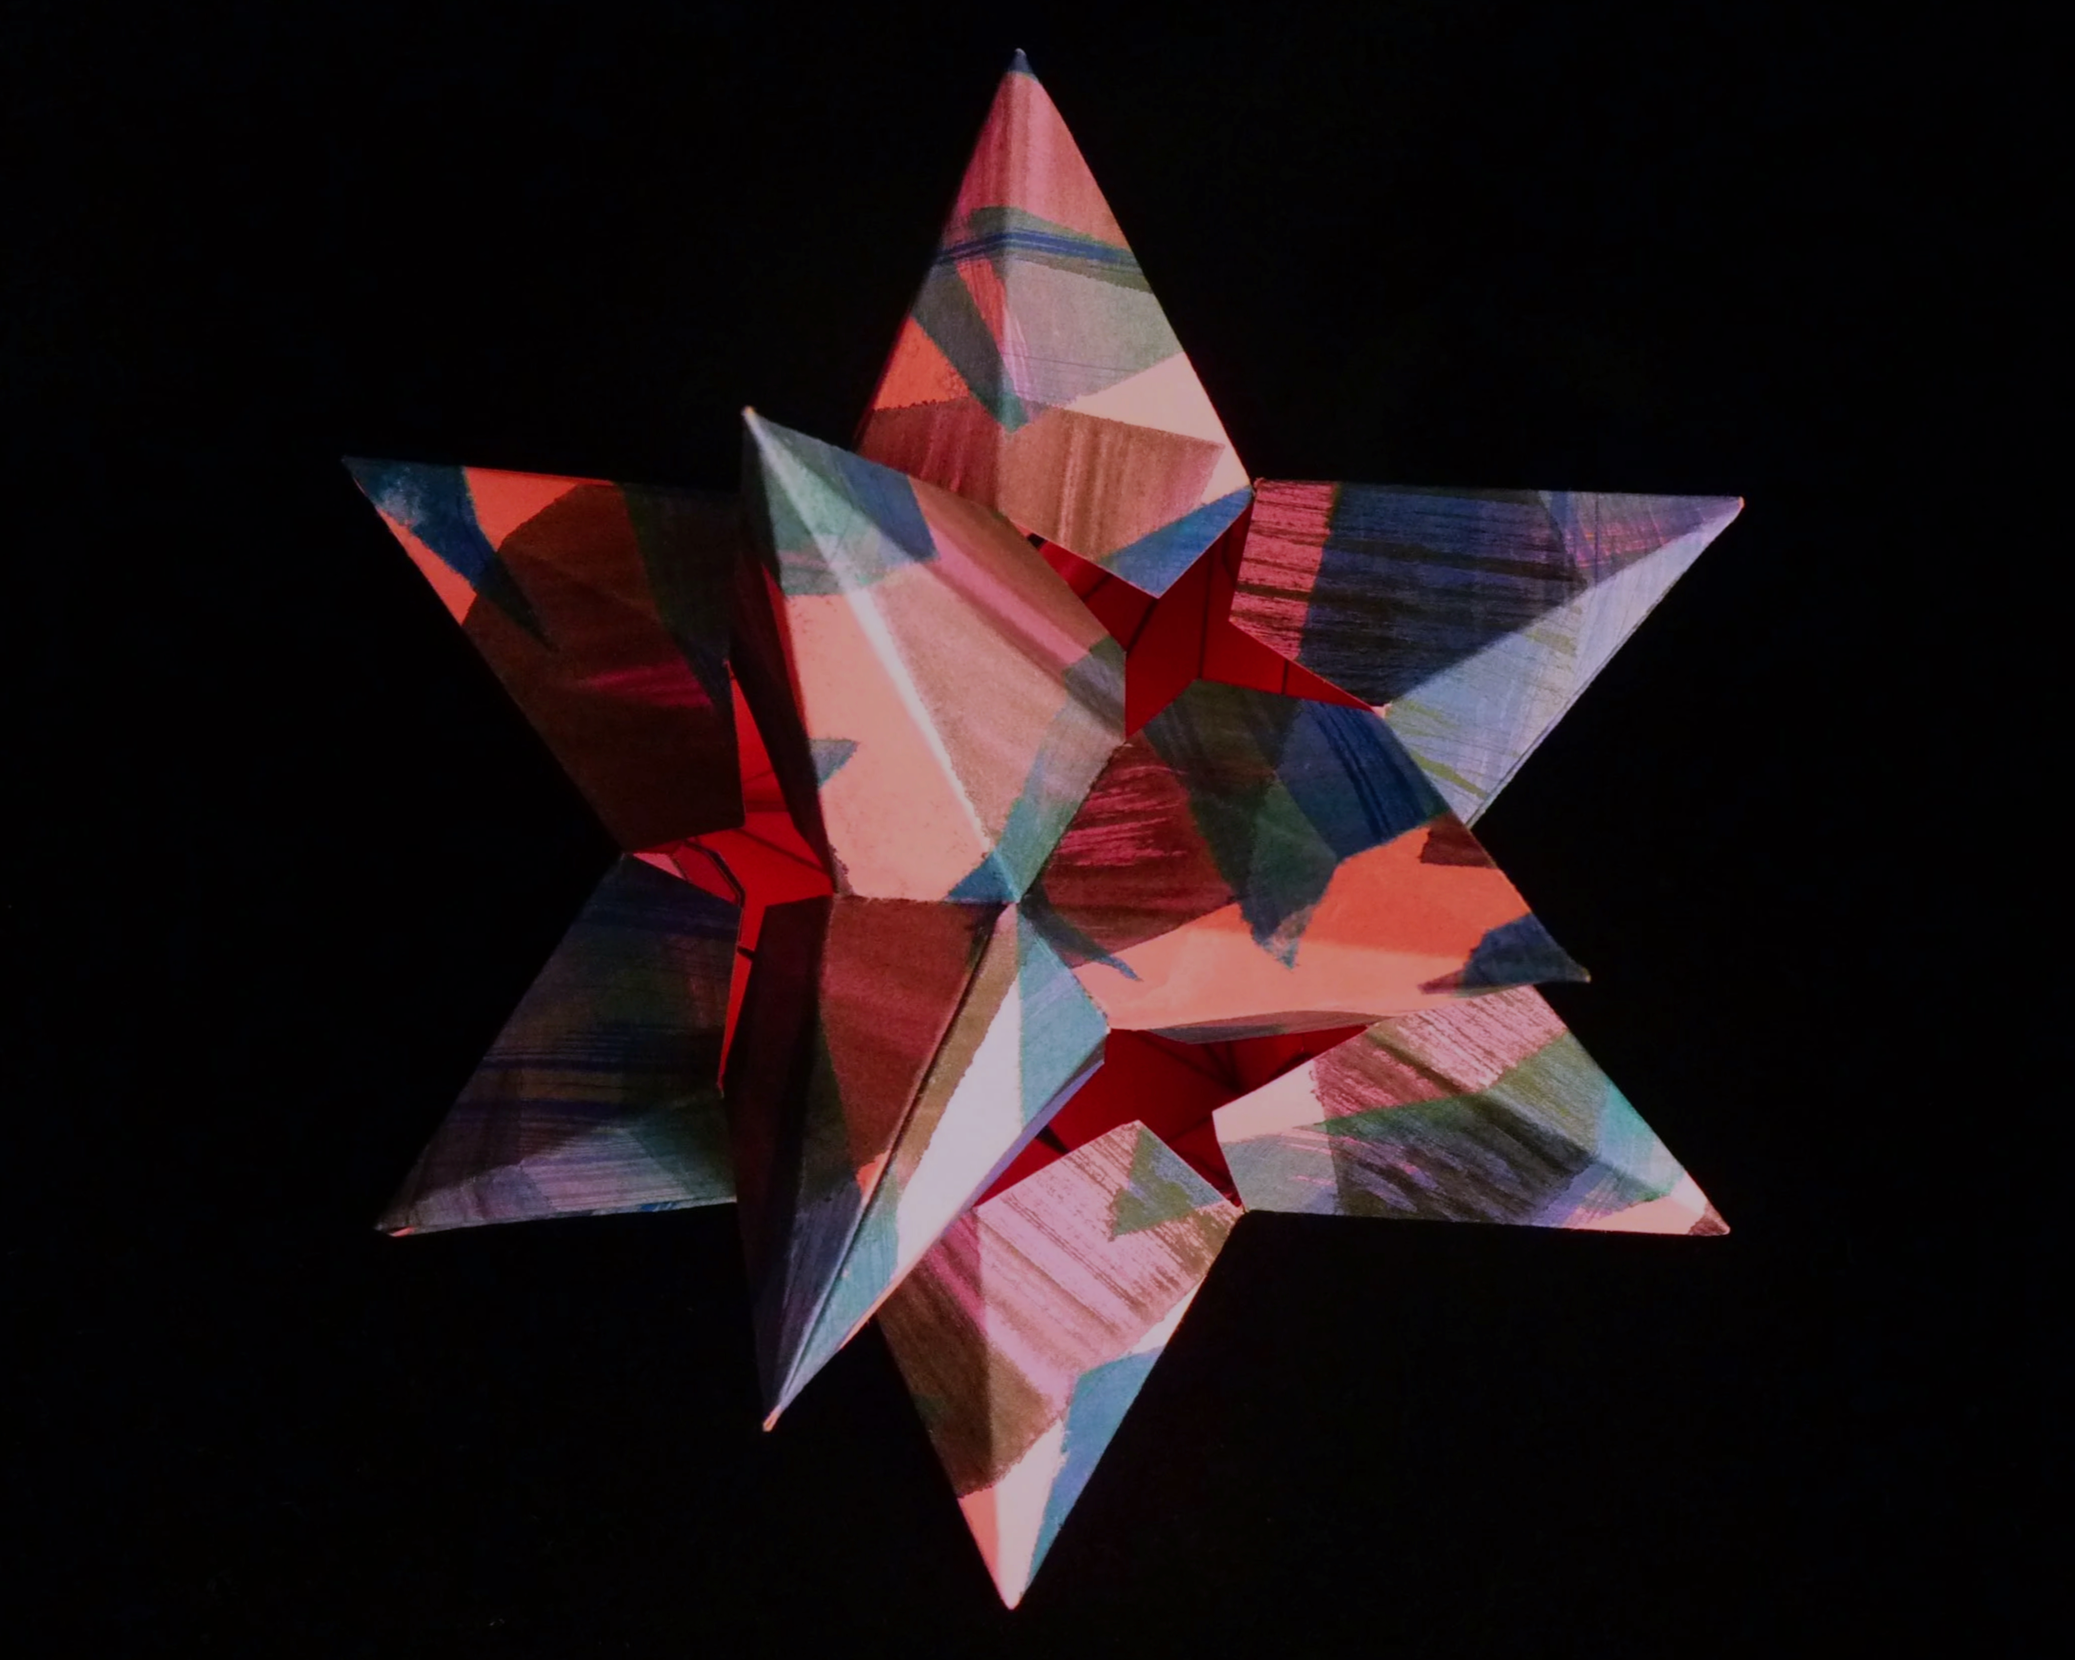
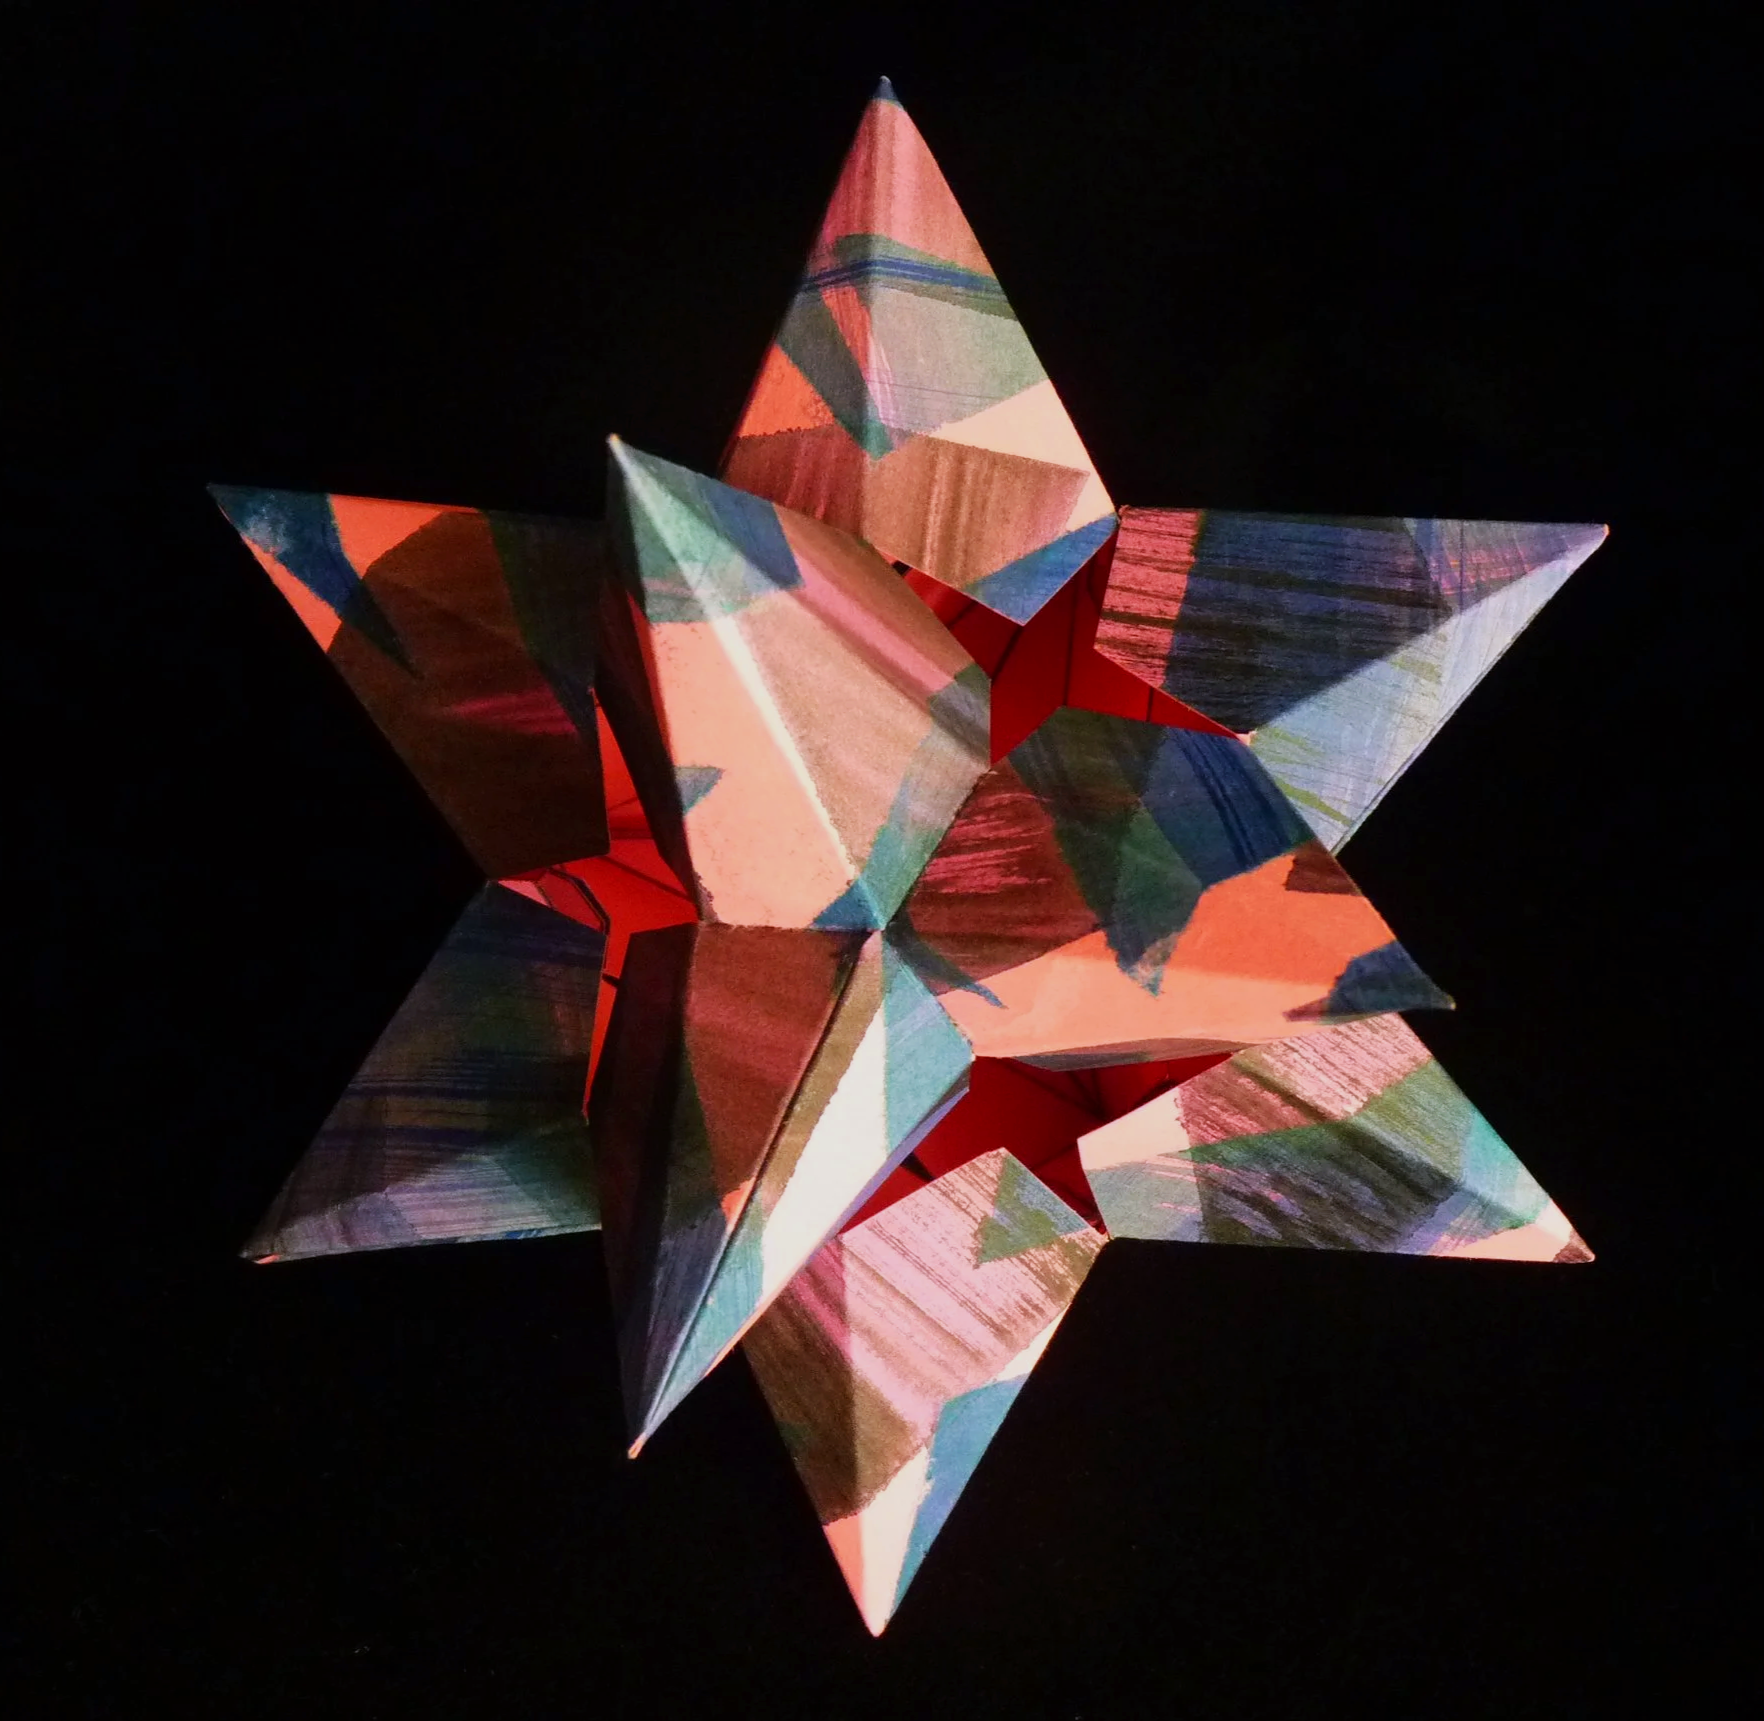
Photo 11. Completed Electra - View 1
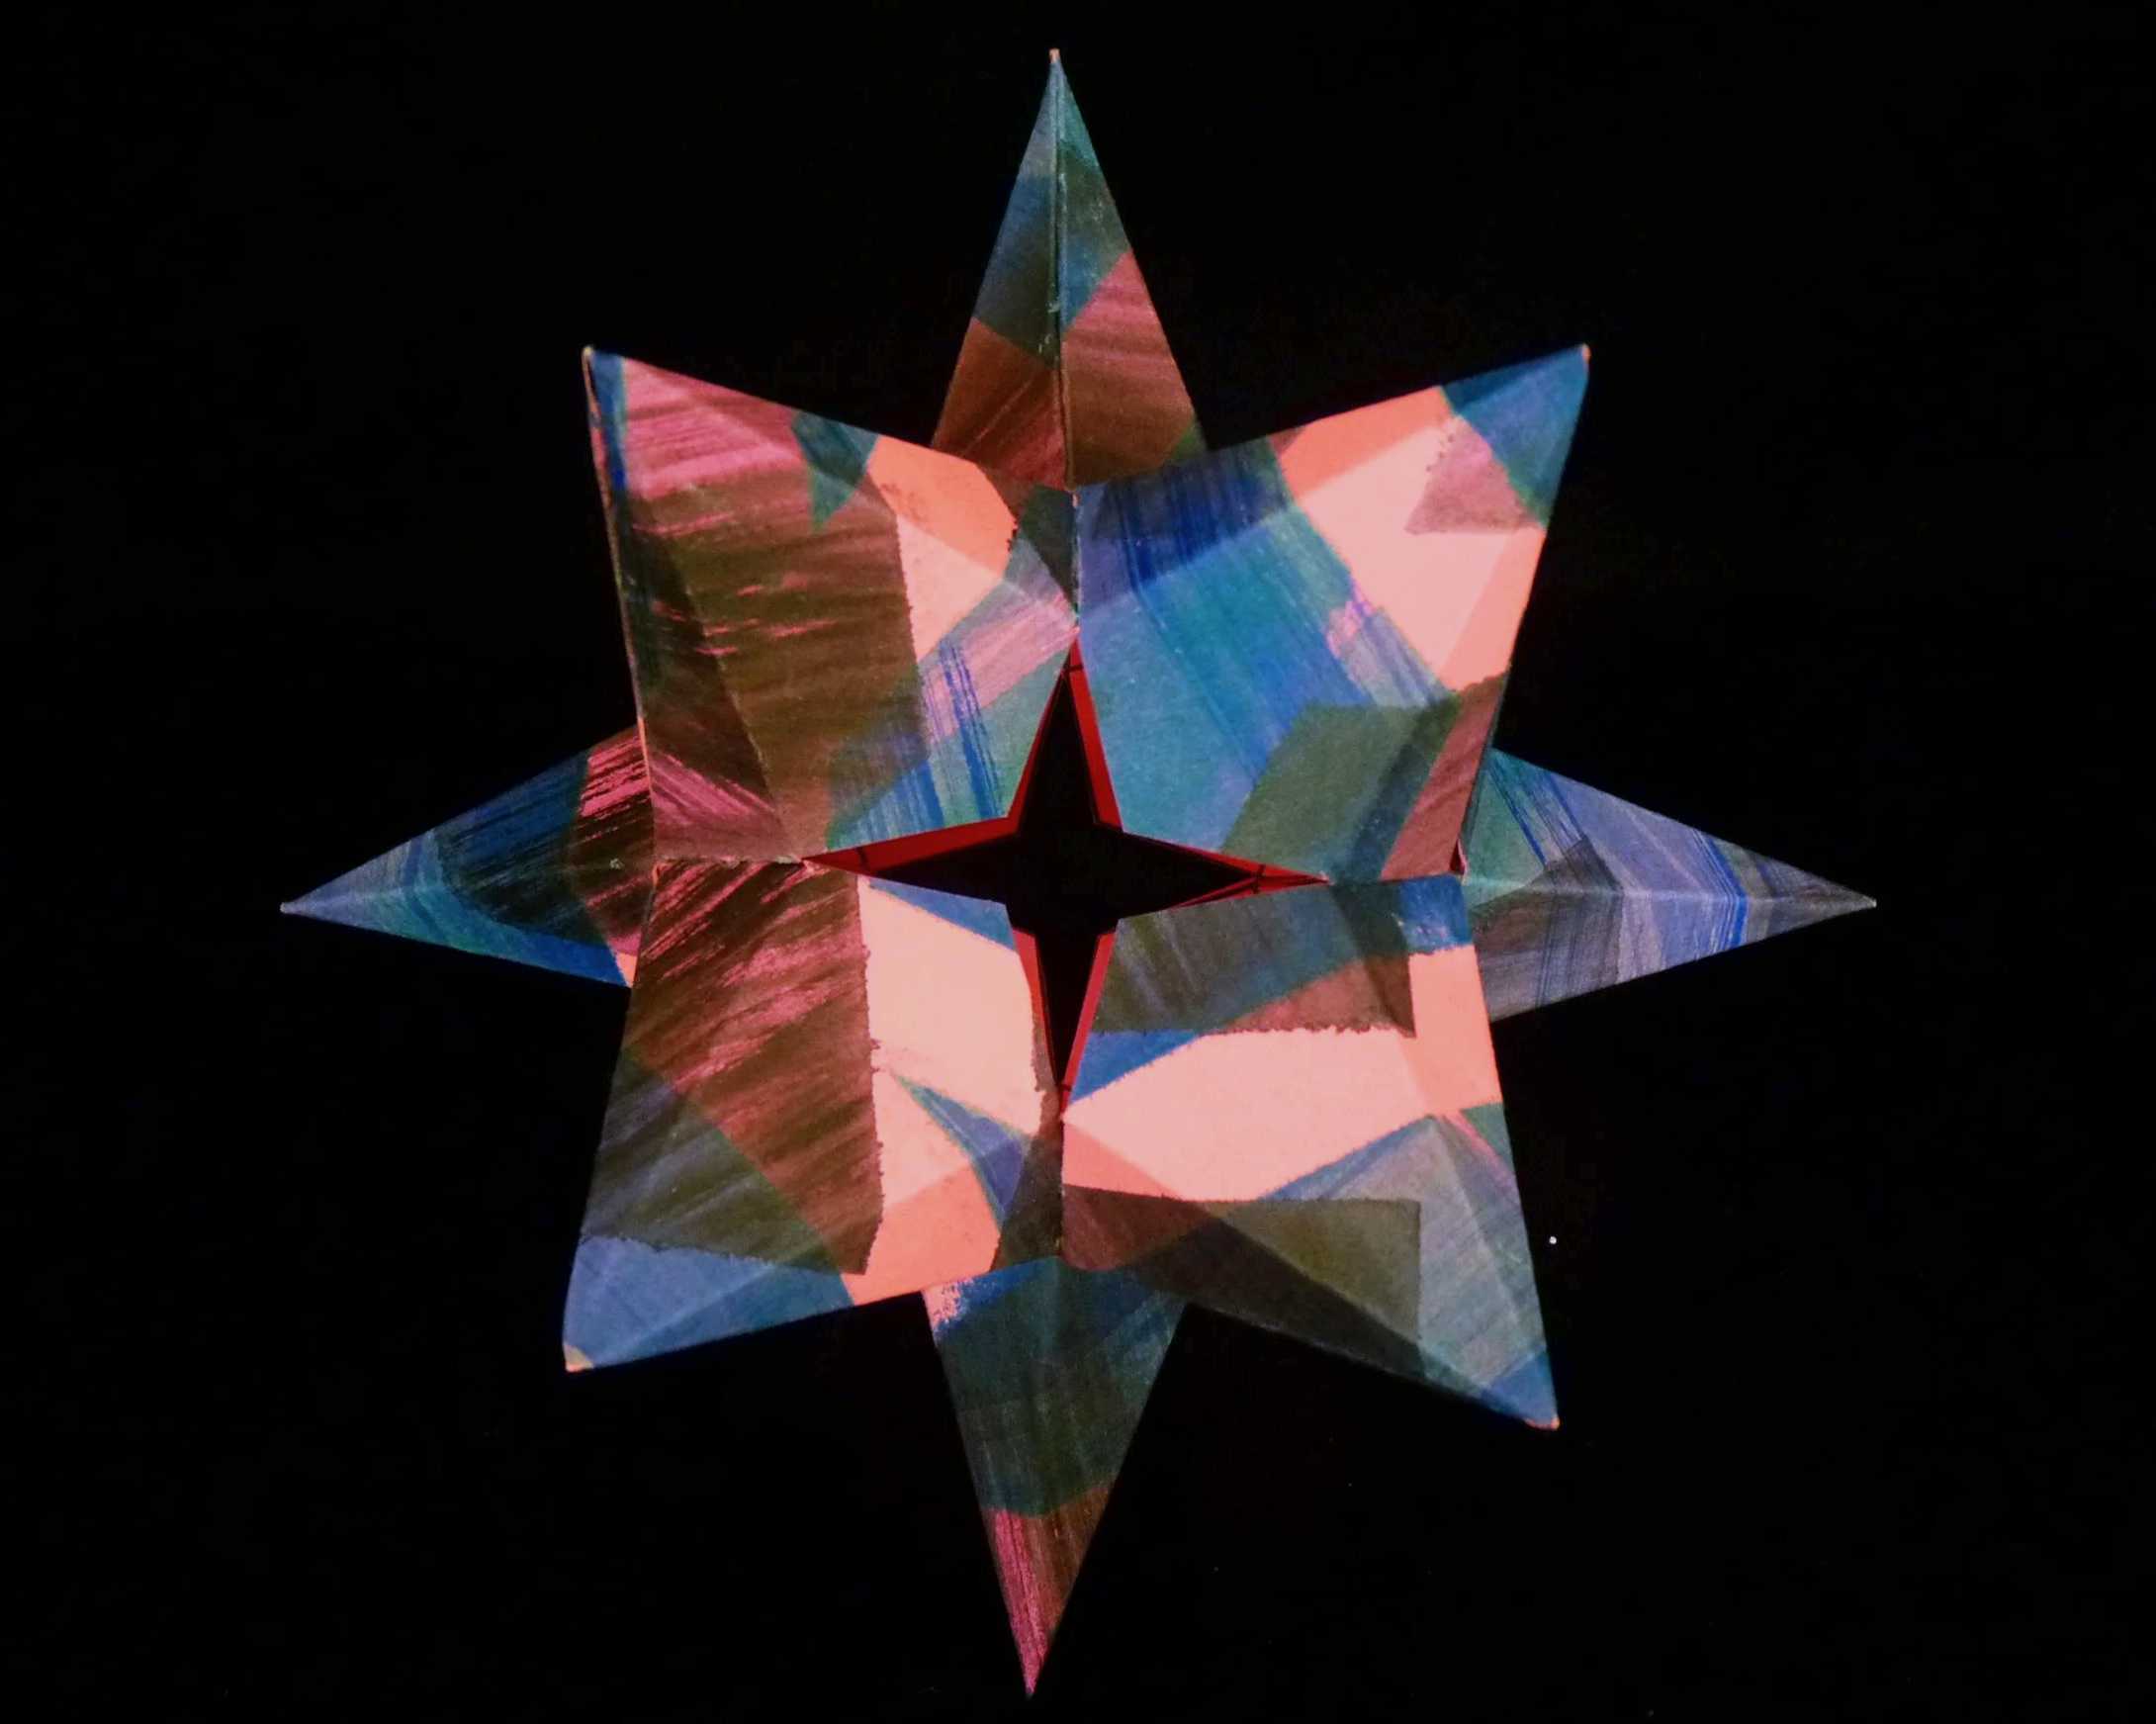
Photo 12. Completed Electra - View 2
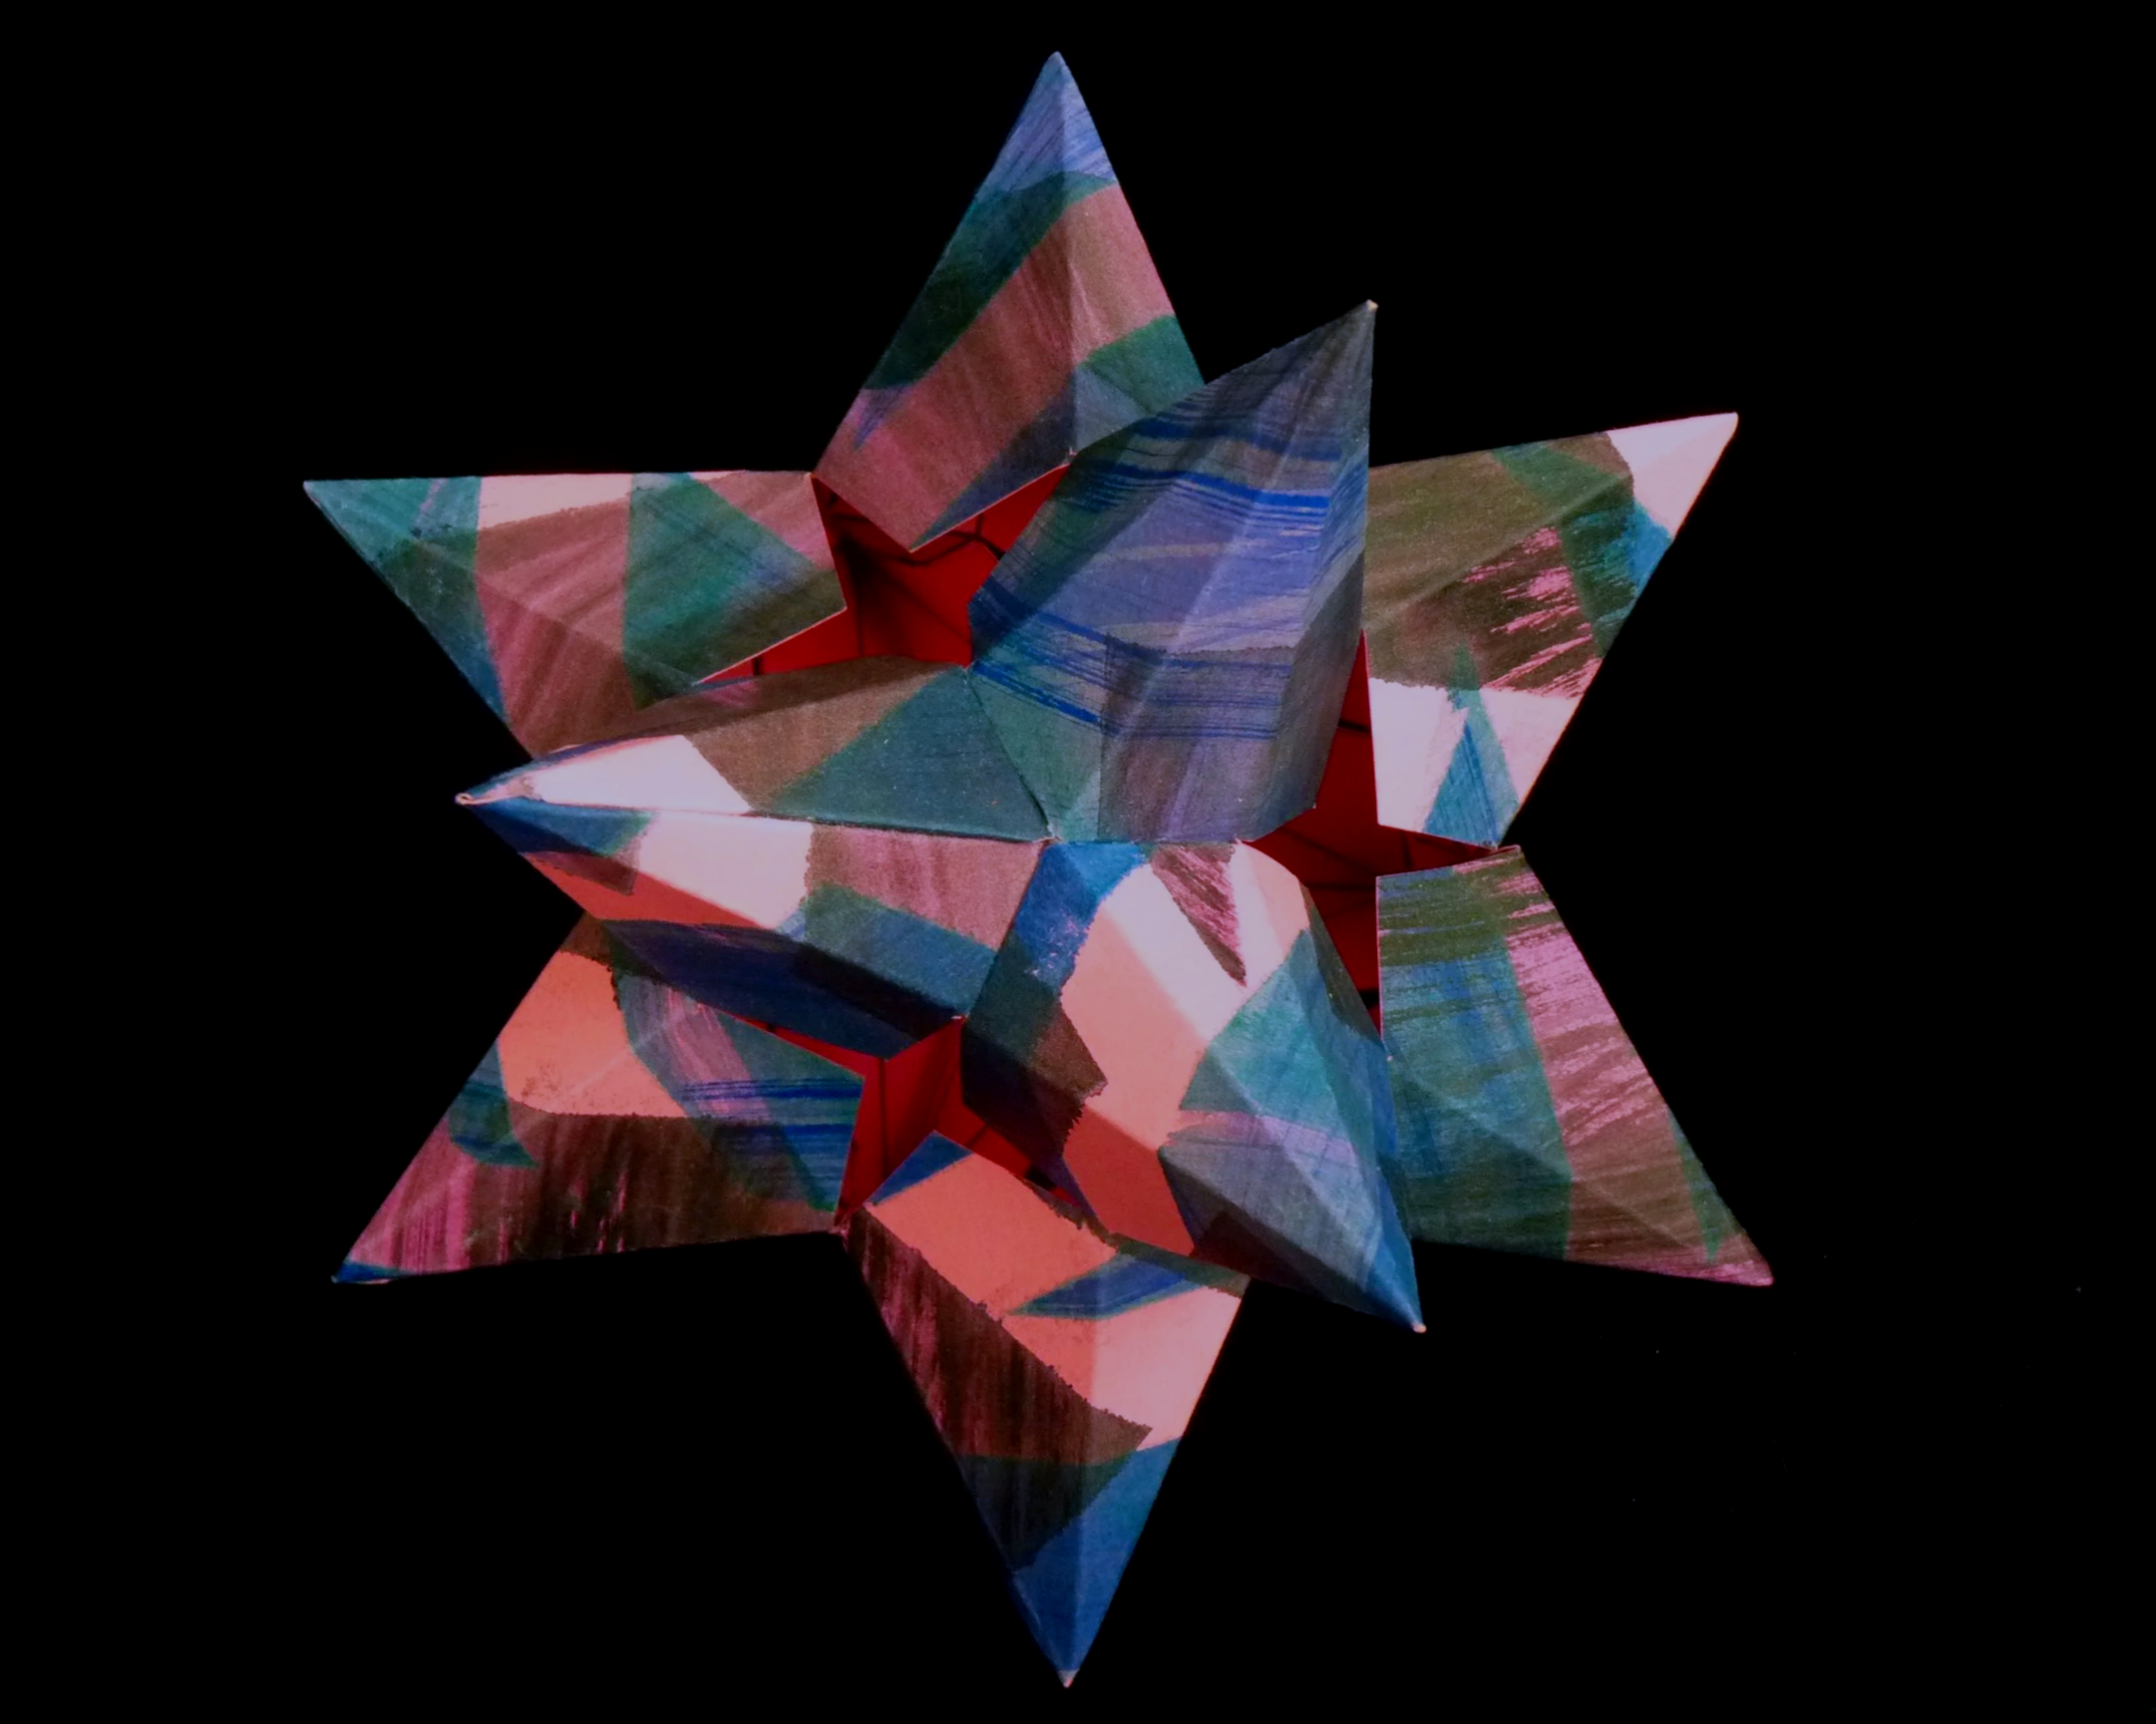
Photo 13 . Completed Electra - View 3
Electra is formed from a rhombic dodecahedron, where each diamond point is truncated on two sides to form a hexagon point.