Spy Satellite
Launch a satellite. See what your neighbors on the other side of the world are doing.
Project Info
Paper required: Three sheets 8 ½ x 11 inch (or A4)
Finished Project size: 4.5 inches (11 cm)
Difficulty Level: advanced
Click button below to get your free printable pattern !
Click button below to get your free printable pattern !
INSTRUCTIONS
STEP 1
Print the Spy Satellite pattern onto the three matching paper sheets of your choice. Both sides of the paper will be visible in this project.
Read the pattern key included in the General Instructions.
Step 2
Cut out the 24 parts by cutting on all solid black lines. (do not cut on the dashed black lines).
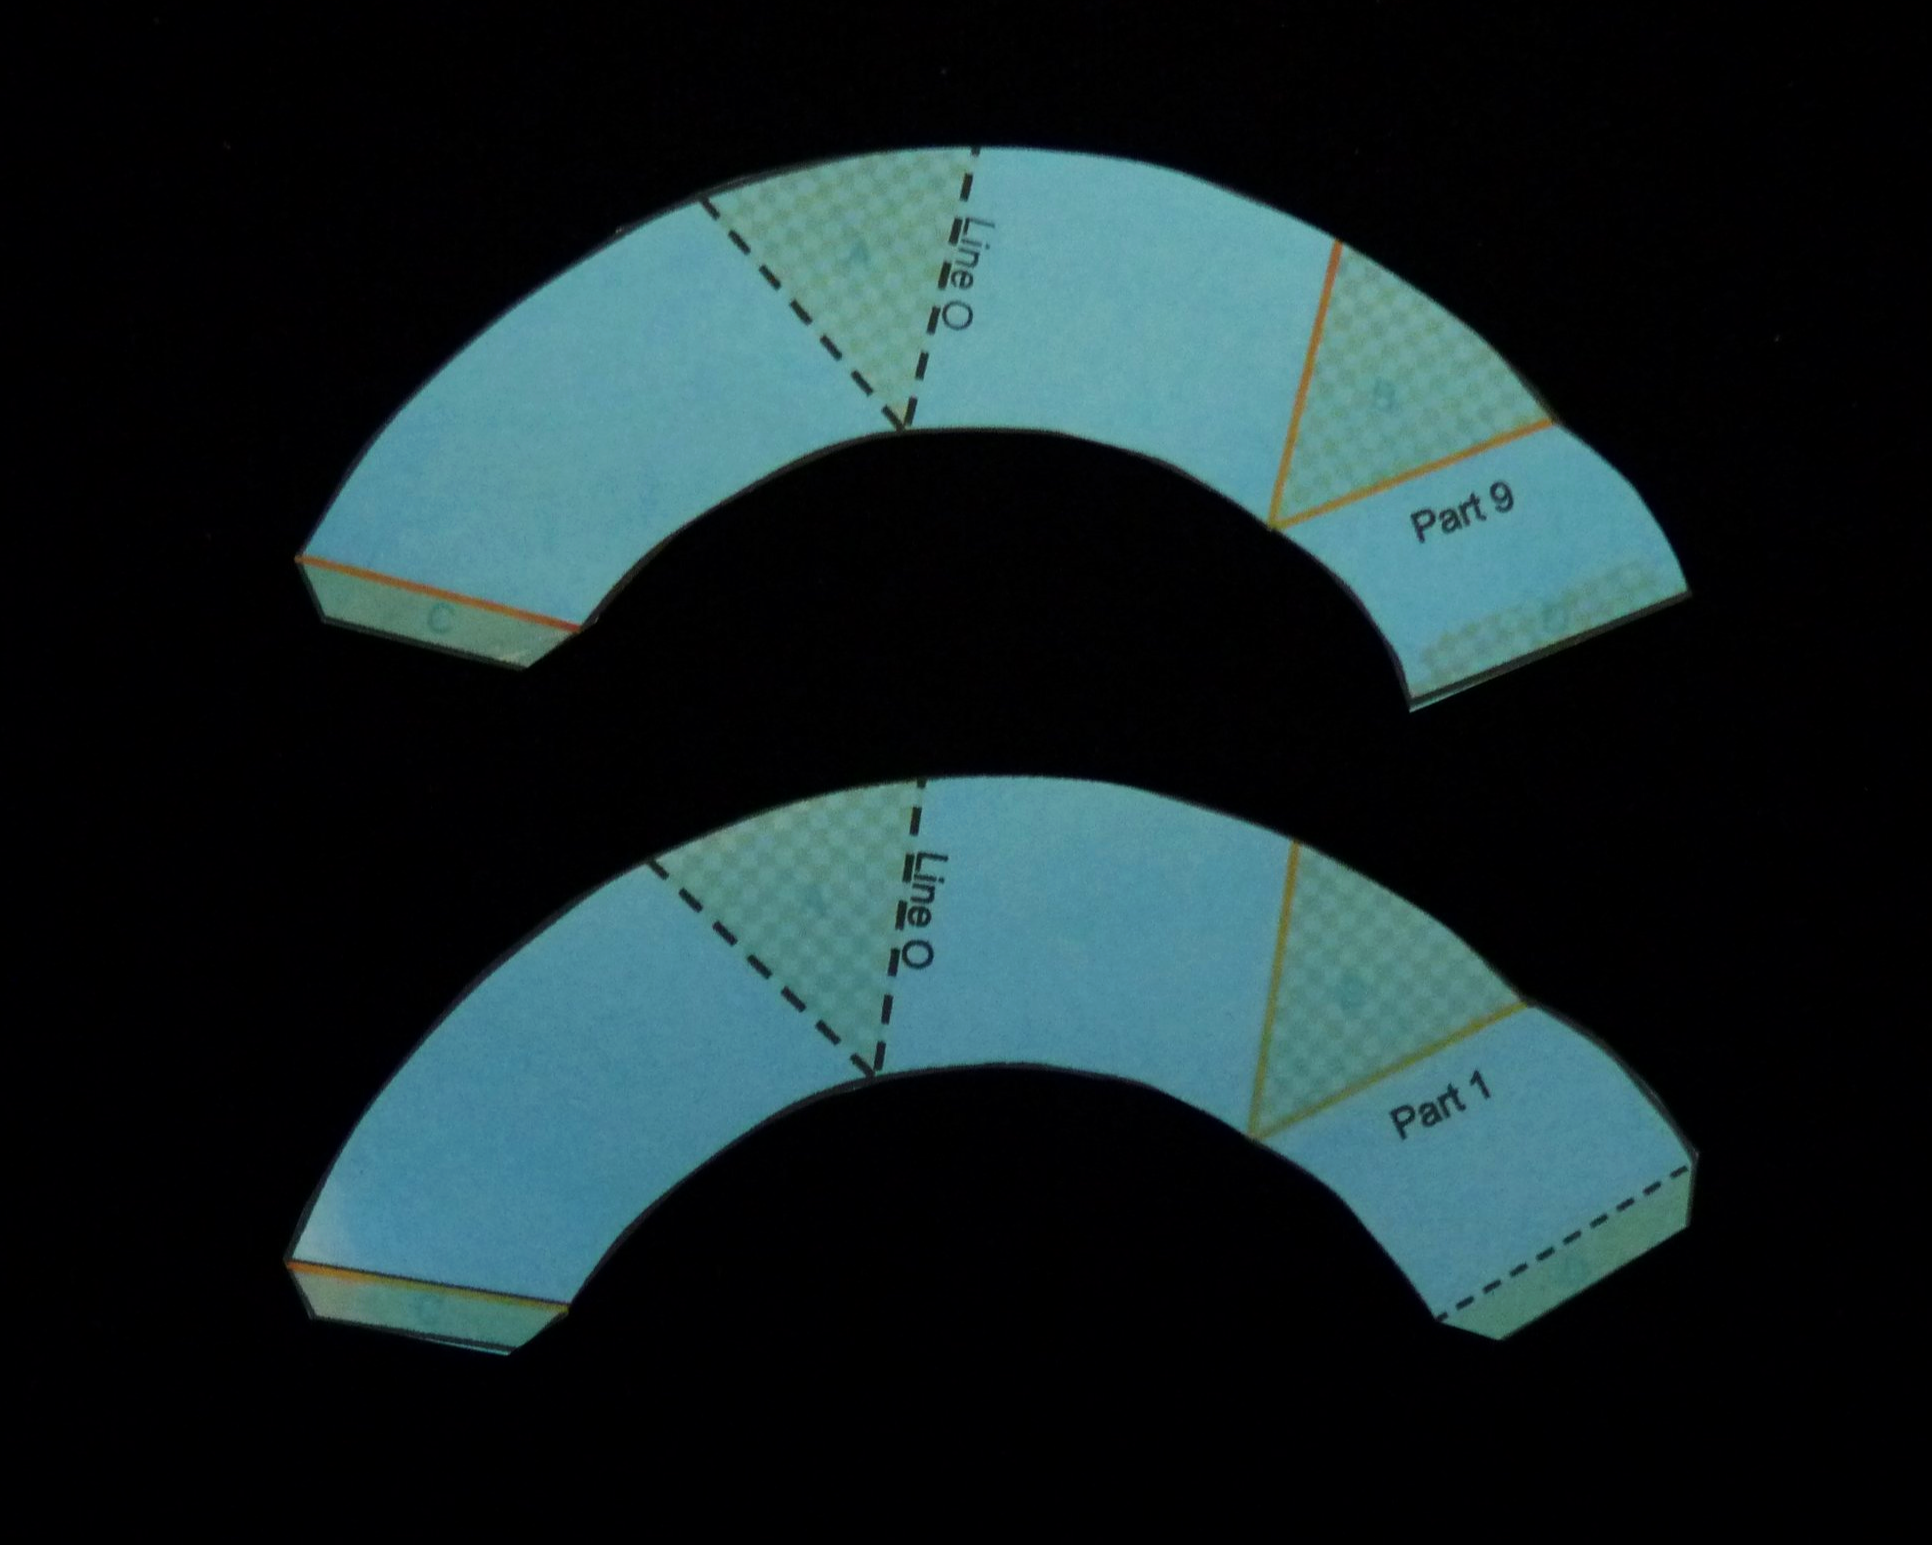
Photo 1. Two Parts Cut - Back of Paper

Photo 2. Two Parts Cut - Front of Paper
STEP 3
On all 24 parts, fold the three red lines as mountain folds.

Photo 3. Two Parts Folded

Photo 4. Two Parts Folded
Step 4
Connect four parts. Glue Patch B on Part 2 to Patch A on Part 1. Glue Patch B on Part 3 to Patch A on Part 2. Glue Patch B on Part 4 to Patch A on Part 3. Glue Patch B on Part 1 to Patch A on Part 4.

Photo 5. Project after Step 4 - View 1
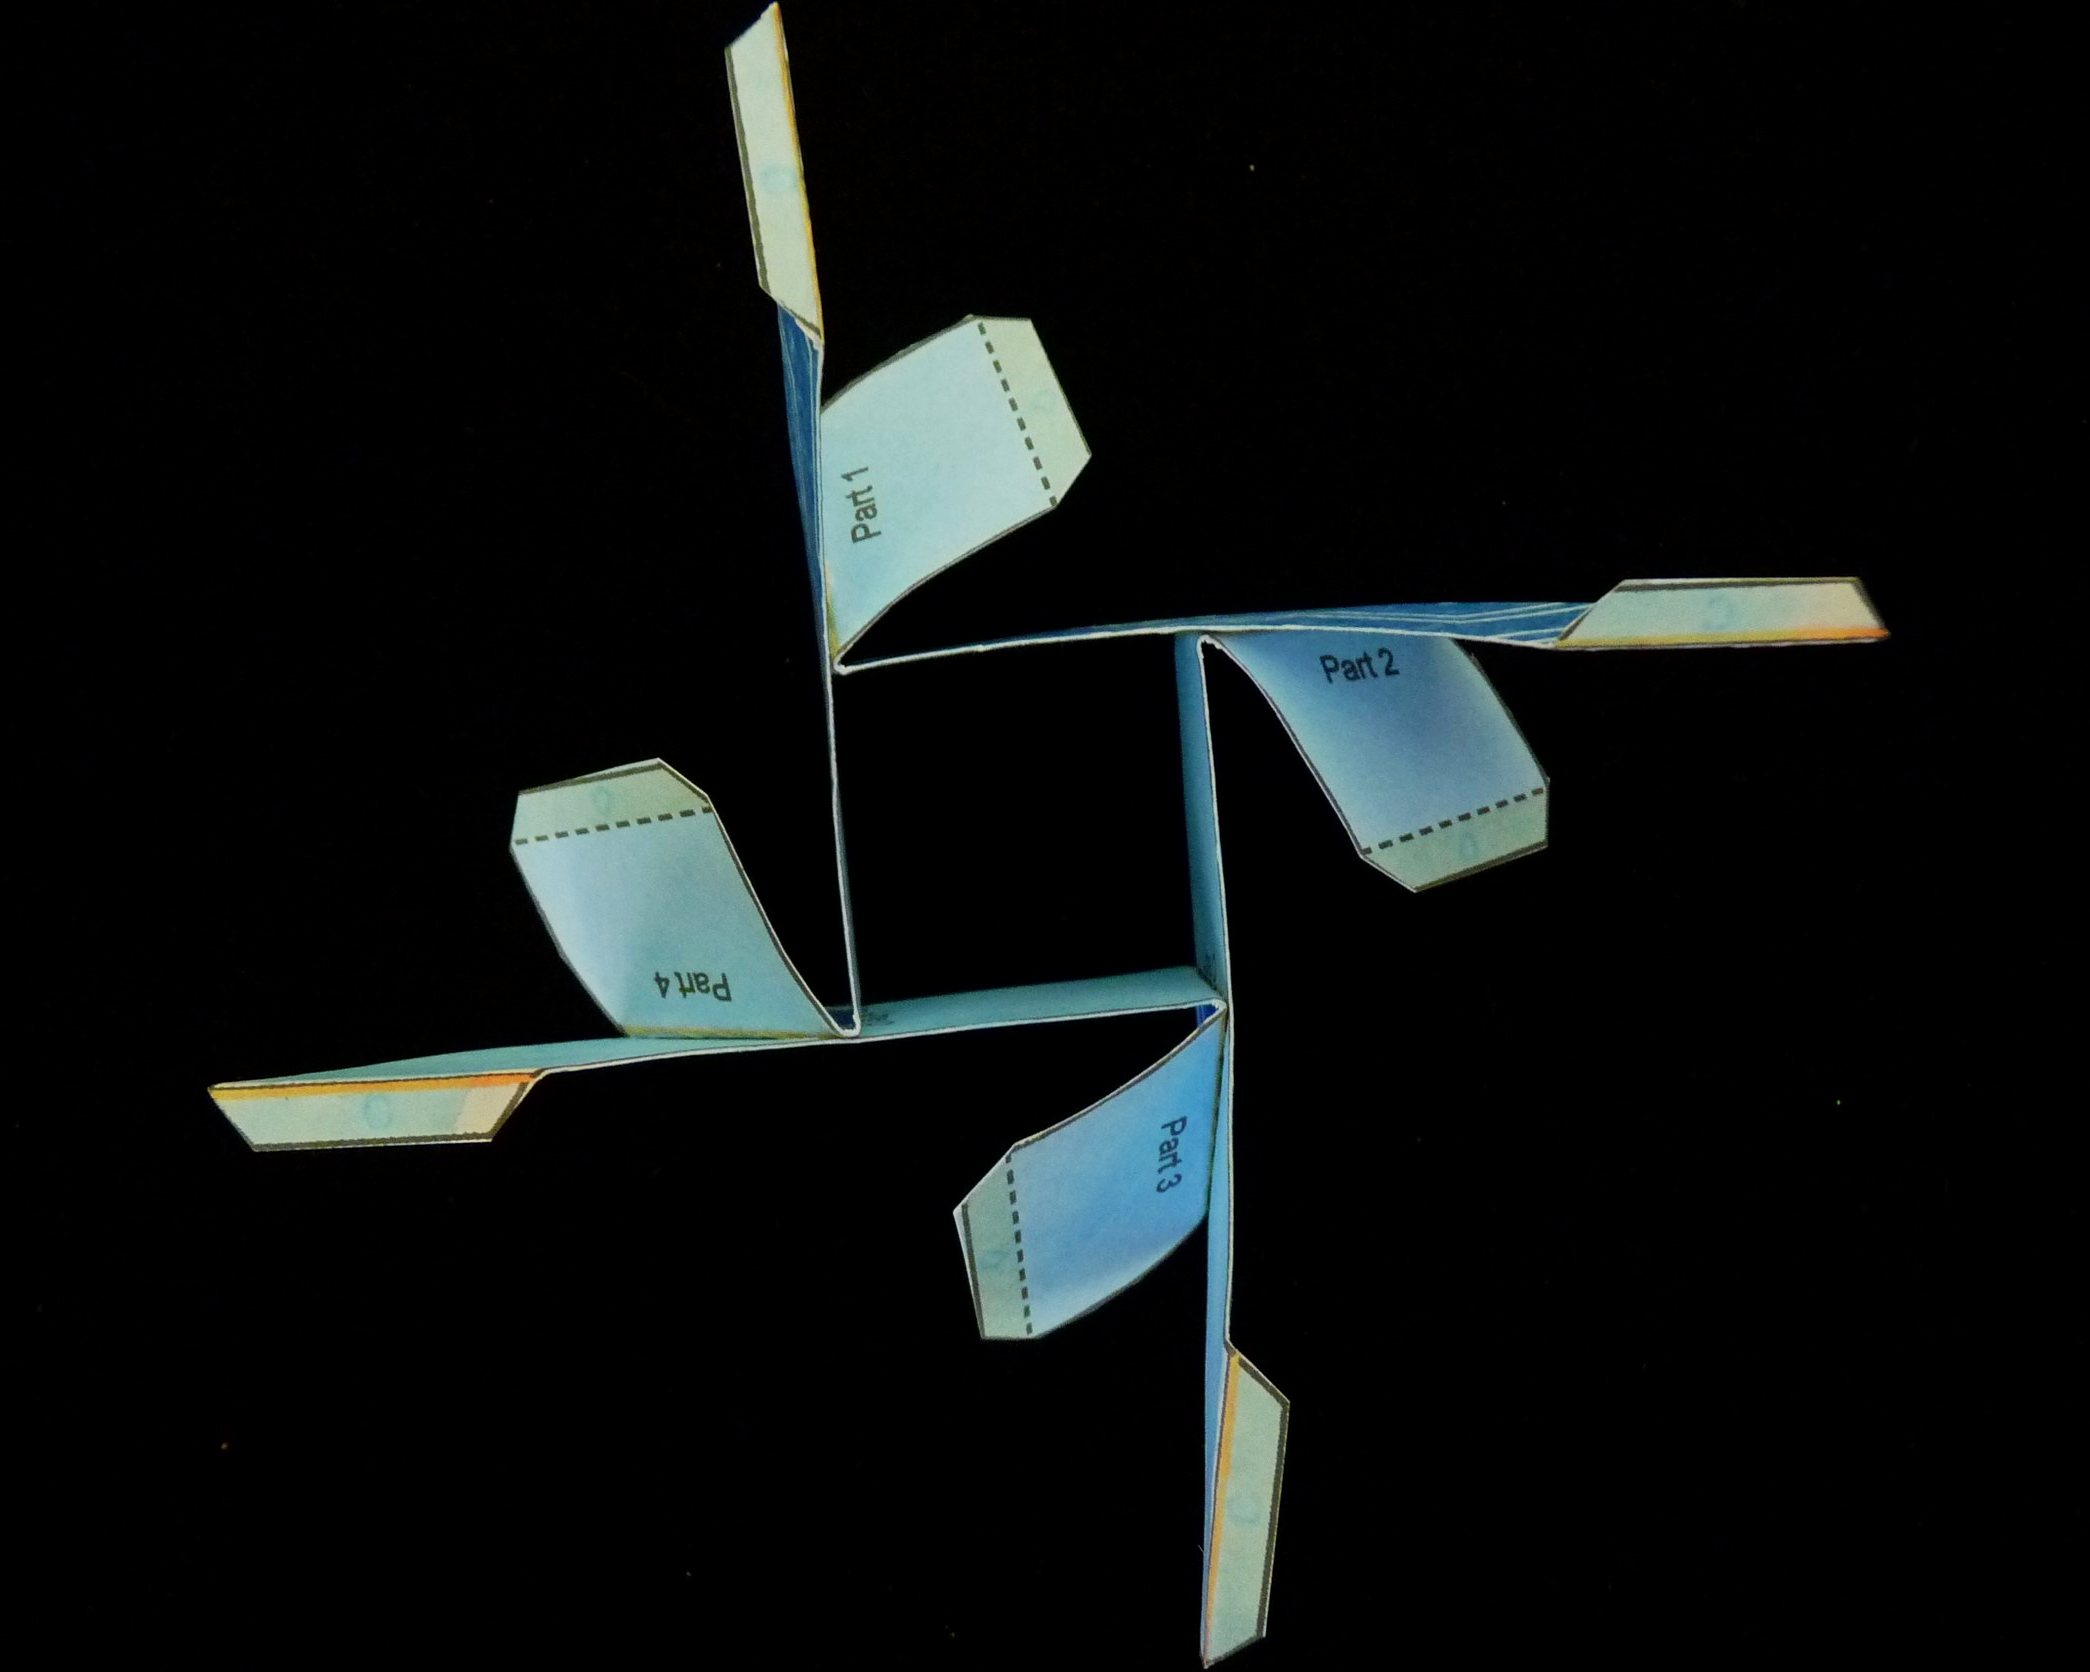
Photo 6. Project after Step 4 - View 2
Step 5
Add Parts 5, 6, 7, and 8. Glue Flap C on Part 5 at Line O on Part 2 (on the opposite side of the printing). Glue Flap C on Part 6 at Line O on Part 1 (on the opposite side of the printing). Glue Flap C on Part 7 at Line O on Part 4 (on the opposite side of the printing). Glue Flap C on Part 8 at Line O on Part 3 (on the opposite side of the printing).

Photo 7. Project after Step 5 - View 1

Photo 8. Project after Step 5 - View 2
Step 6
Add Parts 9, 10, 11, and 12. As in Step 5, where it says to glue at Line O, it is always on the opposite side of the paper as the printing.
• For Part 9, glue Part 9 Patch B to Part 5 Patch A, glue Part 9 Flap C to Part 6 at Line O, glue Part 9 Flap D to Part 2 Flap D, and glue Part 1 Flap C to Part 9 at Line O.
• For Part 10, glue Part 10 Patch B to Part 6 Patch A, glue Part 10 Flap C to Part 7 at Line O, glue Part 10 Flap D to Part 1 Flap D, and glue Part 4 Flap C to Part 10 at Line O.
• For Part 11, glue Part 11 Patch B to Part 7 Patch A, glue Part 11 Flap C to Part 8 at Line O, glue Part 11 Flap D to Part 4 Flap D, and glue Part 3 Flap C to Part 11 at Line O.
• For Part 12, glue Part 12 Patch B to Part 8 Patch A, glue Part 12 Flap C to Part 5 at Line O, glue Part 12 Flap D to Part 3 Flap D, and glue Part 2 Flap C to Part 12 at Line O.
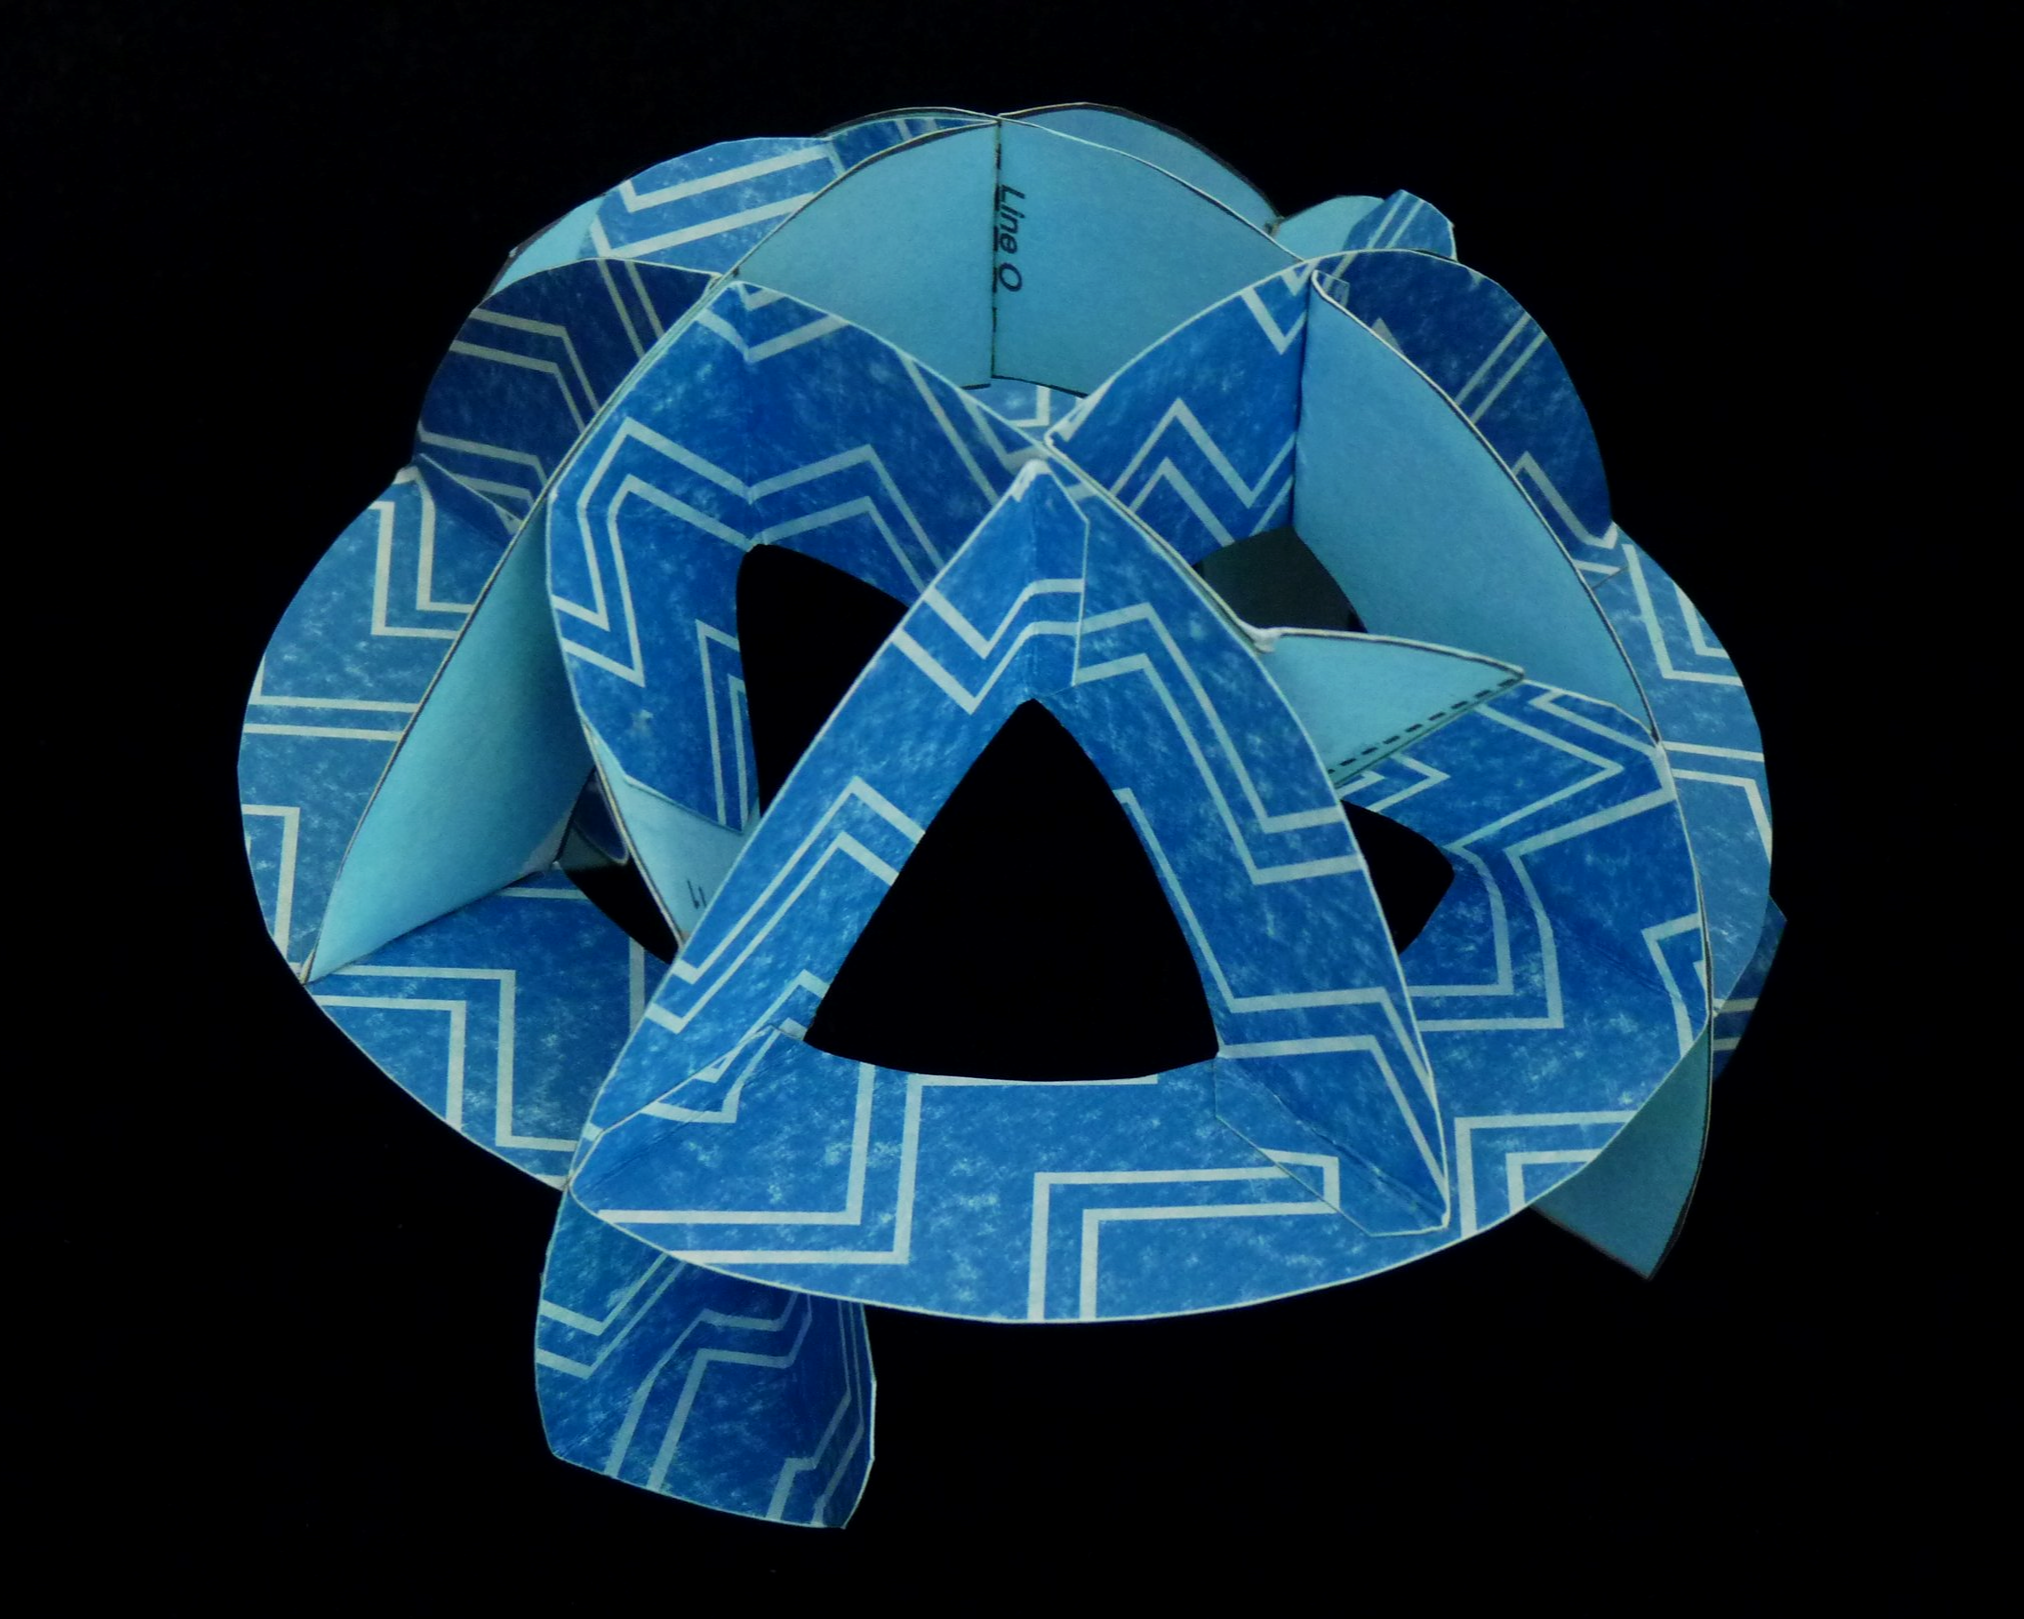
Photo 9. Project after Step 6 - View 1
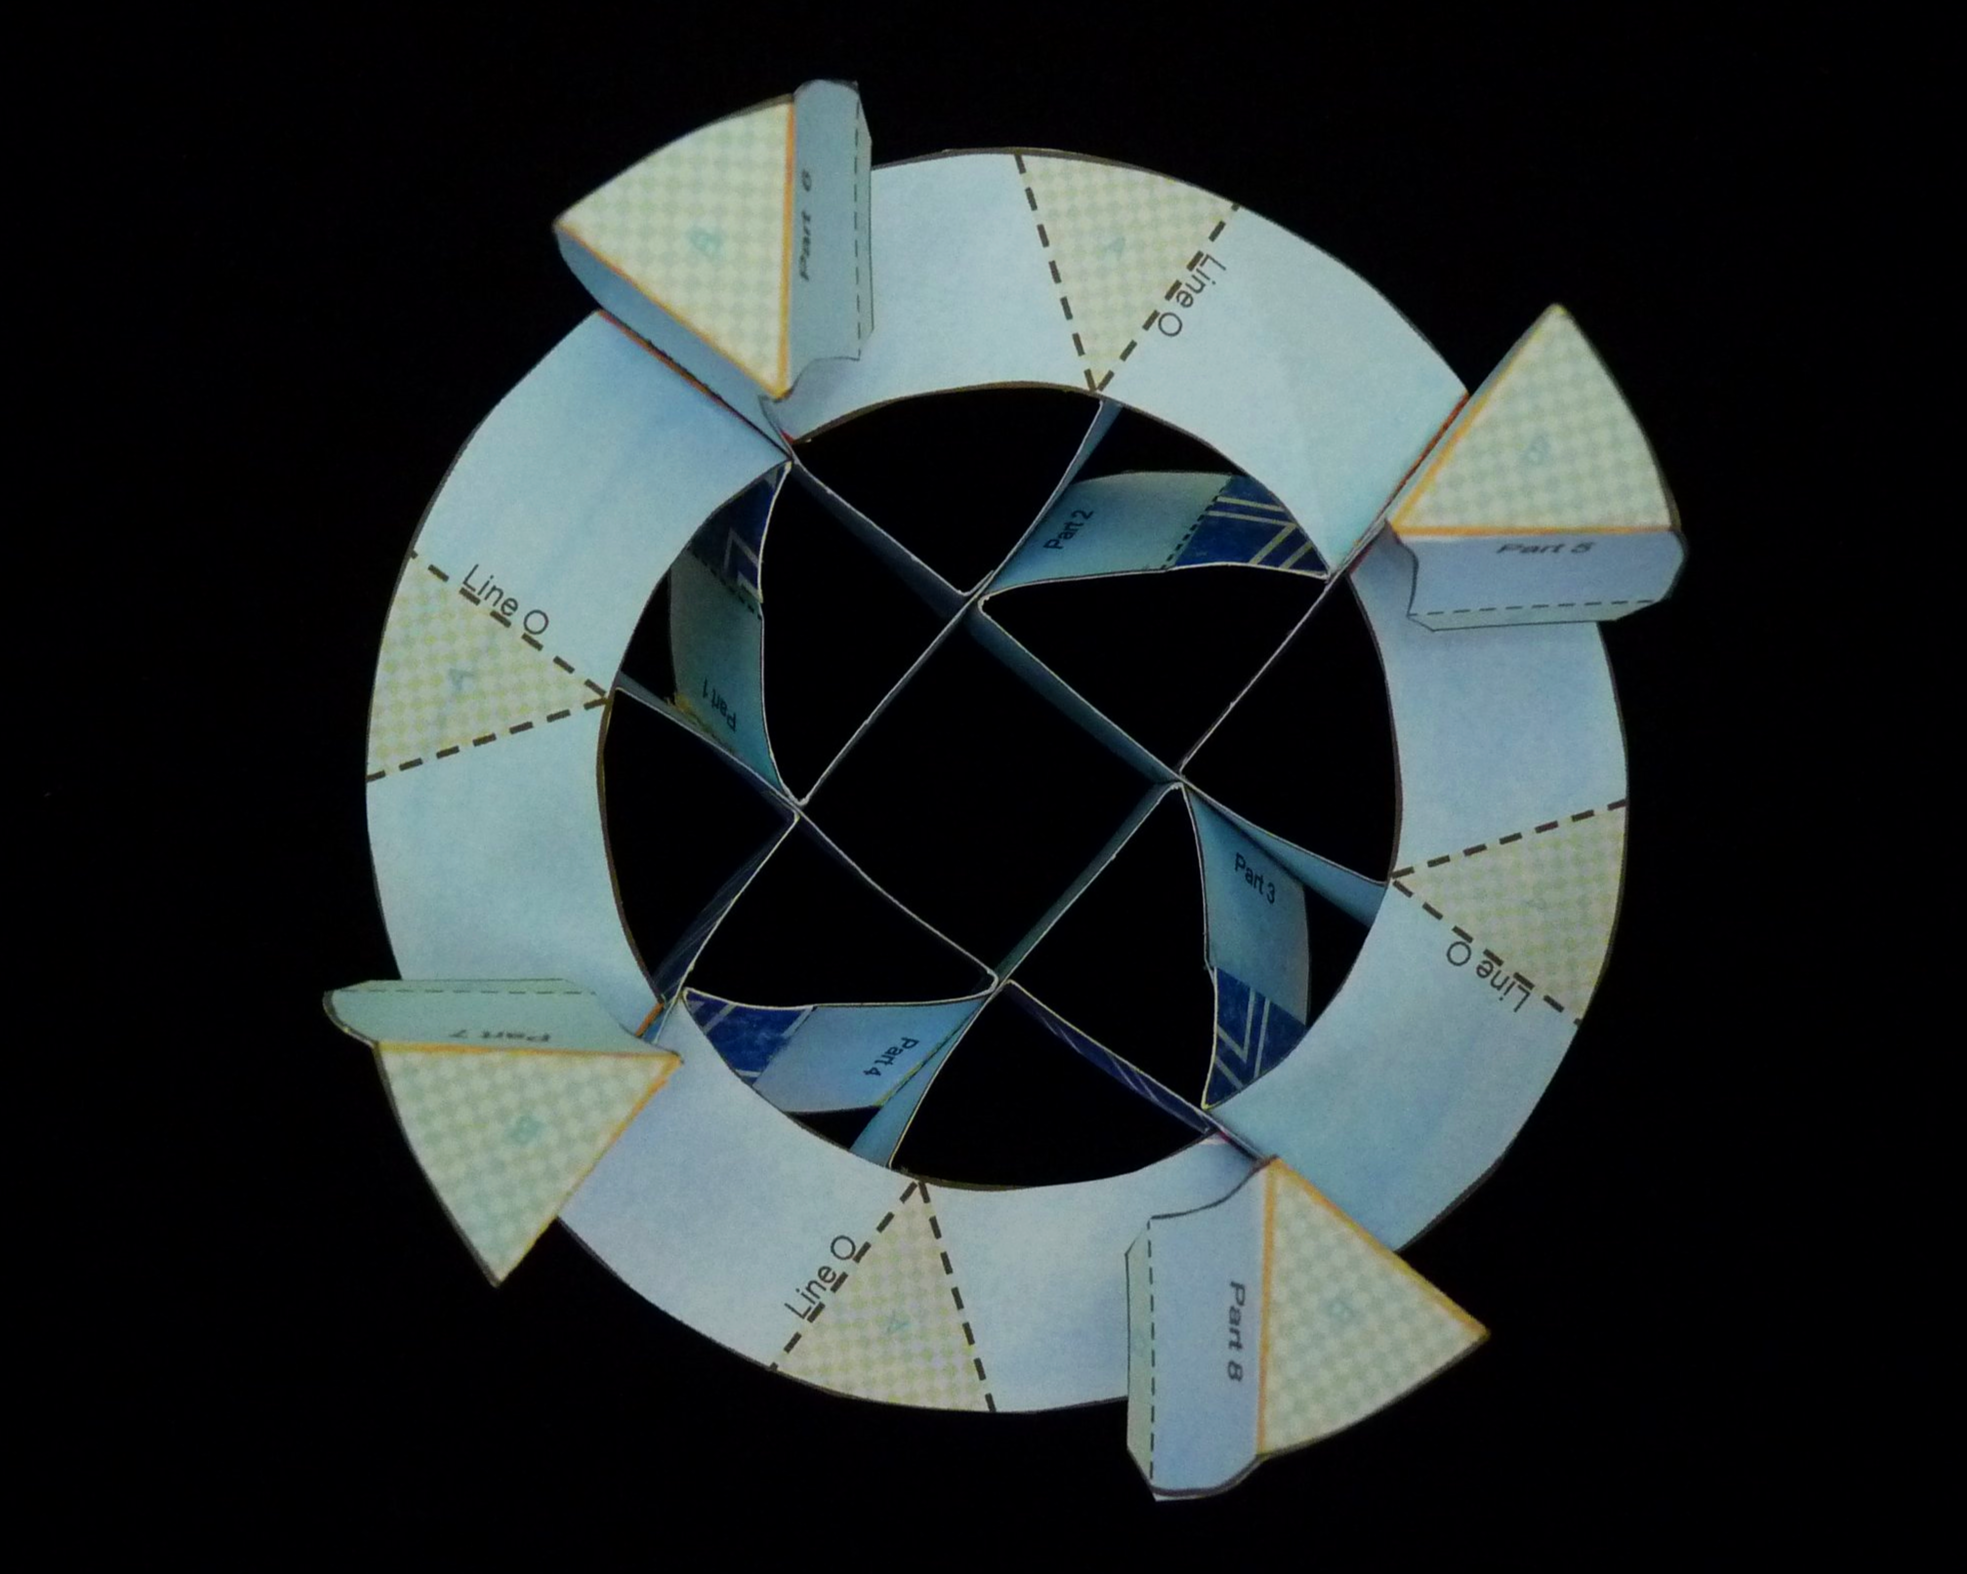
Photo 10. Project after Step 6 - View 2
Step 7
Add Parts, 17, 18, 19, and 20. Glue Patch A on Part 17 to Patch B on Part 7. Glue Patch A on Part 18 to Patch B on Part 6. Glue Patch A on Part 19 to Patch B on Part 5. Glue Patch A on Part 20 to Patch B on Part 8.
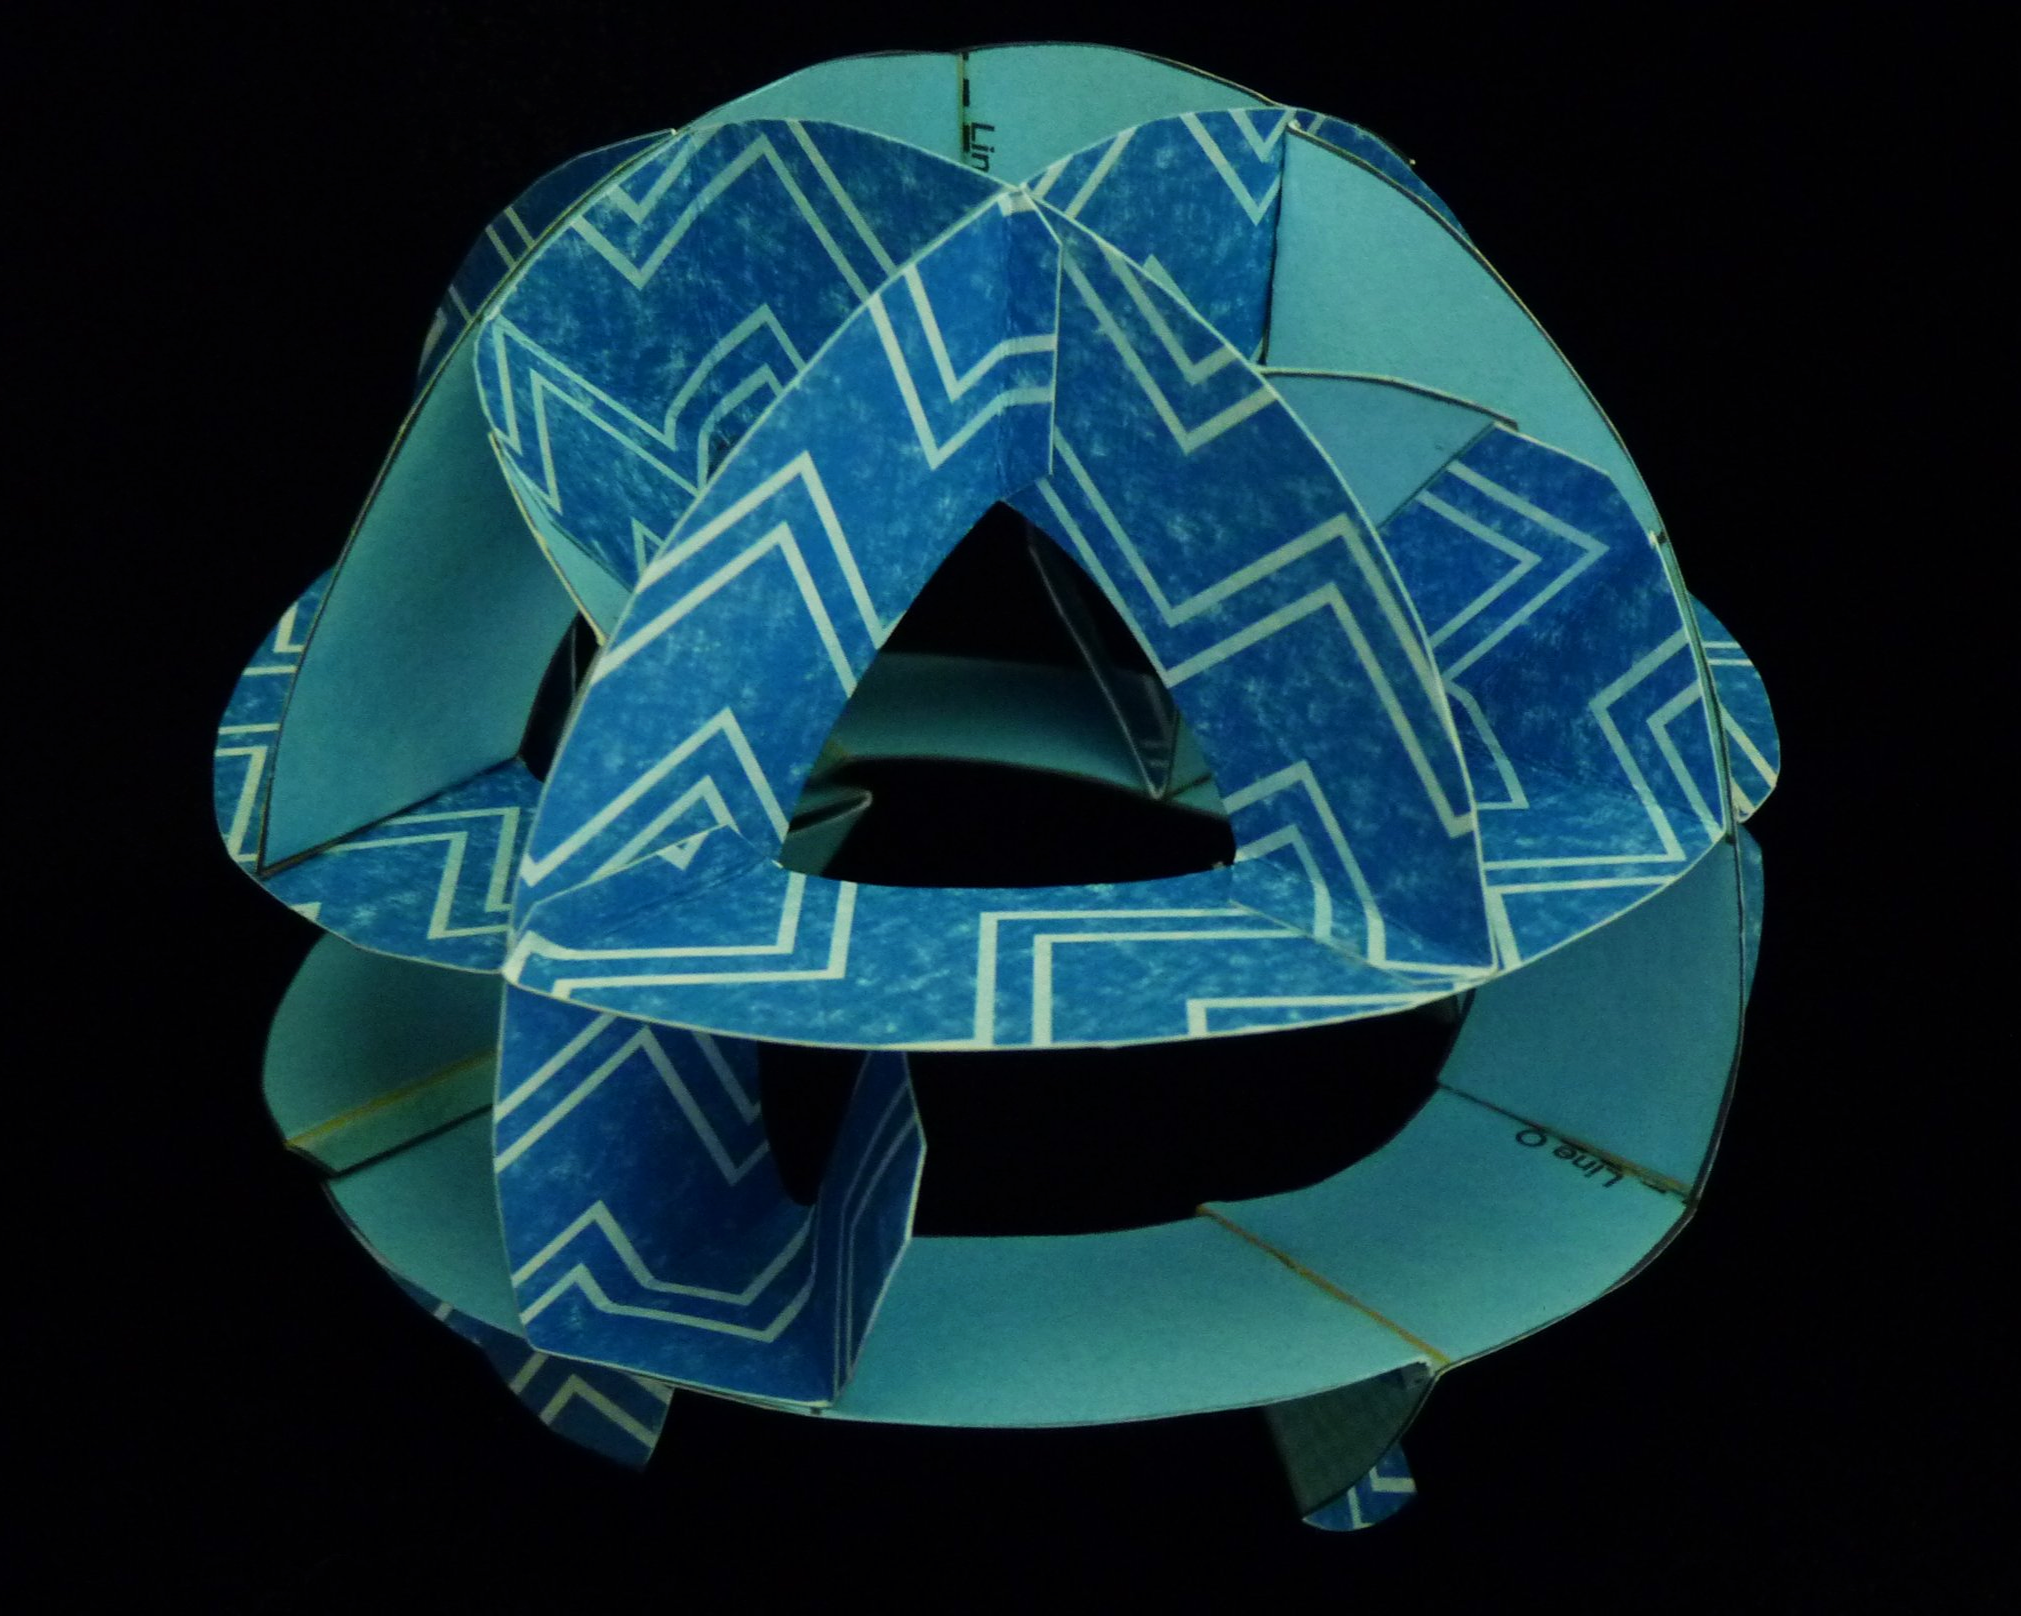
Photo 11. Project after Step 7 - View 1

Photo 12. Project after Step 7 - View 2
Step 8
Add Parts 13, 14, 15, and 16. As in Steps 5 and 6, where it says to glue at Line O, it is always on the opposite side of the paper as the printing.
• For Part 13, glue Part 13 Patch B to Part 11 Patch A, glue Part 13 Patch A to Part 17 Patch B, glue Part 20 Flap C to Part 13 at Line O, and Glue Part 13 Flap D to Part 8 Flap D.
• For Part 14, glue Part 14 Patch B to Part 12 Patch A, glue Part 14 Patch A to Part 20 Patch B, glue Part 19 Flap C to Part 14 at Line O, and Glue Part 14 Flap D to Part 5 Flap D.
• For Part 15, glue Part 15 Patch B to Part 9 Patch A, glue Part 15 Patch A to Part 19 Patch B, glue Part 18 Flap C to Part 15 at Line O, and Glue Part 15 Flap D to Part 6 Flap D.
• For Part 16, glue Part 16 Patch B to Part 10 Patch A, glue Part 16 Patch A to Part 18 Patch B, glue Part 17 Flap C to Part 16 at Line O, and Glue Part 16 Flap D to Part 7 Flap D.

Photo 13. Project after Step 8
Step 9
Finally, add Parts 21, 22, 23, and 24. As in previous steps, where it says to glue at Line O, it is always on the opposite side of the paper as the printing.
• For Part 21, glue Part 21 Flap C to Part 17 at Line O, Glue Part 21 Patch B to Part 24 Patch A, glue Part 16 Flap C to Part 21 at Line O, and glue Part 21 Flap D to Part 16 Flap D.
• For Part 22, glue Part 22 Flap C to Part 20 at Line O, Glue Part 22 Patch B to Part 21 Patch A, glue Part 13 Flap C to Part 22 at Line O, and glue Part 22 Flap D to Part 13 Flap D.
• For Part 23, glue Part 23 Flap C to Part 19 at Line O, Glue Part 23 Patch B to Part 22 Patch A, glue Part 14 Flap C to Part 23 at Line O, and glue Part 23 Flap D to Part 14 Flap D.
• For Part 24, glue Part 24 Flap C to Part 18 at Line O, Glue Part 24 Patch B to Part 23 Patch A, glue Part 15 Flap C to Part 24 at Line O, and glue Part 24 Flap D to Part 15 Flap D.

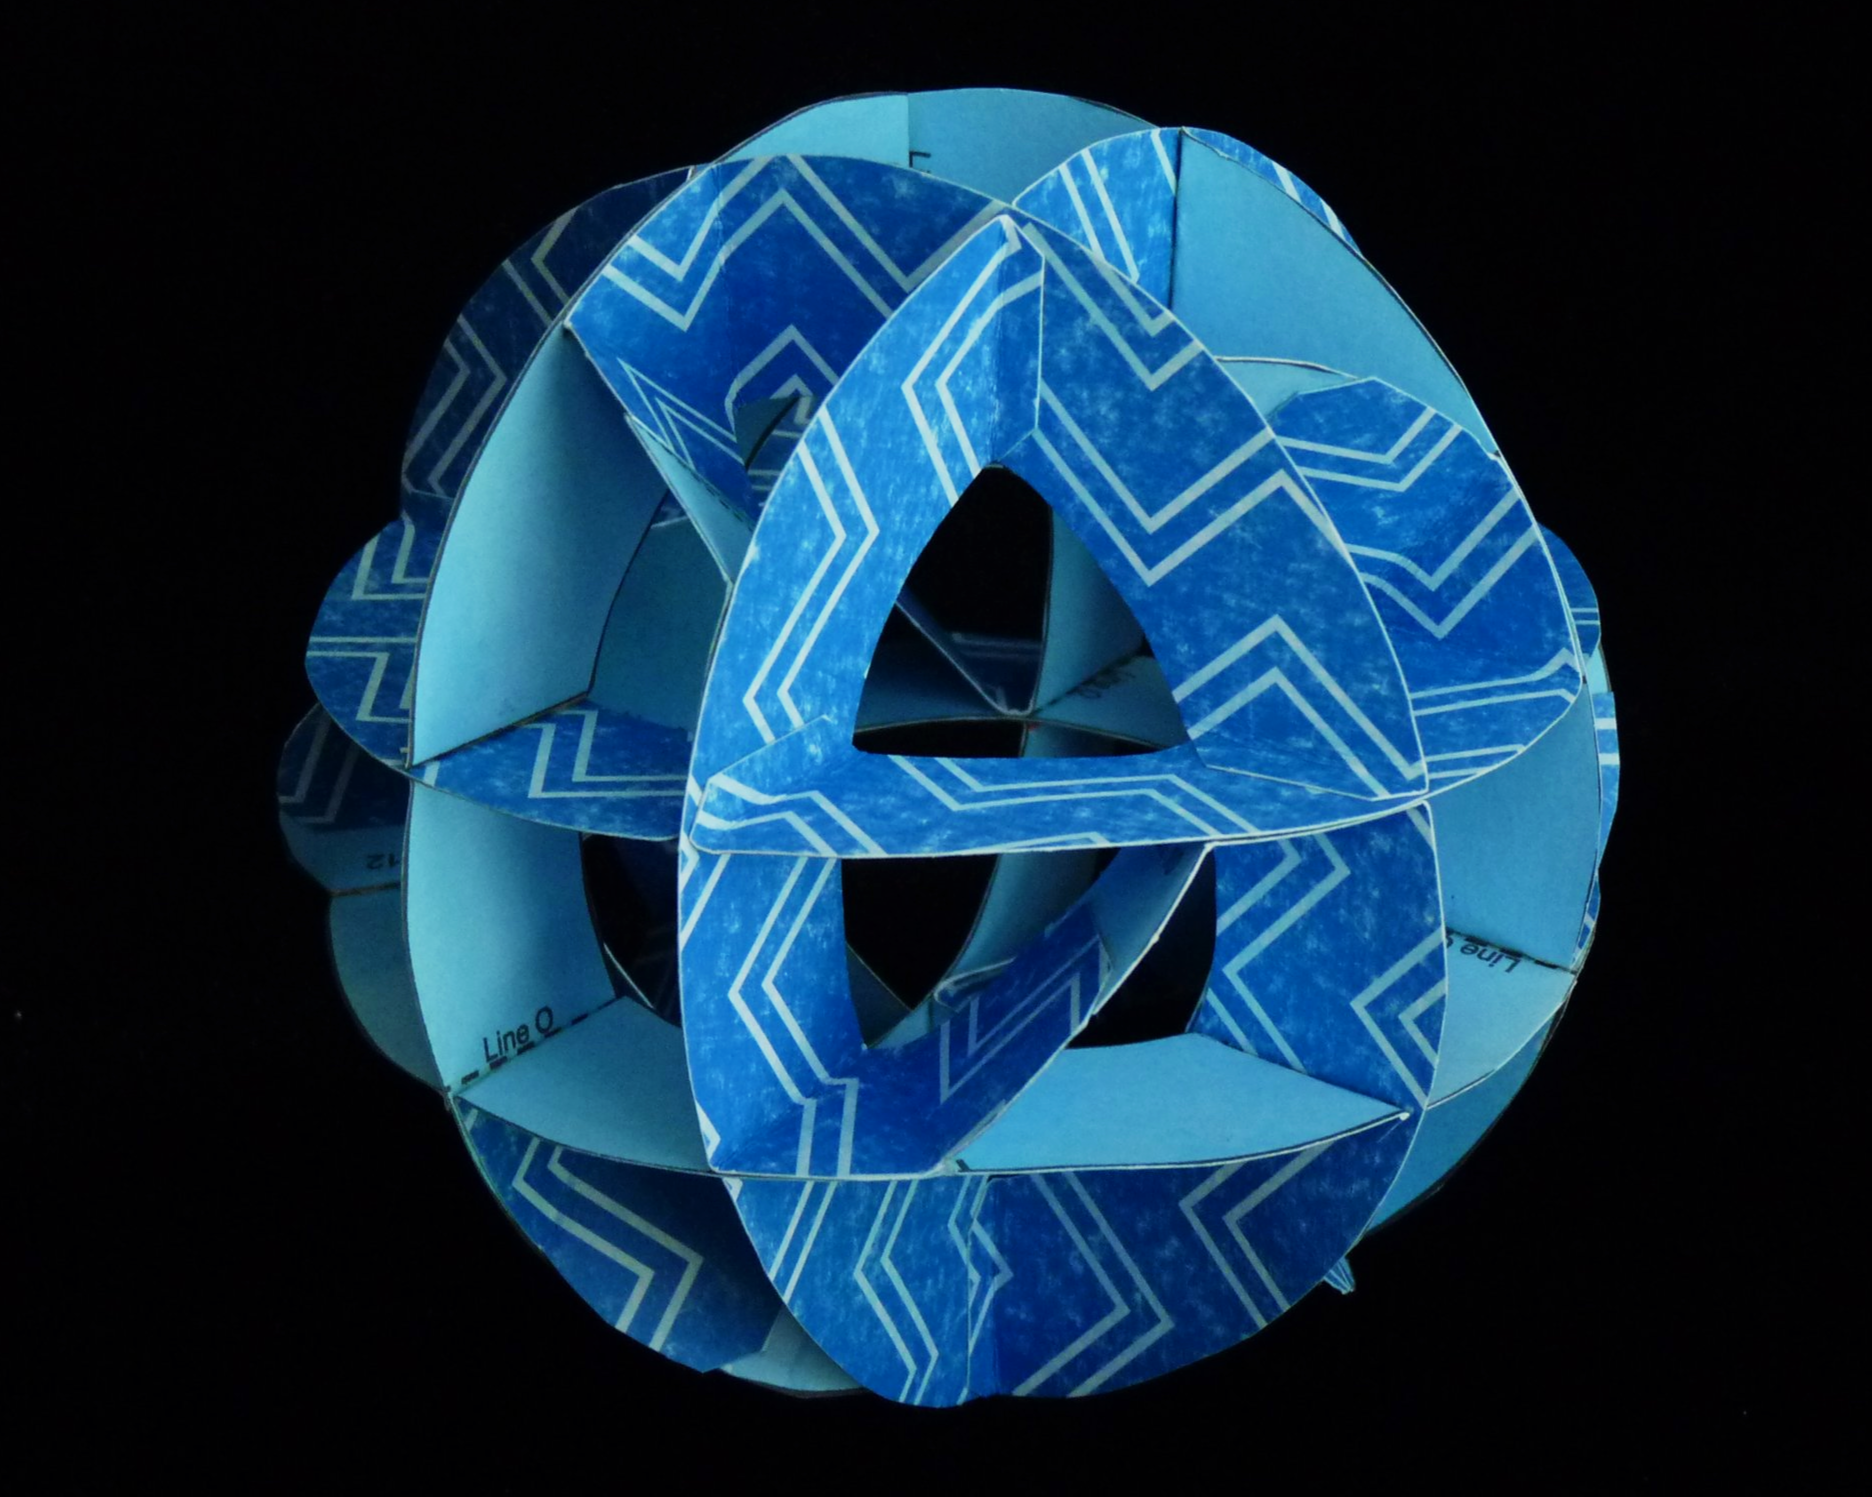
Photo 14. Completed Spy Satellite - View 1
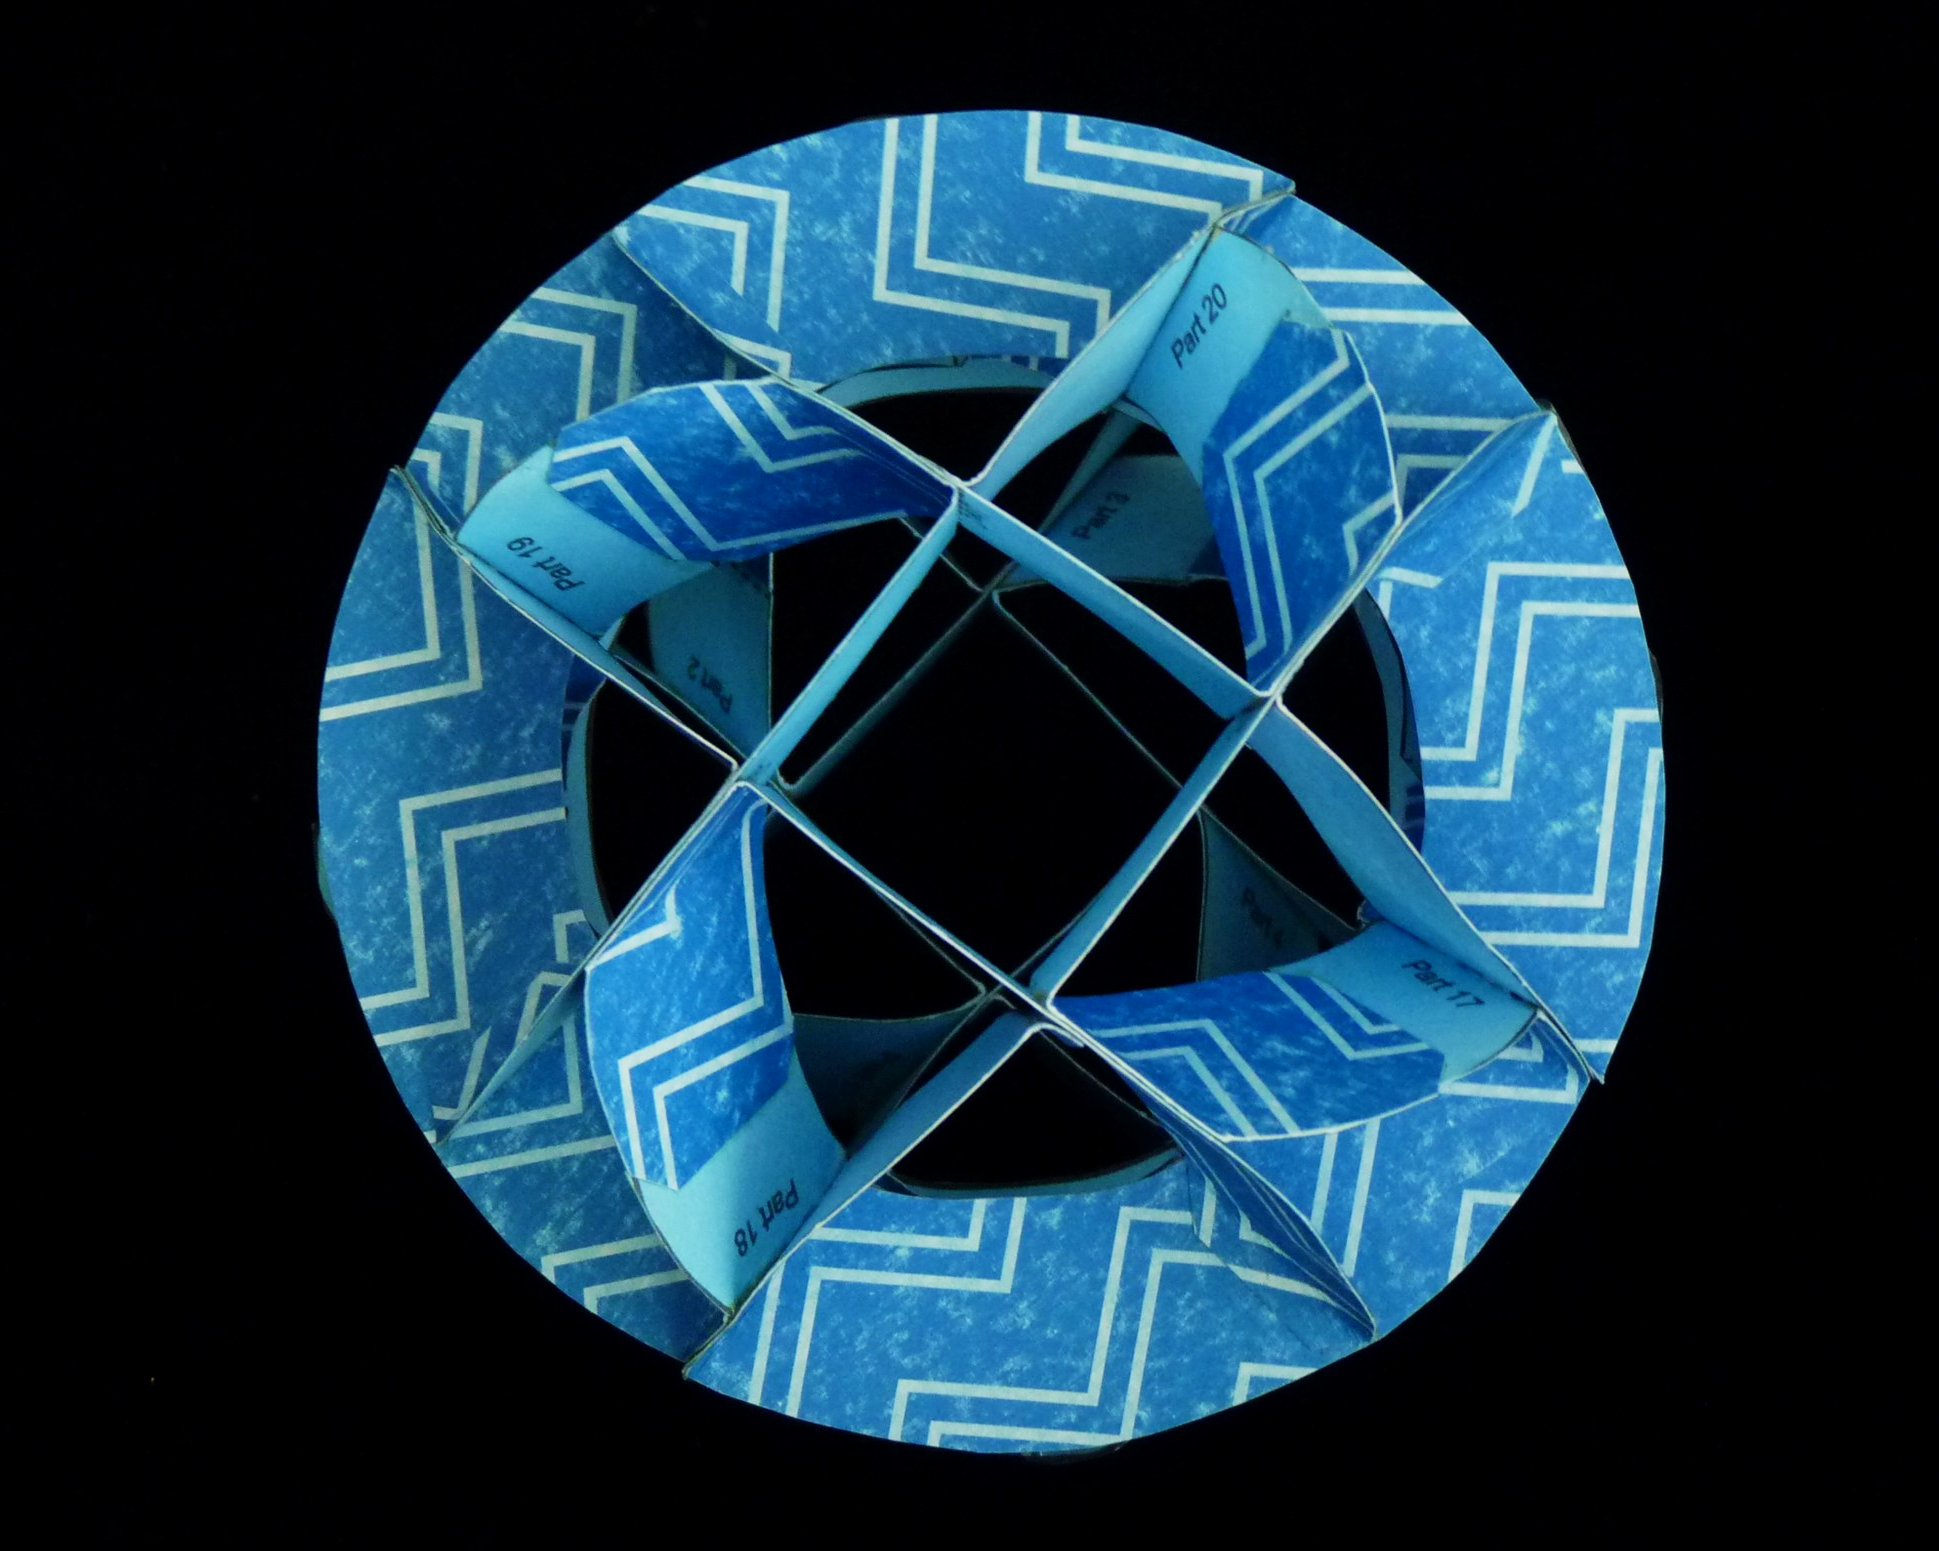
Photo 15. Completed Spy Satellite - View 2

Photo 16. Completed Spy Satellite - View 3

Photo 17. Completed Spy Satellite - View 4
Another Example
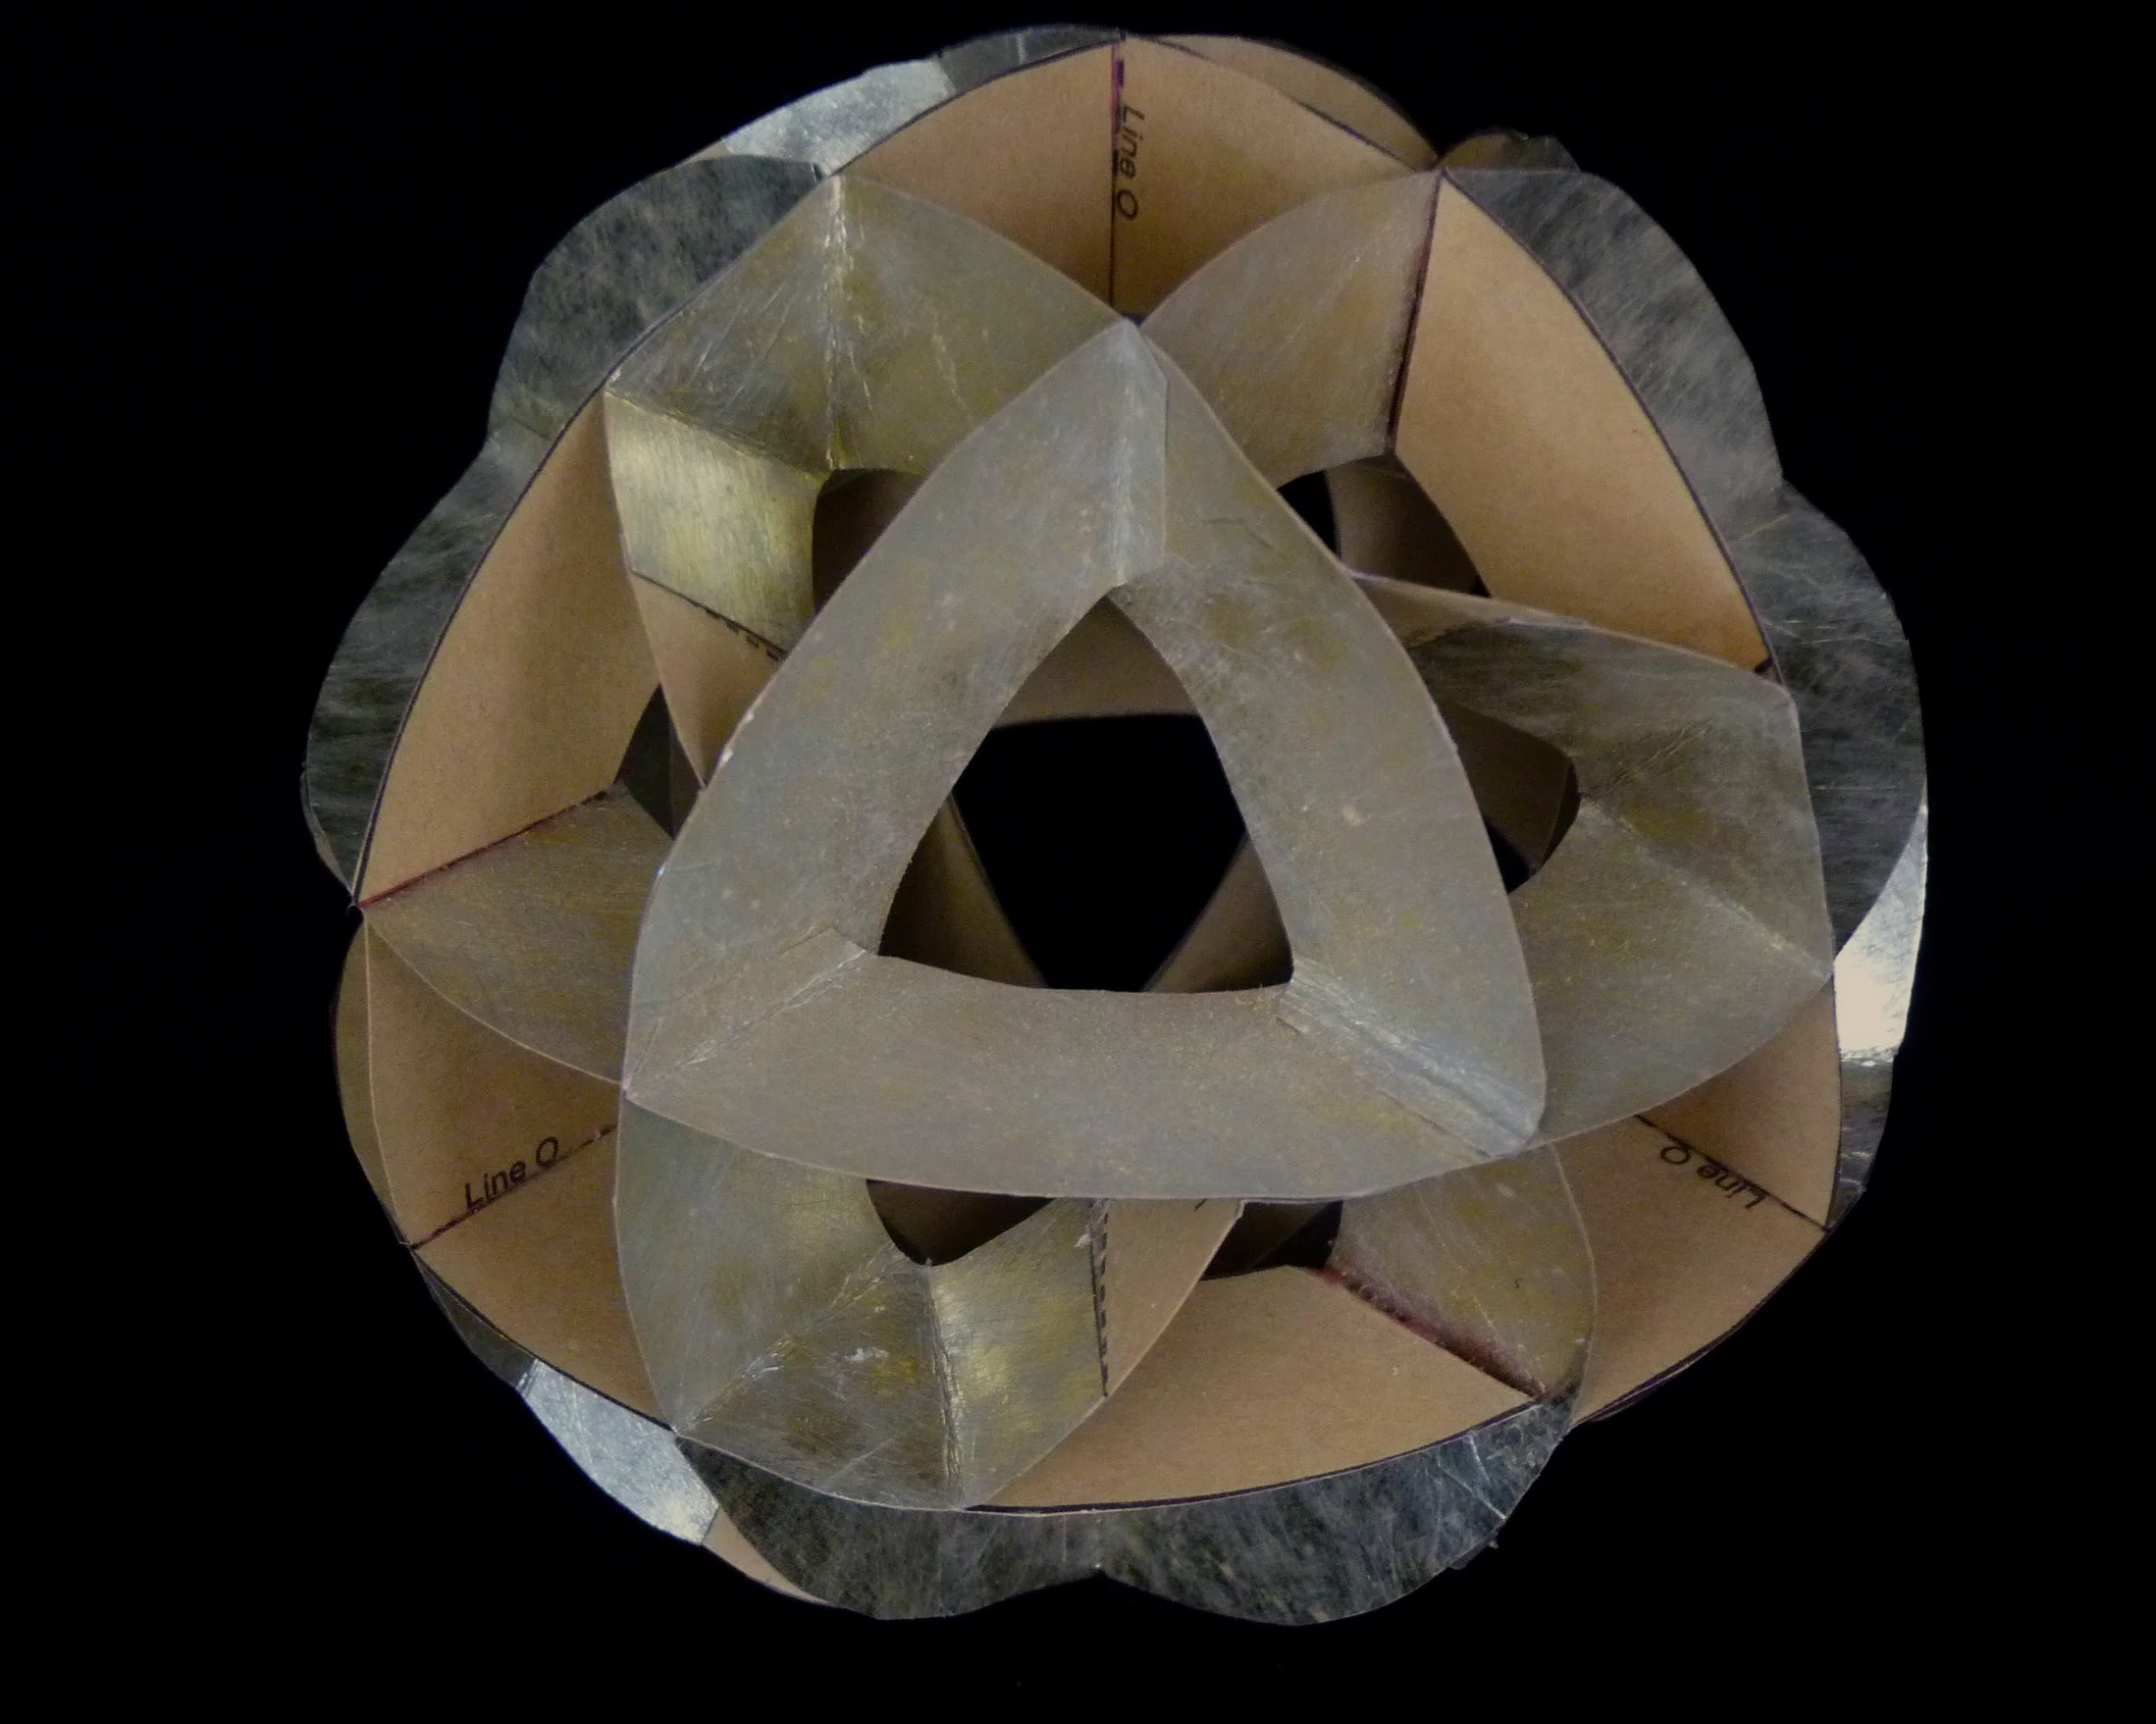
Photo 17. Another Completed Spy Satellite - View 1
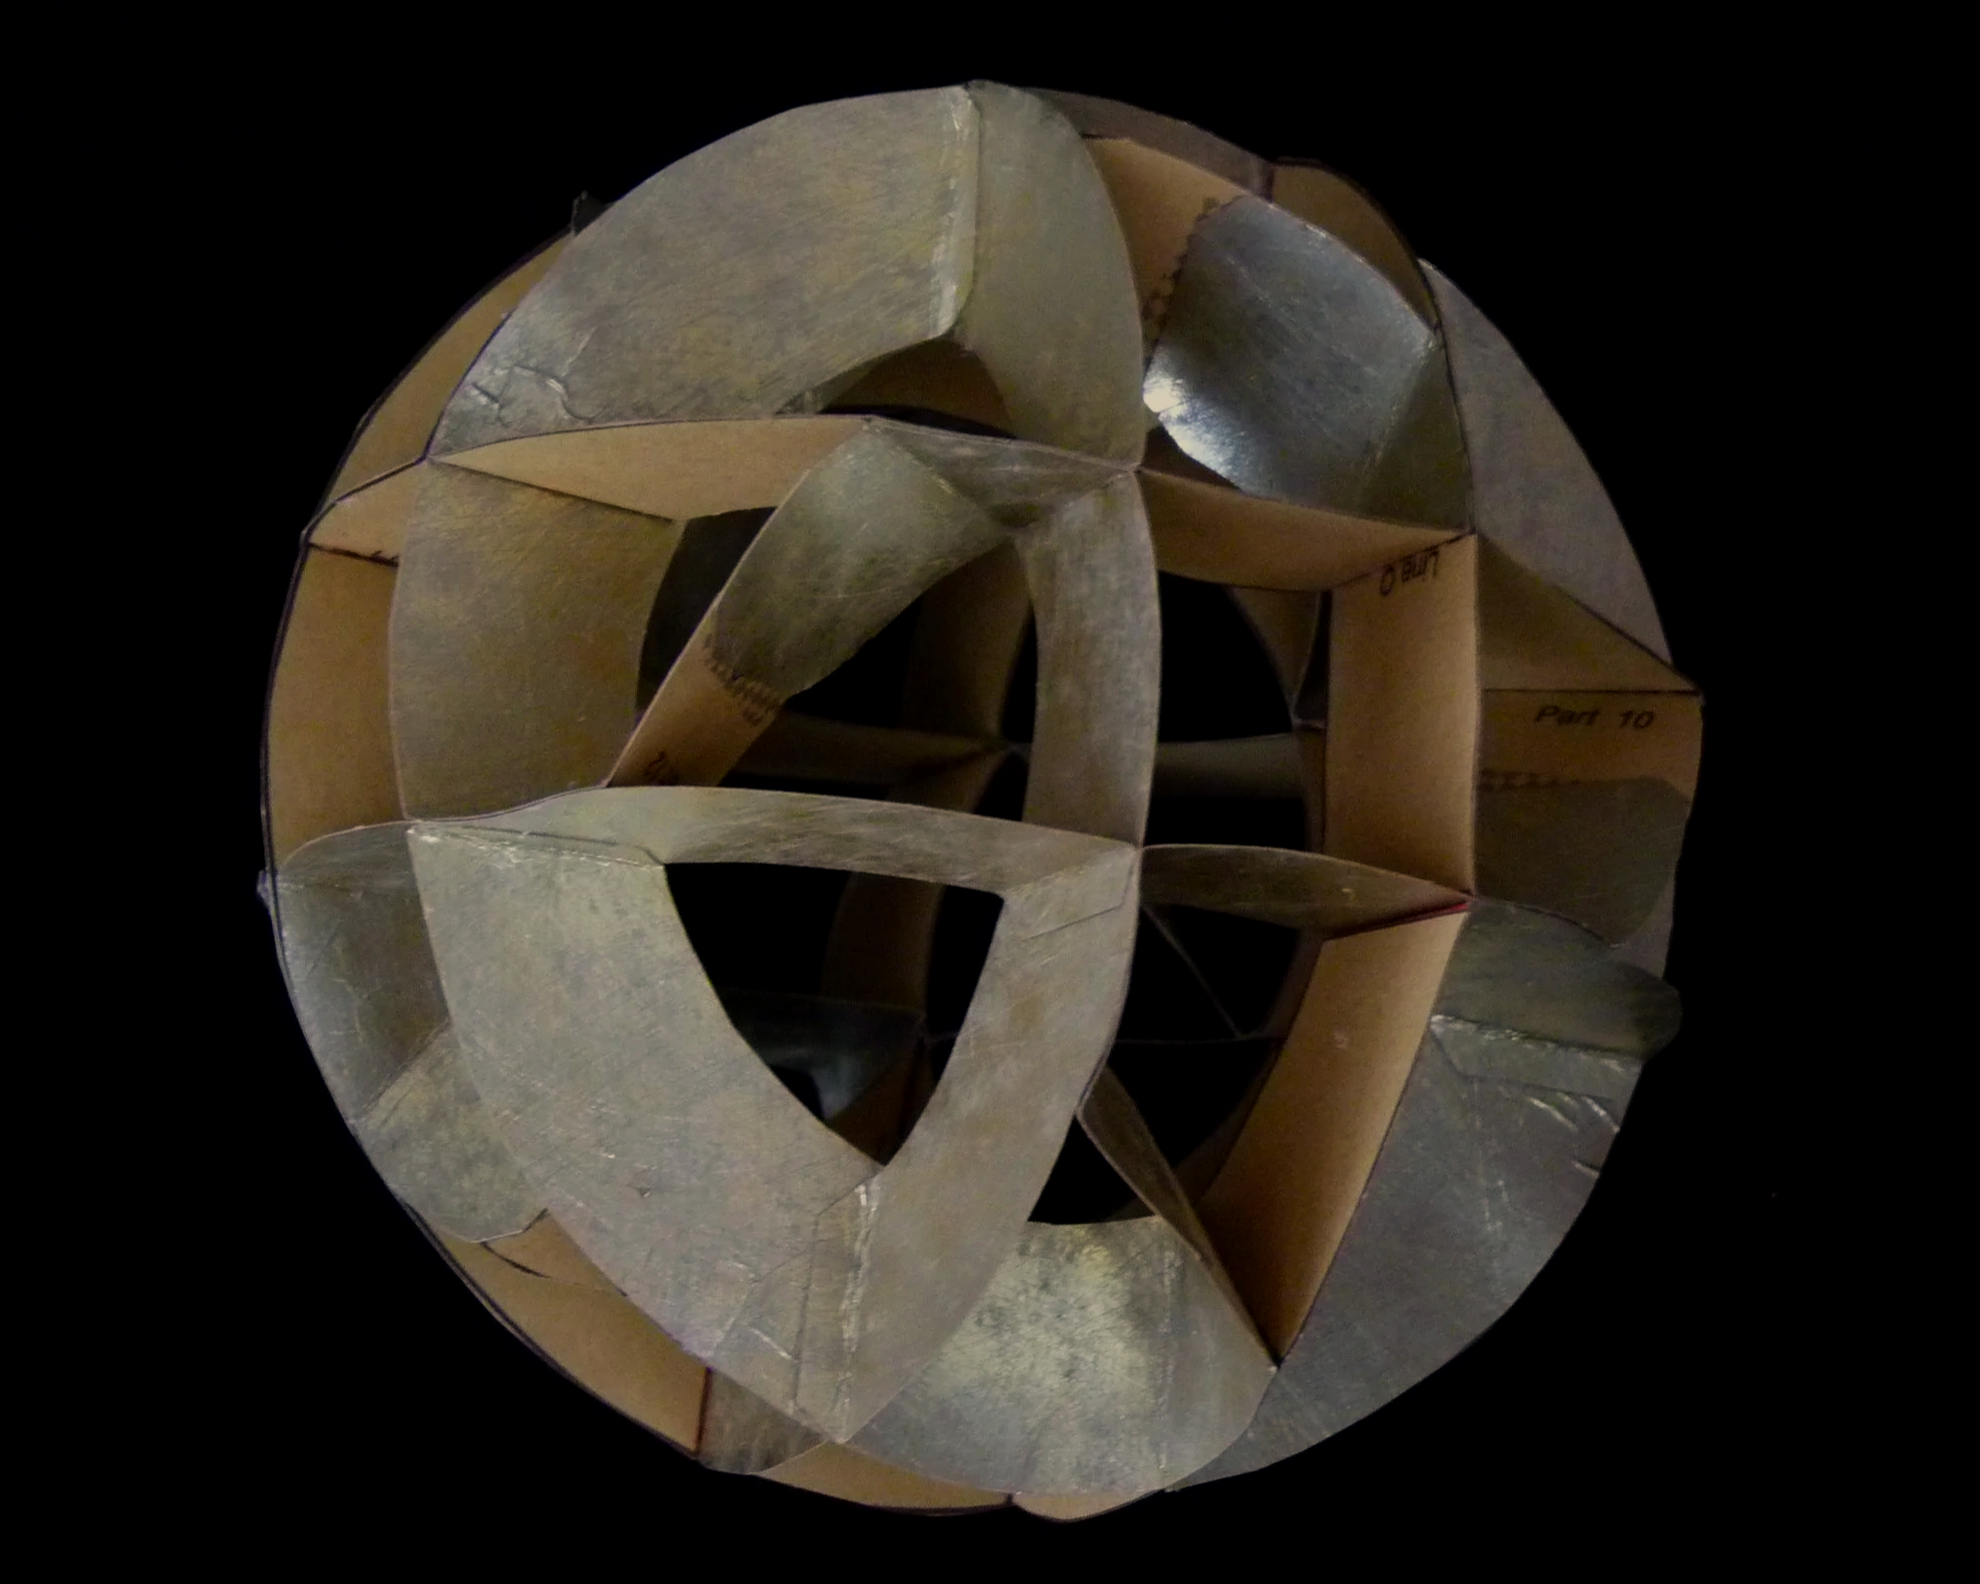
Photo 18. Another Completed Spy Satellite - View 2